Prepare the Loader (400E Loader)

TS219-UN-23AUG88
-
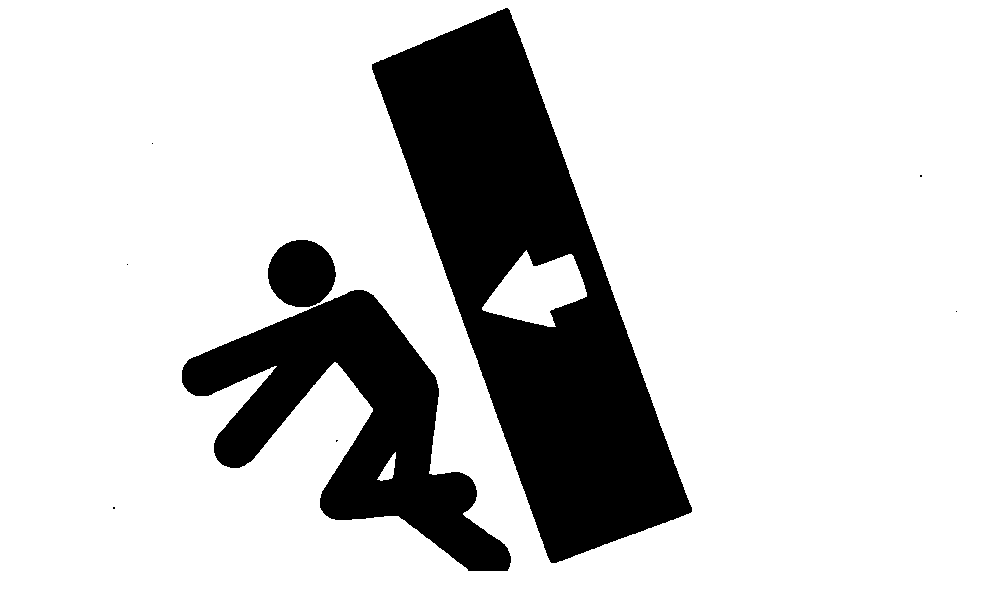
Avoid crushed oil lines. DO NOT wrap chains around the torque tube. Chains can crush oil lines, making replacement necessary.
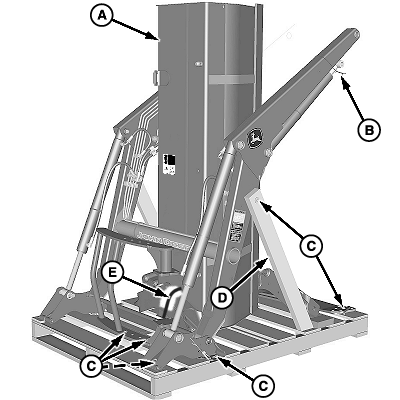
W28171-UN-10JUL17A - Bucket
B - Shipping Wire
C - Screw (2 each side)
D - Brace (1 each side)
E - Banding
Remove and discard all the banding (E). -
Remove any contents from the bucket (A).
-
Remove the bucket from the pallet.
-
Remove all screws (C) and braces (D) from the loader and shipping pallet.
-
Prevent possible injury. Use a lifting device to remove
masts and hood guard. Approximate weight of each mast is 40 kg (88
lb) and hood guard is 19 kg (42 lb).
Use a lifting device and remove masts and hood guard from the pallet.
-
Remove shipping wires (B) from lift cylinders and pivot cylinders to the ground.
-
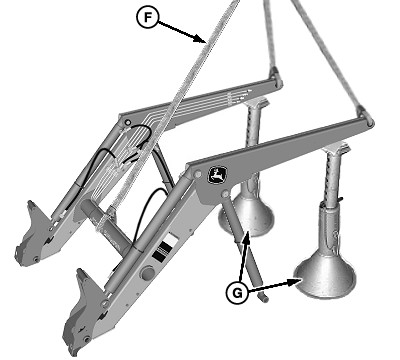
W28172-UN-10JUL17Left-Hand Side Shown
F - Lifting Strap
G - Safety Stand (2 used)
Using lifting straps (F) and an overhead hoist, lift the loader from the pallet. -
Prevent possible injury. Position safety stands (G)
toward the rear of the loader booms as shown.
Rest the loader assembly on the ground and safety stands (G).
-
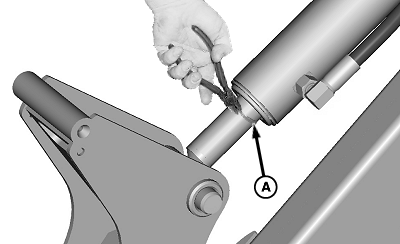
W23414-UN-14FEB13A - Paint Mask Ring (1 per cylinder)
Cut paint mask rings (A) off all cylinders. -

W27934-UN-05JUL17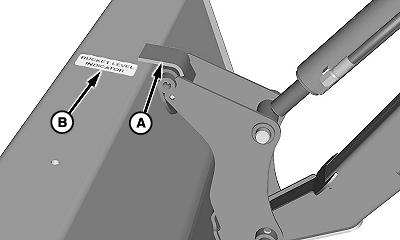
W27936-UN-05JUL17A - Right-Hand Side Hook
B - Bucket Level Indicator Decal
Ensure decal adhesion. Before applying new decals, clean all dirt, grease, oil, and moisture from application area. Surface must be at least 15°C (60°F) when the decal is applied.Apply the indicator decal (B) next to the right-hand side hook (A) as shown. Refer to Safety Signs section for all safety decal locations.
Clean the area on the bucket where the decal is located.
-
Remove the paper backing from the decal.
-
Align and press one edge of the decal on the surface as shown.
-
Smooth out air pockets while slowly pressing across the decal to the opposite edge. Ensure complete decal adhesion.
|
OUO6064,0001B9D-19-20180829 |