Detach 220R Loader
-

W14000-UN-05OCT88
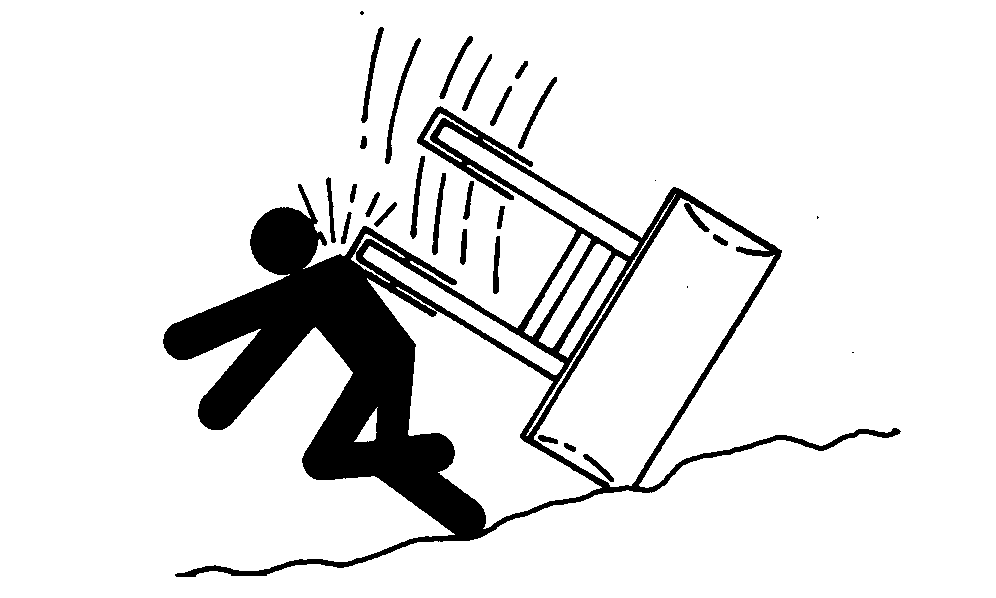
Prevent possible injury caused by a falling or shifting loader. Always detach the loader on a hard, level surface. DO NOT detach the loader if equipped with a pallet fork. A materials bucket is recommended.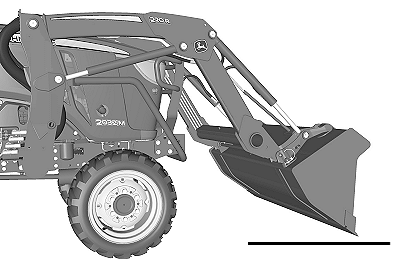
W27553-UN-08JUL16Avoid damage to hydraulic hoses. Make sure that the hoses are removed from retaining guides before detaching. Avoid damage to the machine. Remove fender extensions before detaching the loader.
Start the engine.
-
Release the park brake or place the transmission in NEUTRAL.
-
Dump the bucket 10—20° and lower to the ground.
-
Retract lift cylinders, raising the front wheels 25—50 mm (1—2 in) off the ground.
-
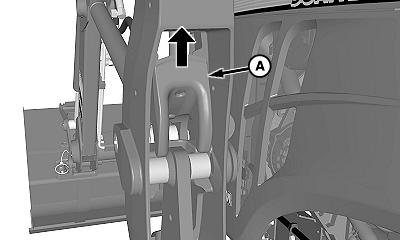
W27057-UN-10SEP15Left-Hand Side Shown
A - Latch (1 each side)
Move both loader mast latches (A) upward into the UNLOCKED position. -
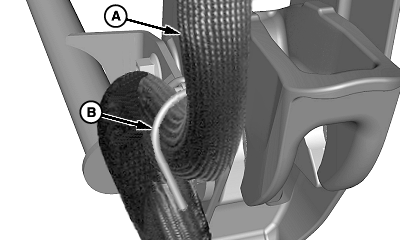
W27693-UN-12OCT16A - Hose Bundle
B - Hose Guide
If equipped with a multicoupler, remove the hose bundle (A) from the hose guide (B). -
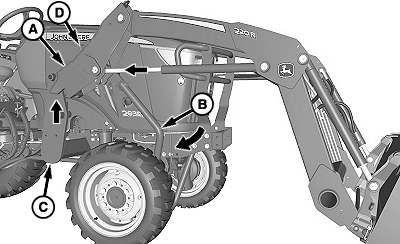
W27554-UN-08JUL16A - Mast
B - Parking Stand
C - Mounting Frame
D - Latch
Roll back the bucket level to the ground. Extend lift cylinders until the parking stand (B) contacts the ground, masts (A) lifts off mounting frames (C), latches (D) automatically snap into the locked position. -
Engage the park brake or place the transmission in PARK.
-
Shut off the engine.
-
The loader and implements can shift when the hydraulic pressure is relieved.
Relieve the hydraulic pressure. (See Relieve Hydraulic Pressure in Controls section.)
-
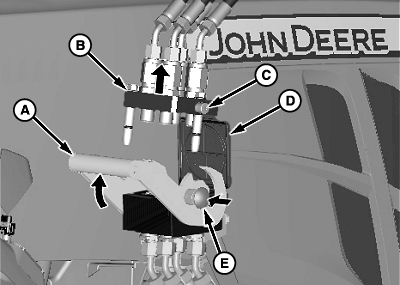
W27059-UN-10SEP15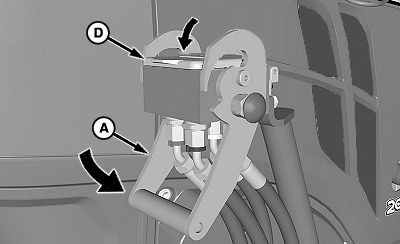
W27061-UN-10SEP15A - Handle
B - Coupler, Loader Half
C - Pin (1 each side)
D - Cover
E - Red Knob
Disconnect hydraulics—multicoupler:-
Push in the red knob (E) and rotate the handle (A) upward to disconnect pins (C) and coupler halves.
-
Remove the loader coupler (B) and store on the hose guide.
-
Avoid loader damage from contact with the tractor fender or wheel. Handle (A) must be in the locked (DOWN) position. Lower the cover (D) to protect the connections.
Rotate the handle (A) downward until locked in the DOWN position.
-
Lower the cover (D).
-
-
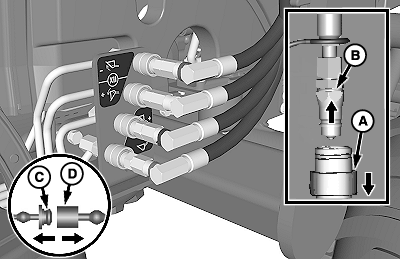
W27062-UN-10SEP15A - Coupler, Female (4 used)
B - Coupler, Male (4 used)
C - Plug (4 used)
D - Cap (4 used)
Disconnect hydraulics—quick couplers:-
Push back the collar on the female coupler (A) and pull out the male coupler (B).
-
Install the dust plug (C) in the female coupler and cap (D) on the male coupler as shown.
-
Repeat for all the remaining hose connections.
-
Store the hoses on the boom. Do not lay the hoses on the ground.
-
-
Avoid hose damage. Be sure that the loader hoses DO NOT catch on the tractor when moving away from the loader.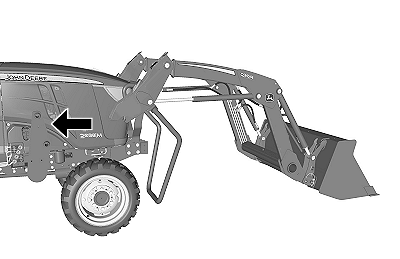
W27555-UN-08JUL16Start the engine.
-
Disengage the park brake or place the transmission in REVERSE. Pull away from the loader.
|
OUO6064,0001918-19-20180829 |


