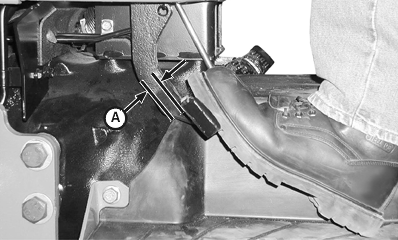
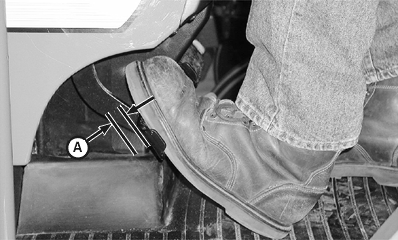
Check and Adjust Clutch Pedal Free Play (CollarShift and SyncShuttle™)Straddle Mount and Hi-CropMeasure free play at top of pedal stroke (A). Ensure free play is within specification. If free play is not within specification, adjust clutch linkage as shown below. Specification
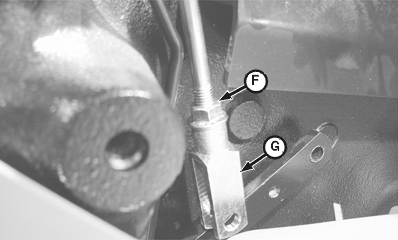
2. Remove clip pin (E). 3. Loosen jam nut (F). 4. Rotate clevis (G) as necessary to obtain the specified free play. 5. Tighten jam nut and install clevis and clip pin. 6. Install floor mat, cap screws and screws.
|
|

OUO1043,00002AD -19-28FEB02-1/2 |
|
Isolated Open Operator Station and Cab
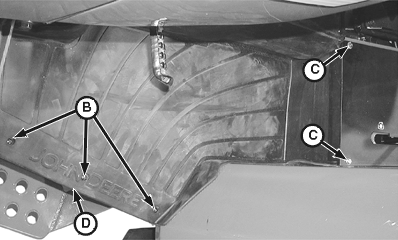
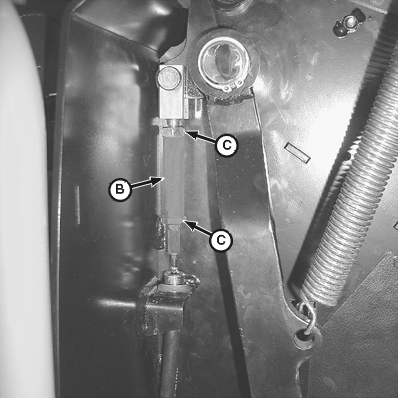
NOTE: Isolated open operator station shown; cab tractor similar. Left console panel removed for clarity of photo. Measure free play at top of pedal stroke (A). Ensure free play is within specification. If free play is not within specification, adjust clutch linkage. Specification
2. Turn turn-buckle (B) counterclockwise to increase free play or clockwise to decrease free play. 3. Tighten jam nuts.
|
|
OUO1043,00002AD -19-28FEB02-2/2 |