Remove Tractor From Storage
Perform the following steps to remove tractor from storage:
-
Check tire inflation pressure. (See Wheels, Tires and Treads section.) Lower tires to ground.
-
Remove all coverings.
-
Unseal all openings sealed during storage.
-
Install battery.
-
Remove ties or block which secured clutch pedal down.
-
IMPORTANT: Cab tractor: If air conditioning compressor is seized, engine operation with compressor clutch engaged will damage belt or compressor.
Cab: Check that A/C compressor pulley moves freely and is not seized.
-
Install alternator/fan belt.
-
Check levels of engine oil, transmission/hydraulic oil and engine coolant. Add fluids as needed.
-
Drain a small amount of fuel from fuel tank to purge any moisture condensation that has collected.
-
Fill fuel tank.
-
Perform all appropriate services listed in Maintenance and Service Intervals section, as dictated by elapsed storage period.
-
Check instruments and indicators by turning key switch to RUN position.
-
IMPORTANT: Do not operate starter more than 20 seconds at a time, and wait at least two minutes for starter to cool before trying again.
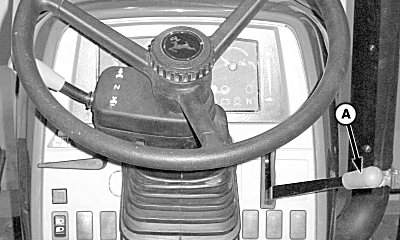
P14828-UN-15APR08Tractor with PowrReverser Shown
Make sure gear shift lever and PowrReverser™ lever (if equipped) is in neutral (“N”) and PTO control lever is in disengaged position. Pull hand throttle (A) all the way back, depress clutch pedal and crank engine until oil pressure rises. Turn key switch to OFF position. -
Connect fuel shut-off solenoid wiring leads/connectors.
-
Depress clutch pedal and start engine. Operate engine at slow idle for several minutes. Warm up carefully and check all systems before placing tractor under load.
|
NS43404,0000531-19-20080407 |