Adjust PTO Clutch Linkage-TSS Transmission (OOS)
-
IMPORTANT: Do NOT adjust PTO clutch linkage until the slot in operators station is measured to determine correct procedure. Incorrect adjustment may cause premature failure to PTO clutch throw out bearing. (See DETERMINE PTO CLUTCH LINKAGE ADJUSTMENT PROCEDURE in this group.)

P10465-UN-20NOV01A - Jam Nut
B - Cotter Pin
C - Pin
Move control lever rearward to its disengaged position. -
Loosen jam nut (A).
-
Remove cotter pin (B) and pin (C).
IMPORTANT: Applying more than 5 lbs. of force will begin to depress the clutch fingers causing inaccurate clutch adjustment leading to potential clutch damage.
-
Pull linkage rearward (in direction of arrow) without exceeding 5 lbs. of force, until resistance is felt to remove free play.
P10464-UN-19NOV01 -
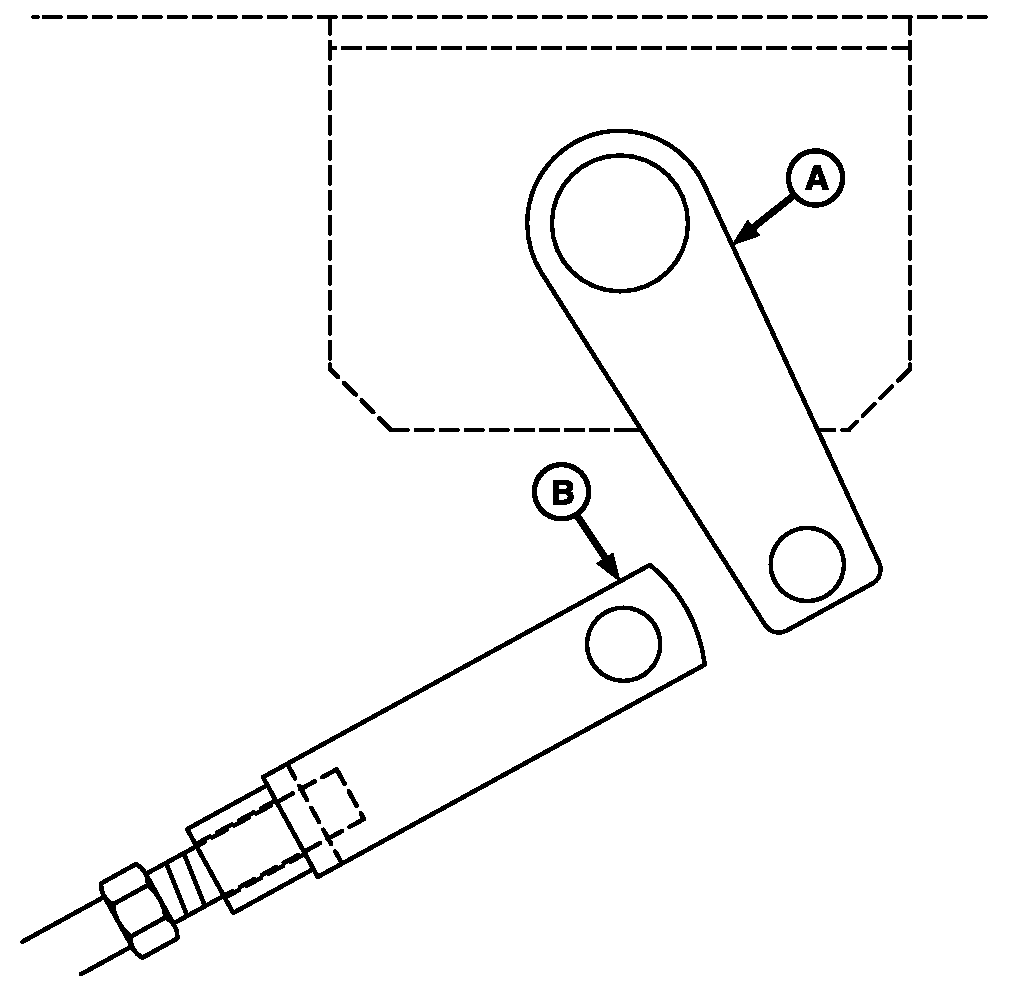
P10466-UN-19NOV01A - Engagement Arm
B - Yoke
Adjust yoke (B) of PTO rod to align the holes on yoke (B) and lever arm (A). -
Engage and disengage PTO five times and make sure pin still gets in freely, if not readjust yoke and align holes again.
-
Put a mark on the yoke and remove pin.
-
Lengthen the rod and yoke by rotating the yoke (B) 2.5 turns counterclockwise (TSS).
-
Install pin and cotter pin.
-
Hold yoke and tighten jam nut.
-
To verify proper adjustment, check free play at PTO engagement lever in operator station. The free play (A) should be approximately 3 mm measured as shown in drawing.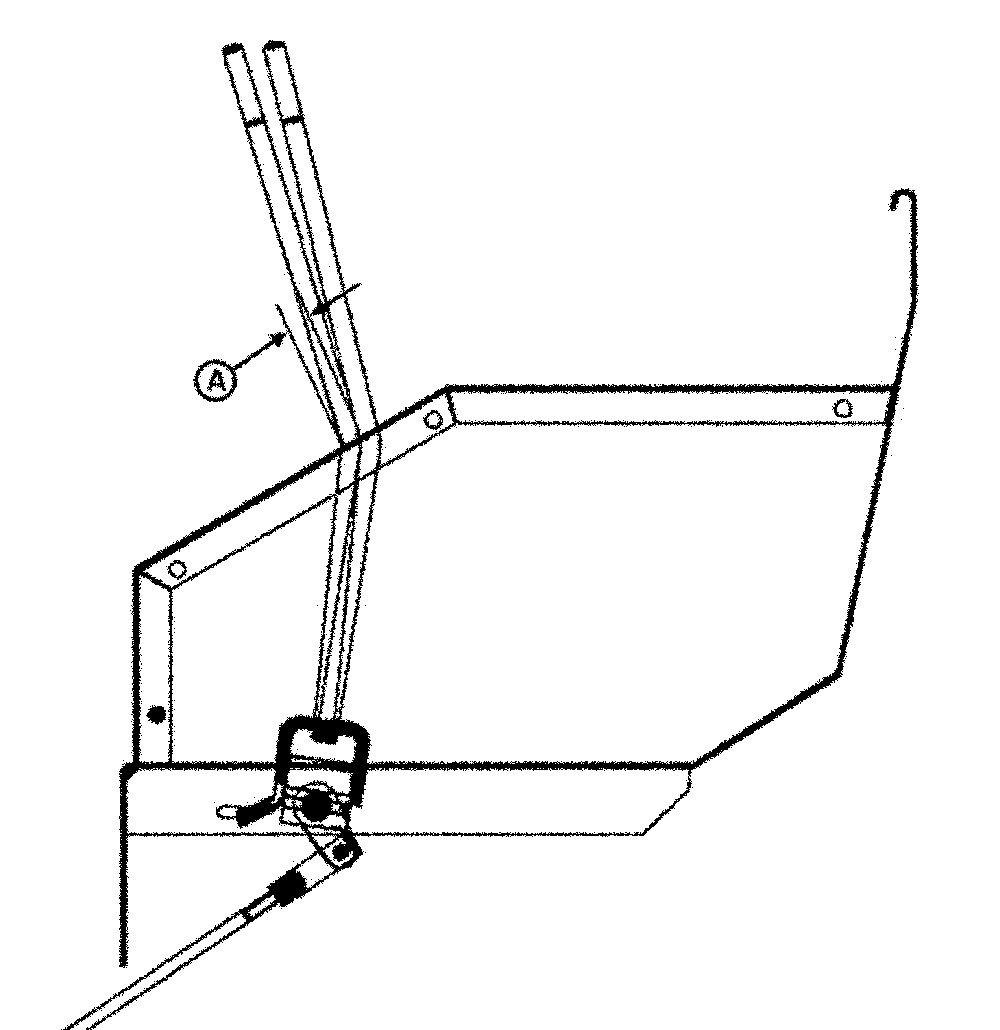
P12390-UN-19AUG03
|
PX03972,00004AB-19-20080417 |