Remove, Inspect and Clean Engine
Aftercooler Core (6068SFM75)
IMPORTANT: Initially remove and inspect the aftercooler core at 250 hour or three month service interval on a new engine. Then, remove and clean at every 500 hour or 12 month interval thereafter.
1.
RG15324-UN-19JUL07
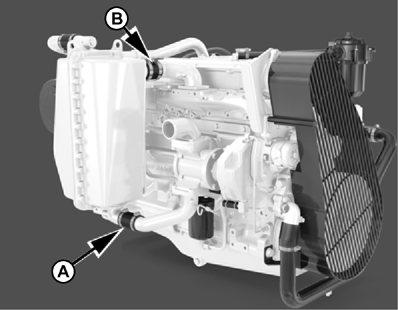
Remove Water and Air Outlet Lines
A - Water Line
B - Air Outlet Line
Close sea cocks and drain the sea water system.2. Loosen clamps and remove water line (A) and air outlet line (B) from aftercooler.
3. Remove all 28 cap screws and Belleville washers from aftercooler housings.
4. Remove front housing mounting bracket cap screws and remove front aftercooler housing.
5. Remove aftercooler core.
6.
RG12181-UN-25FEB02
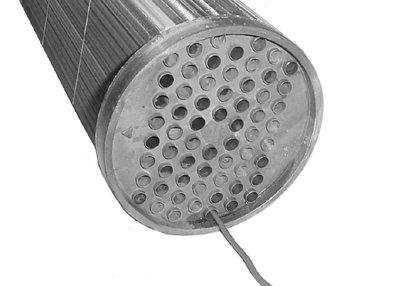
Clean Aftercooler Core
Thoroughly clean all buildup from both end caps.7. Use a 4.76 mm (3/16 in.) diameter brass rod to clean out any buildup in each tube. Run the rod the entire length of each tube to push debris out.
8. Flush the tubes with clean water, making sure all tubes are cleared of debris. Clean (with brass rod) and flush aftercooler core again if necessary to remove any remaining debris from tubes.
If you suspect that your aftercooler core is defective, have your authorized servicing dealer or engine distributor pressure test for leaks. Replace aftercooler core as required.
|
OUOD006,00000AA-19-20100222 |