Service Air Cleaner Elements
 CAUTION: Dirty air cleaner element is indicated when air cleaner
restriction indicator (A) illuminates. Dirty air cleaner results in
loss of power or excessive smoke.
CAUTION: Dirty air cleaner element is indicated when air cleaner
restriction indicator (A) illuminates. Dirty air cleaner results in
loss of power or excessive smoke.
-
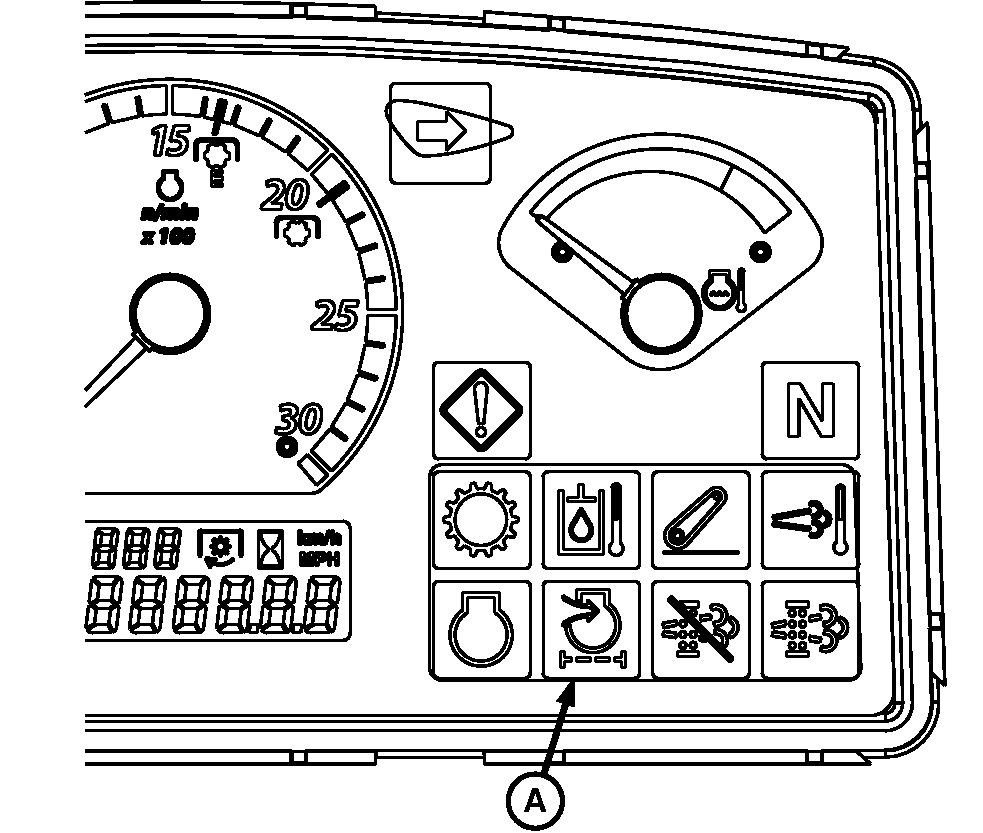
LV15474-UN-22FEB12Air Restriction Indicator
LV14669-UN-18AUG11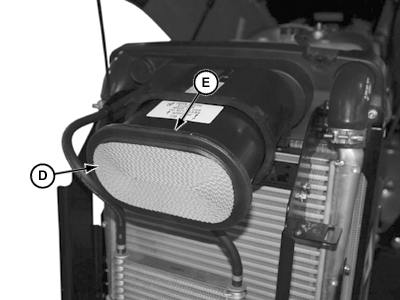
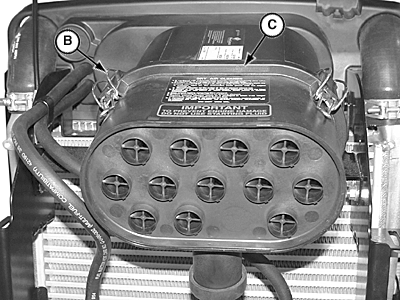
LV14670-UN-19AUG11A - Air Restriction Indicator
B - Latch
C - Cover
D - Primary Air Cleaner Element
E - Guide Ring
Open hood. -
Remove latch (B), cover (C) and pull out primary air cleaner element (D).
IMPORTANT: If primary element does not pull out with ease, move side-to-side to remove safely. Do not remove secondary element of air cleaner unless you are replacing it.
-
When primary air cleaner element (D) must be serviced in the field, tap it on the palm of your hand as a temporary measure.
IMPORTANT: The guide ring (E) must not be damaged or deformed.
-
CAUTION: High pressure compressed air or vibration may damage
primary air cleaner element (D).
If tapping primary air cleaner element (D) does not remove dust, blow out dust with low pressure compressed air. Do NOT exceed 600 kPa (6 bar; 90 psi). Blow air from engine end of element (guide ring [E]) to outside air end. Do NOT insert nozzle into element material.
-
Replace both elements (primary and secondary) after they have been cleaned five times. Clean out and inspect canister interior before installing new elements.
IMPORTANT: Before installation, review decals on canister and primary cleaner.
-
Replace elements if core material or seals (both ends) are damaged, or if air cleaner restriction indicator remains illuminated after elements have been cleaned.
-
Install elements as necessary and latch cover.
-
Lower hood.
NOTE: If frequency of restriction increases, replace air cleaner elements.
Service air cleaner more often in extremely dusty condition.
|
JZ81662,0000F78-19-20121130 |