Attach Implements to 3-Point Hitch
-
PY5374-UN-09DEC05
PY23266-UN-06FEB15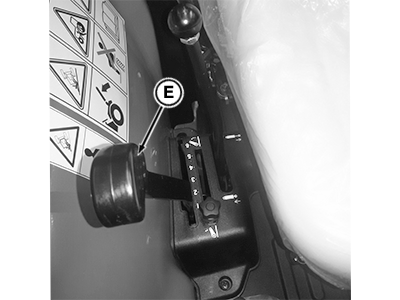
PY24518-UN-23JUL15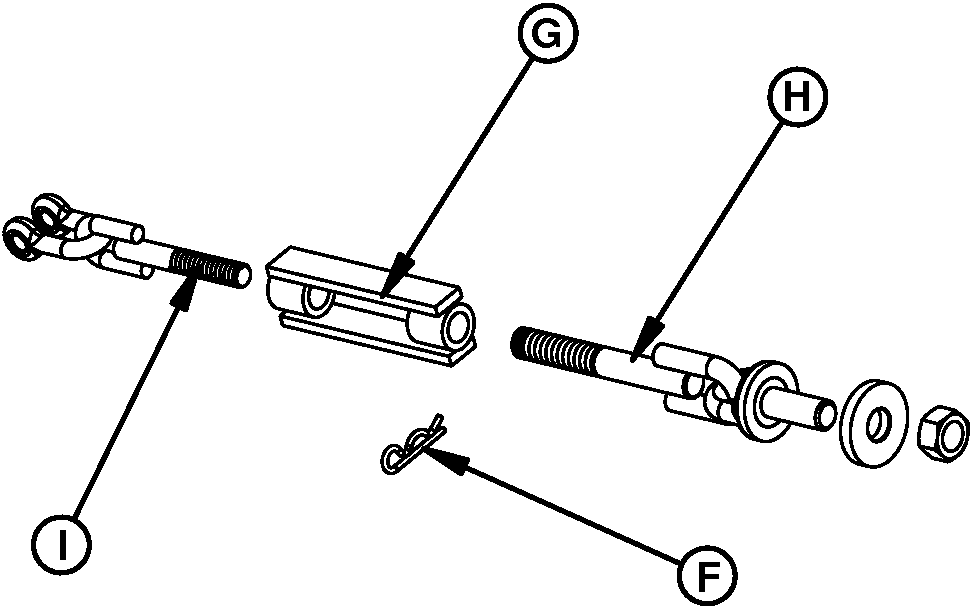
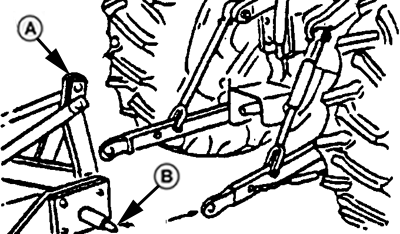
PY23301-UN-24FEB15A - Implement
B - Implement Hitch Pins
C - Center Link Locking Clip
D - Latch
E - Position Control Lever
F - R-Pin
G - Turn Buckle
H - Threaded Rod, RH
I - Threaded Rod, LH
Be sure drawbar will not interfere. If necessary, move drawbar ahead, or remove it. Check for any other potential interference.NOTE: Note that a typical hitch & implement is illustrated.
-
Back tractor up to implement (A) so hitch points (B) align. Place transmission in NEUTRAL (N), stop the engine and engage park brakes “before” leaving the tractor seat.
-
Slip draft links over implement hitch pins (B), and retain with quick-lock pins.
-
To remove center-link from transport hook, lift center link locking clip (C), and rotate latch (D) to rear of center link clip.
-
Attach center link to implement top mast.
-
Adjust center link and lift links as necessary. (See Level the Hitch in this section.)
-
 CAUTION: To avoid bodily injury or machine damage whenever an
implement, implement quick coupler, or other attachment is connected
to the tractor 3-Point Hitch, check full range of operation for interference,
binding or PTO separation.
CAUTION: To avoid bodily injury or machine damage whenever an
implement, implement quick coupler, or other attachment is connected
to the tractor 3-Point Hitch, check full range of operation for interference,
binding or PTO separation.Using position control lever (E), lower and raise implement slowly and check for any point of interference.
IMPORTANT: DO NOT shorten chains so short that they do not allow hitch to be raised completely. If chain prevents hitch from raising, causing braking of chain, hydraulic valve will open, causing excessive oil heating, pump damage or equipment
NOTE: Use spring or rubber strap to keep draft links out of rear tyres when draft links are not attached to implement.
Implement side sway should be adjusted when the rockshaft is raised for transport. Remove R-Pin (F) from the threaded rod (H) prior to adjustment. Rotate the turn buckle (G) to get the right length and then reinstall the R-pin (F) to lock the adjusted length.
|
NM61126,00000BA-19-20150716 |