Adjusting Loader Bucket Self-Leveling Linkage and Return-to-Dig SwitchWhen the self-leveling linkage is adjusted correctly, it will cause the loader control lever to move from NEUTRAL to BUCKET DUMP when the front loader boom is fully raised, automatically leveling the bucket and preventing spillage of material. When self-leveling linkage and return-to-dig switch are both adjusted correctly, the return-to-dig function will cause the front loader bucket to roll back until flat on the ground or be slightly forward (dumped) when boom is lowered to ground after dumping. NOTE: The front loader bucket self-leveling linkage and return-to-dig switch must be adjusted together to ensure proper operation. Perform these three procedures IN THE ORDER SHOWN to obtain proper adjustment. 1. Adjust the bellcrank-to-loader control lever linkage yoke. (See Adjust Bellcrank-to-Loader Control Lever Linkage Yoke procedure.) 2. Adjust the sensor tube-to-actuator yoke. (See Adjust Sensor Tube-to-Actuator Yoke procedure.) 3. Adjust the return-to-dig switch. (See Adjust Return-to-Dig Switch procedure.) |
CED,OUO1079,470 -19-17JUL00-1/4 |
|
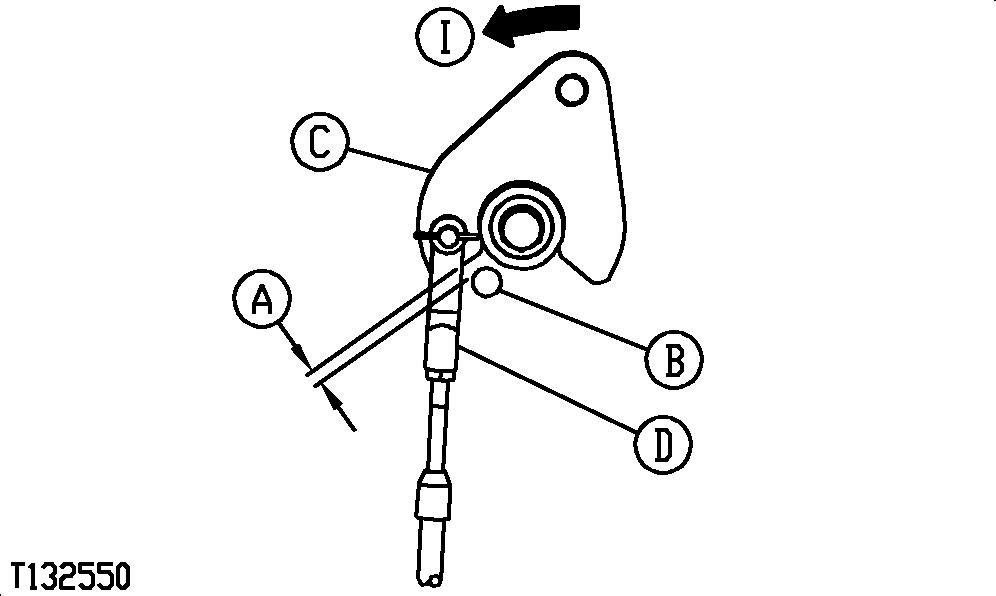
Adjust Bellcrank-to-Loader Control Lever Linkage Yoke
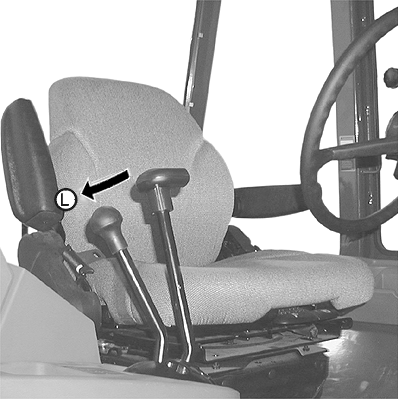
1. Position bucket flat on ground and turn engine OFF. NOTE: Bellcrank-to-loader control lever linkage yoke must be adjusted so that gap is at specification when linkage is fully depressed and loader control lever is fully in BUCKET CURL position. 2. Move loader control lever fully to BUCKET CURL (K). With lever in this position, linkage should pull bellcrank (C) fully counterclockwise (I). 3. Measure gap (A) between guard/stop (B) and bellcrank. Specification
4. If gap is not to specification, adjust bellcrank-to-loader control lever linkage yoke (D) to obtain correct gap.
|
|
CED,OUO1079,470 -19-17JUL00-2/4 |
|
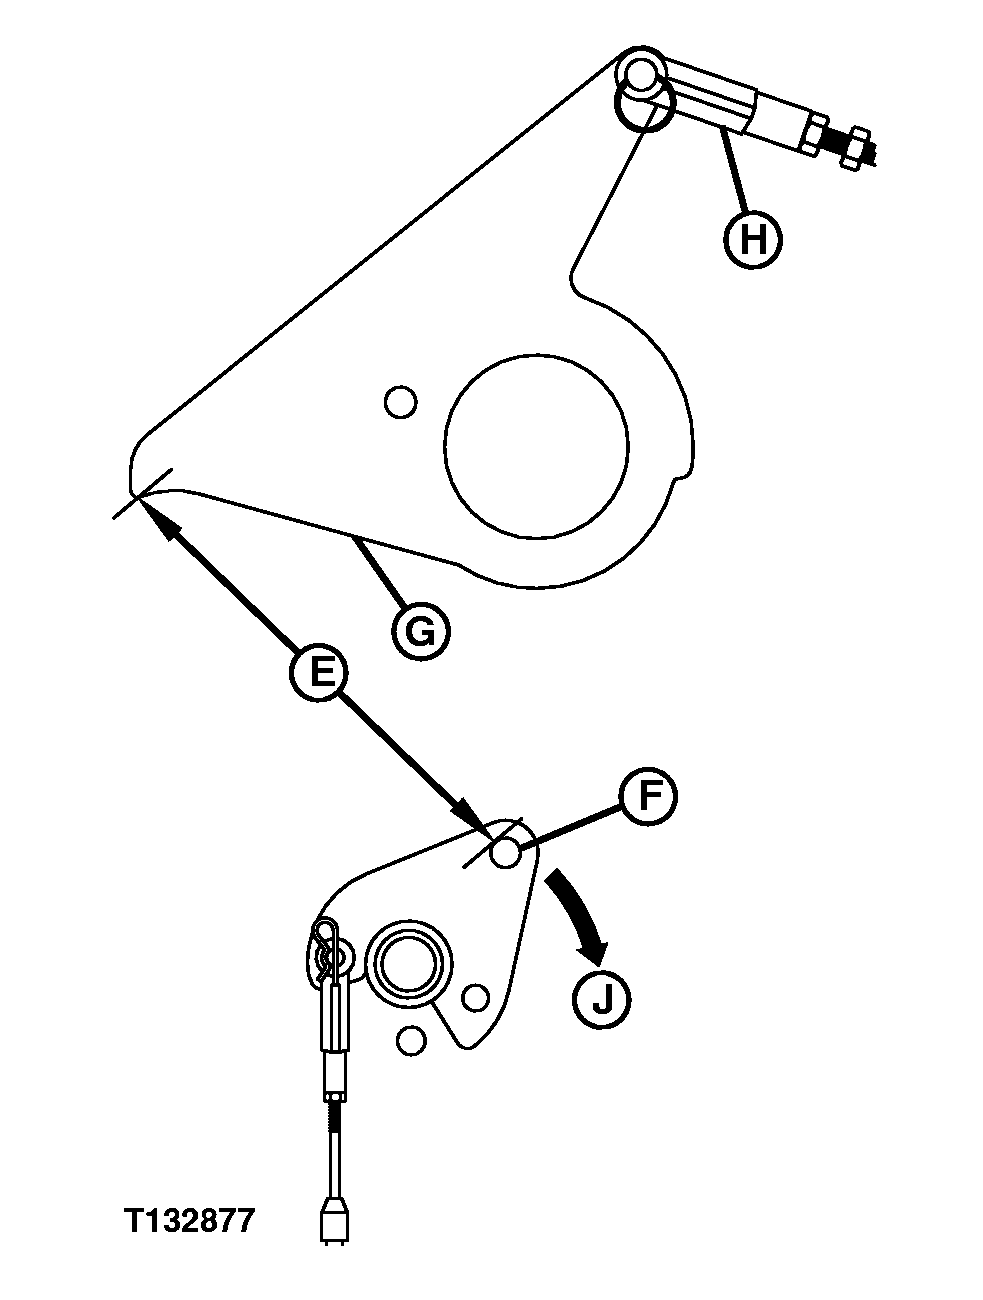
Adjust Sensor Tube-to-Actuator Yoke
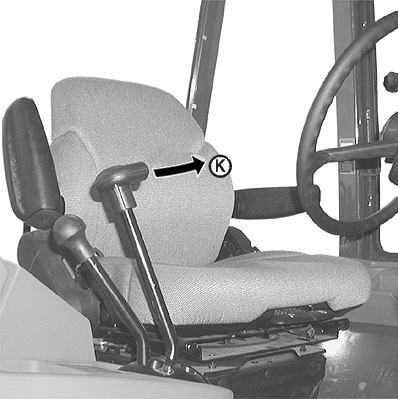
NOTE: Sensor tube-to-actuator yoke must be adjusted so that gap is at specification when loader control lever is in NEUTRAL but bellcrank is rotated to put slight tension on bellcrank-to-loader control lever linkage. 1. Allow loader control lever to return to NEUTRAL (L). Rotate bellcrank partially clockwise (J) until slight tension is felt on loader control lever linkage. 2. Measure gap (E) between top of bellcrank pin (F) and bottom of actuator tang (G). Specification
3. If gap is not to specification, adjust sensor tube-to-actuator yoke (H) to obtain correct gap.
|
|
CED,OUO1079,470 -19-17JUL00-3/4 |
|
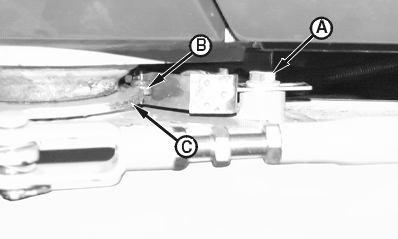
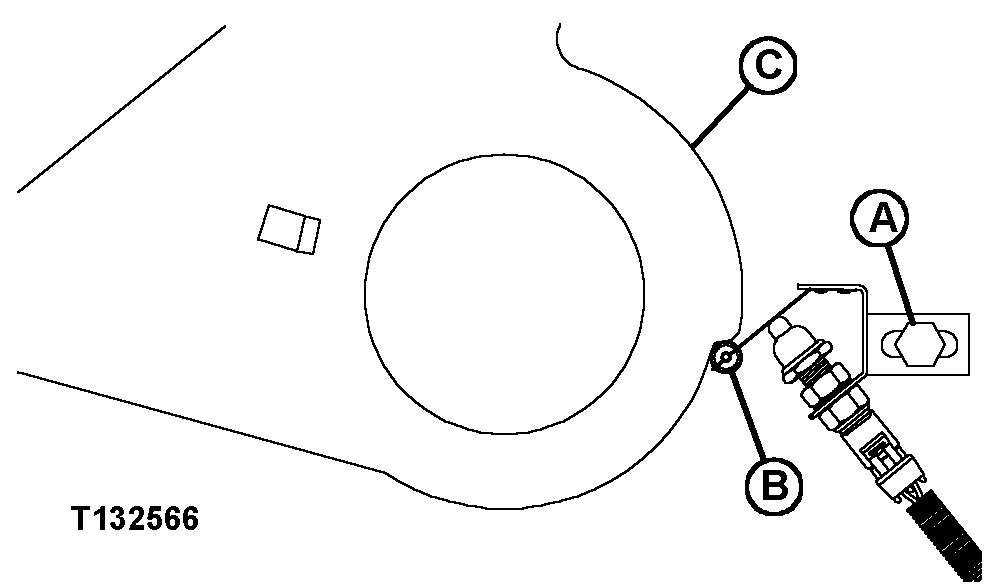
Adjust Return-to-Dig Switch
1. Loosen cap screw (A) and move return-to-dig switch so roller (B) is touching cam surface (C) as shown. 2. Tighten cap screw without moving return-to-dig switch out of position. 3. Test operation of the return-to-dig switch. a. Disconnect the sensor tube yoke from the self-leveling actuator. NOTE: Ensure that switch arm and roller do not bottom on switch housing. b. Turn the self-leveling actuator back-and-forth while watching the return-to-dig switch roller move on the cam surface. If the cam surface hits the switch bracket, or the return-to-dig switch roller arm bottoms against the switch housing when depressed, reposition the return-to-dig switch. Repeat steps 1-3. c. Reconnect the sensor tube yoke to the self-leveling actuator. |
|
CED,OUO1079,470 -19-17JUL00-4/4 |