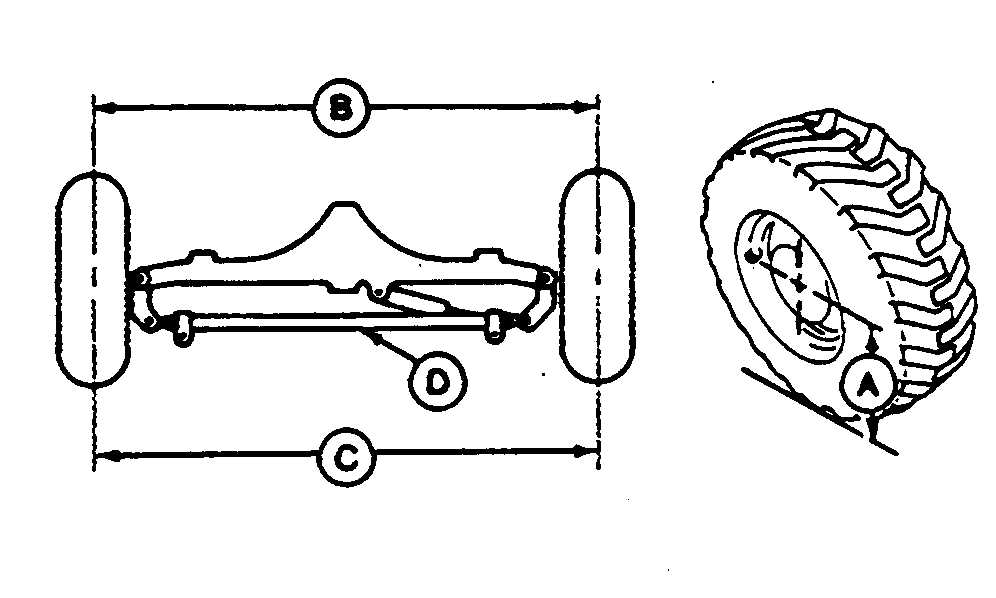
Toe-In Check and Adjust (S.N. 888004-)
1. Park machine on a flat level surface with the front wheels in the straight ahead position. Perform Tracking Angle Check and Adjust. (Group 9020-20.) 2. Measure ground-to-center of hub distance (A). 3. At tread center line at front of tire, measure from ground up using value obtained in step 2. Put a mark on the tire tread at location measured. Do same at tread center line at rear of tire. 4. Repeat steps 2 and 3 for other front wheel. 5. Measure distance at front of tires (B) (from tread center line to tread center line where marked). 6. Measure distance at rear of tires (C) (from tread center line to tread center line where marked). 7. Distance (B) must be less than distance (C) as specified. Specification
|
|
||||||||
VD76477,0001450 -19-28FEB07-1/1 |
