Changing Tine Ram Drive Belts
Removing Belt
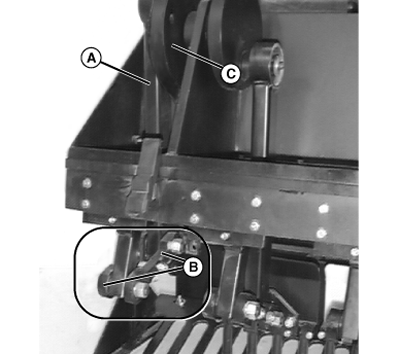
NOTE: The connecting rod (A) must be loosened at the return links (B) and removed from the belt pulley (C).
TCAL41120-UN-18JAN13
TCAL41121-UN-18JAN13
-
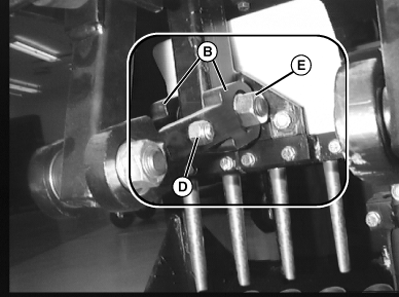
Loosen locknut (D) to release pressure on return links (B). Remove front nut (E) and bolt (closest to tine holder) to allow return links to drop free from the connecting rod.
-
Remove the dirt shield (F) by removing the self-tapping screw (G).
TCAL41122-UN-18JAN13 -
Remove wing nut (H) to remove divider seal (I).
-
NOTE: Bolts holding connecting rods to belt pulleys are LEFT-HAND threaded. Refer to the decal (J) on the arm indicating direction of thread.
Remove bolt and washer (K) and pull connecting rod away from belt pulley.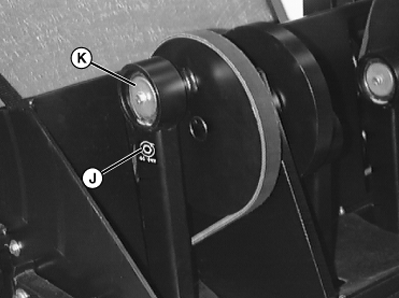
TCAL41123-UN-18JAN13 -
Remove two lock nuts (L) and bolts securing reduction shaft to the side wall of the frame.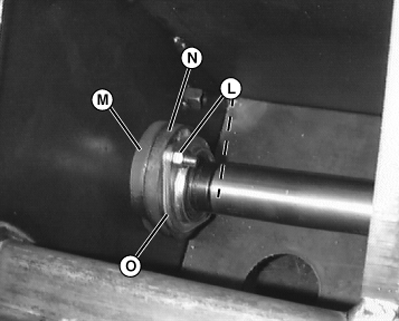
TCAL41124-UN-18JAN13 -
Remove blank spacer (M), bearing spacer (N), and outer bearing plate (O).
-
Remove belt (P) from around bearing (Q) and shaft and remove from machine.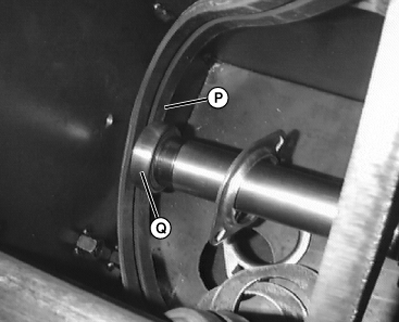
TCAL41125-UN-18JAN13
Installing Belt
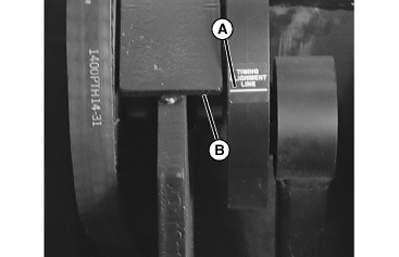
IMPORTANT: Avoid damage! Aeration head flex-links are timed. Timing marks (A) on both flywheel pulleys must line up with reinforcement bracket edges (B) when assembled.
TCAL41126-UN-18JAN13
-
To install belt, reverse steps 1 through 7 in “Removing Belt”.
-
NOTE: When installing reduction shaft to side wall, install outer bearing plate and bearing spacer (C) onto bearing first. While holding them in place, install blank spacer (D) and insert two bolts (E) from the outside through the spacers and bearing plates. Secure with nuts.
Tighten hardware to standard torque.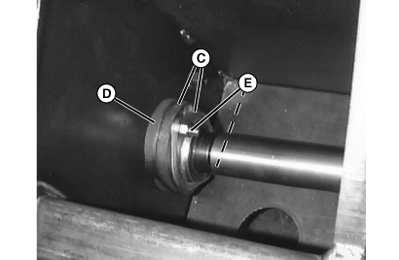
TCAL41127-UN-18JAN13 -
Adjust belt tension. The belt must deflect approximately to specification.
Item Measurement Specification Belt Deflection 5.1 mm (0.2 in.) with 26.2 lb. (or moderate thumb pressure)
|
OUO1082,00065D7-19-20150612 |