Replacing Fuses and Relays
IMPORTANT: Avoid damage! The electrical system can be damaged if incorrect replacement fuses are used. Replace the defective fuse with a fuse of the same ampere rating.
Locating Fuses and Relays
All electrical circuits are protected by fuses. Ampere rating is marked on each fuse, plus fuses are color coded to ensure proper replacement.
|
Fuses |
|
|---|---|
|
Fuse Rating |
Color |
|
10A |
Red |
|
15A |
Blue |
|
20A |
Yellow |
|
30A |
Green |
Fuse Location—OOS
-
Park machine safely. (See Parking Safely in the Safety section.)
-
Open hood.
-

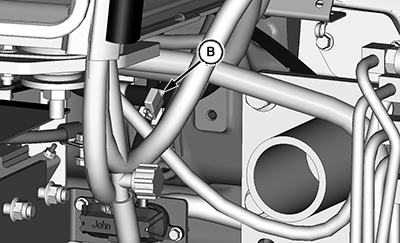
LV17953-UN-04JUN13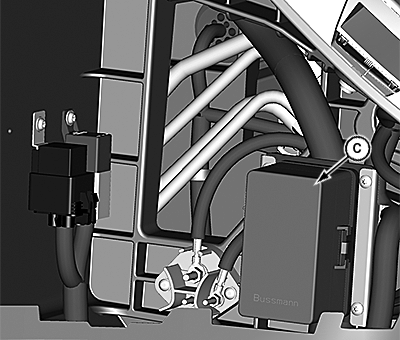
LV17954-UN-04JUN13A - Hood Cowl Latch
B - Hood Cowl
C - Load Center Cover
Pull hood cowl latch (A) out and up on both sides. -
Remove hood cowl (B).
-
Remove load center cover (C).
-
Identify fuse or relay in the fuse block.
-
Pull out defective relay or fuse.
-
Replace with the new relay or fuse.
-
Install load center cover.
-
Line up hood cowl and gently slide into place.
-
Close hood.
Fuse Location—Cab
-
Park machine safely. (See Parking Safely in the Safety section.)
-
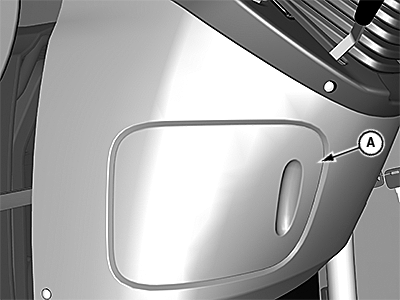
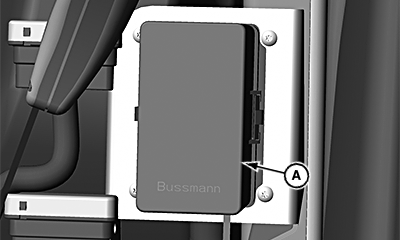
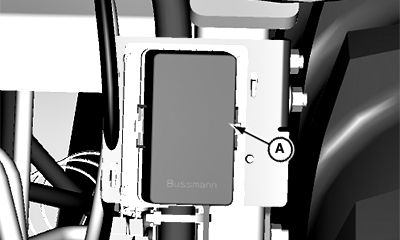
LV17956-UN-04JUN13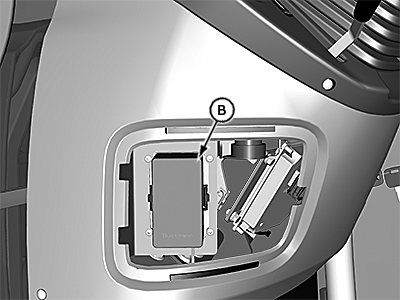
LV17957-UN-04JUN13A - Fuse Cover
B - Load Center Cover
Pull fuse cover (A) out. -
Remove load center cover (B).
-
Identify fuse or relay in the fuse block.
-
Pull out defective relay or fuse.
-
Replace with the new relay or fuse.
-
Install load center cover.
-
Replace fuse cover.
Fuse Location—Junction Block (4066M and 4066R Tractors)
 CAUTION: Verify which fuse configuration is on your machine
and replace with same rated fuse. Damage to machine could occur if
incorrect fuse is installed.
CAUTION: Verify which fuse configuration is on your machine
and replace with same rated fuse. Damage to machine could occur if
incorrect fuse is installed.
NOTE: ECU and Junction block fuses are located near the battery.
-
Park machine safely. (See Parking Safely in the Safety section.)
-
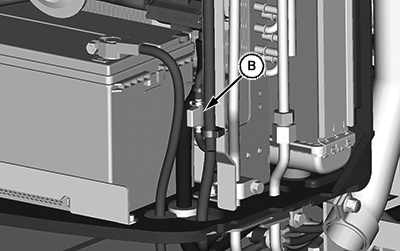
LV23675-UN-30JAN15Open Station—Front Grill Area Near the Battery—20 A fuse configuration for 4066 shown
LV23676-UN-30JAN15Cab—Right Side of Cab Near Battery Box—20 A fuse configuration for 4066 shown
B - 20 A Junction Block Fuse
Identify defective 20 A Junction Block Fuse (A). -
Pull out defective fuse.
-
Replace with the new fuse.
Fuse and Relay Size and Function
Open Operator Station
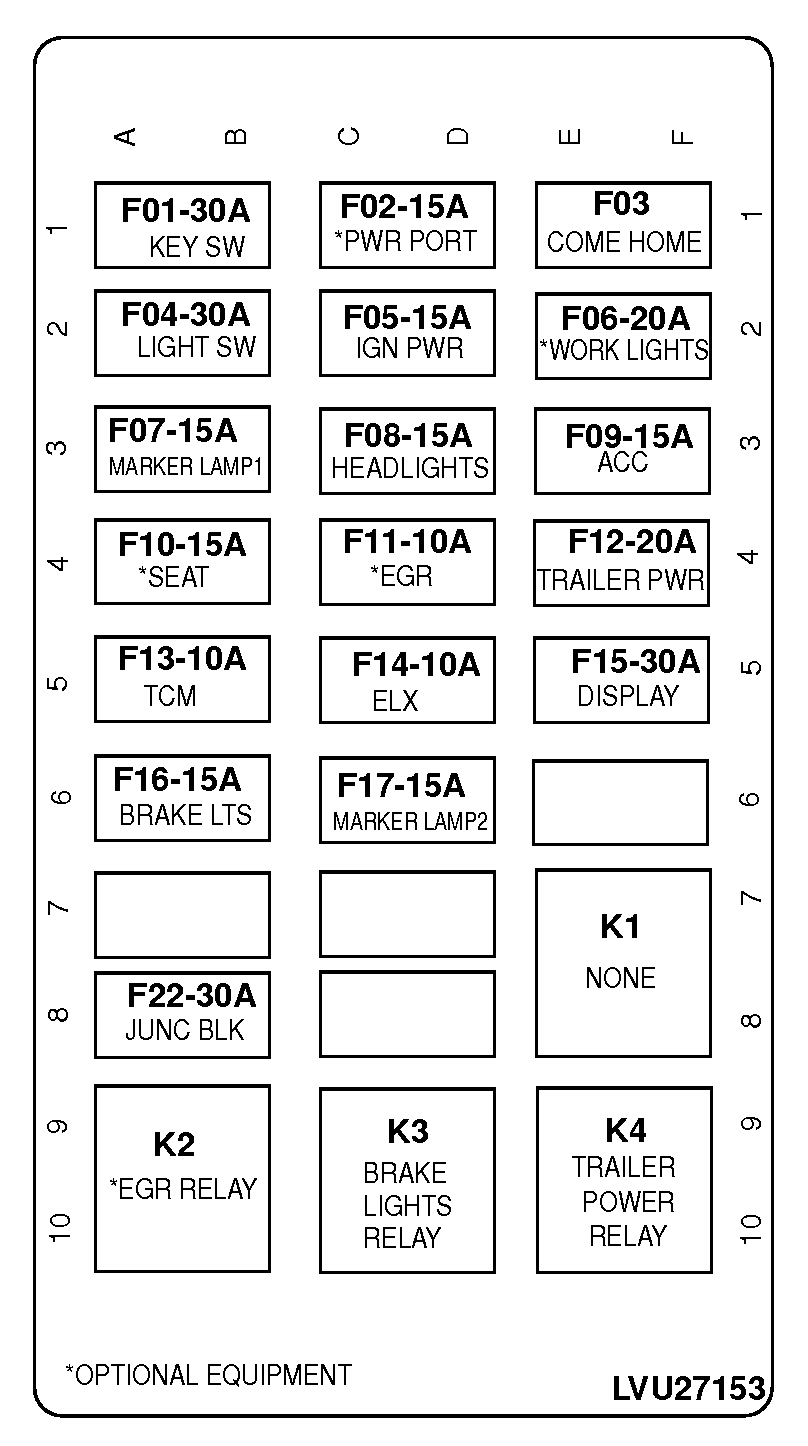
LVP11021-UN-02JUN20
Open Operator Station - LVU27153
F01 - Key Switch Fuse (30A)
F02 - Power Port Fuse (Option) (15A)
F03 - Come Home Fuse
F04 - Light Switch Fuse (30A)
F05 - Ignition Power Fuse (15A)
F06 - Work Light Fuse (Option) (20A)
F07 - Marker Light 1 Fuse (15A)
F08 - Headlight Fuse (15A)
F09 - Accessory Fuse (15A)
F10 - Air Ride Seat Fuse (Option) (15A)
F11 - EGR Fuse (Option) (10A)
F12 - 7 Pin Trailer Fuse (20A)
F13 - TCM Fuse (10A)
F14 - ELX Fuse (10A)
F15 - Display Panel Fuse (30A)
F16 - Brake Lights Fuse (15A)
F17 - Marker Light 2 Fuse (15A)
F22 - Junction Block Fuse (30A)
K1 - Spare
K2 - EGR Valve Relay (Option)
K3 - Brake Light Relay
K4 - 7 Pin Trailer Relay
Cab

LVP11022-UN-02JUN20
Cab - LVU34441
F01 - Key Switch Fuse (30A)
F02 - Power Port Fuse (Option) (15A)
F03 - Come Home Fuse
F04 - Light Switch Fuse (30A)
F05 - Ignition Power Fuse (15A)
F06 - Work Light Fuse (25A)
F07 - Right Tail Light Fuse (15A)
F08 - Headlight Fuse (15A)
F09 - Accessory Fuse (15A)
F10 - Air Ride Seat Fuse (Option) (15A)
F11 - EGR Fuse (Option) (10A)
F12 - 7 Pin Trailer Fuse (20A)
F13 - TCM Fuse (10A)
F14 - ELX Fuse (10A)
F15 - Display Panel Fuse (30A)
F16 - Brake Lights Fuse (15A)
F17 - Left Tail Light Fuse (15A)
F18 - Roof Power 2 Fuse (20A)
F19 - Wiper Fuse (20A)
F20 - Roof Power 1 Fuse (20A)
F22 - Junction Block Fuse (30A)
F23 - HCC Fuse (10A)
K1 - Work Light Relay
K2 - EGR Valve Relay (Option)
K3 - Brake Light Relay
K4 - 7 Pin Trailer Relay
Rear Outlet SCV Load Center Fuse and Relays (If Equipped)
NOTE: SCV load center is on the left side of the seat on OOS and on a cab tractor, next to the right rear tire on the back of the tractor.
-
Park machine safely.
-
LV18069-UN-11JUN13Open Operator Station
LV18070-UN-11JUN13Cab
A - Access Cover
Pry open tabs on the load center access cover (A) and lift to remove. -
Pull defective fuse or relay from socket.
-
Push new fuse or relay into socket.
-
Install load center access cover.
Fuse and Relay Size and Function
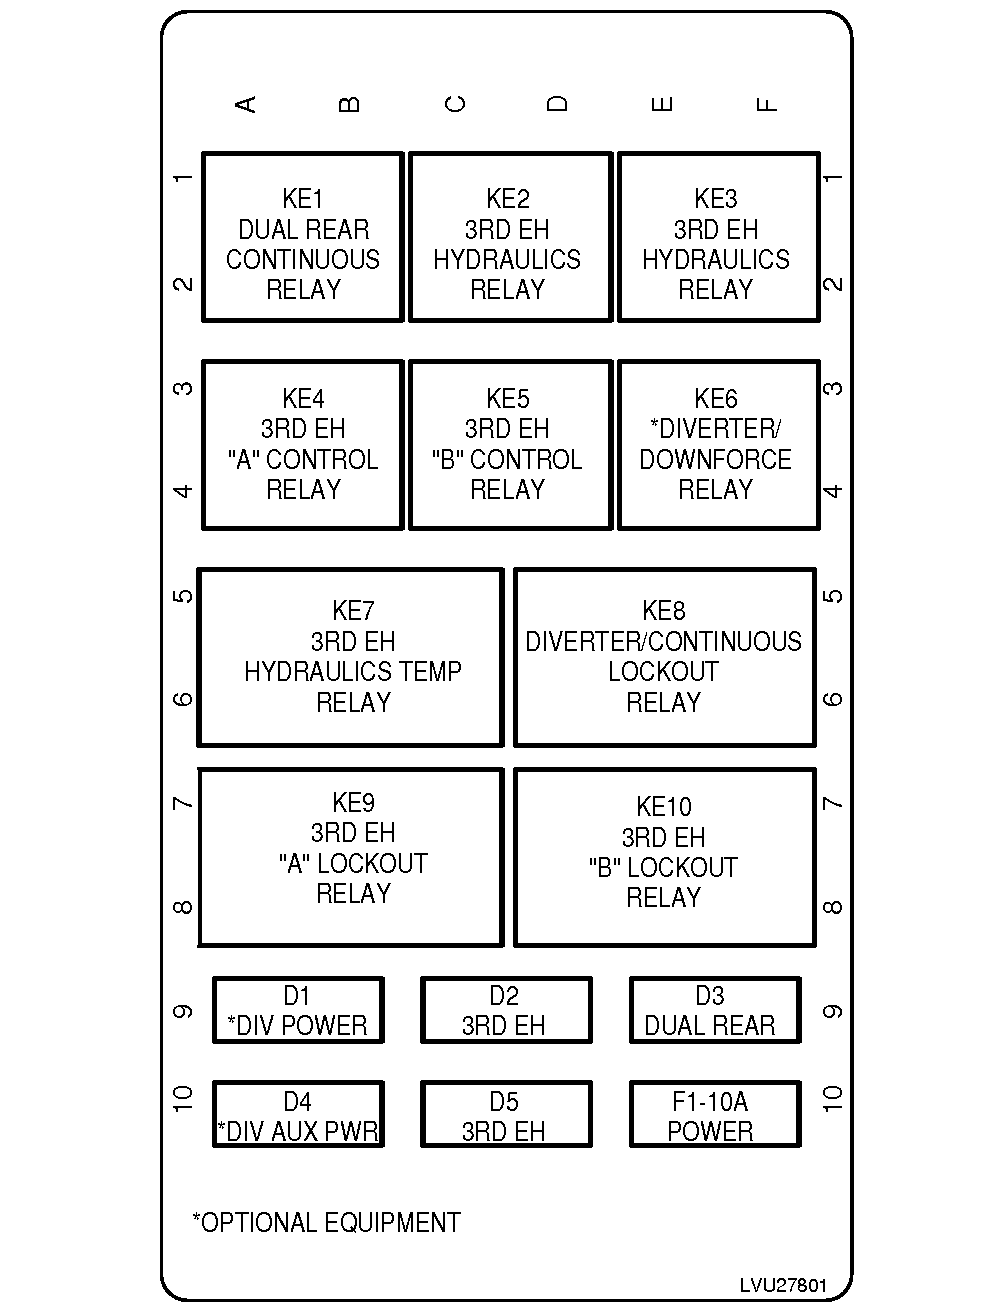
LV19399-UN-15OCT13
LVU27801
D1 - Diverter Power Diode
D2 - Third EH Diode
D3 - Dual Rear Diode
D4 - Diverter Auxiliary Power Diode
D5 - Third EH Diode
F1 - EH Hydraulics Power Fuse (10A)
KE1 - KE1 Dual Rear Continuous Relay
KE2 - Third EH Hydraulics Relay
KE3 - Third EH Hydraulics Relay
KE4 - Third EH A Control Relay
KE5 - Third EH B Control Relay
KE6 - Diverter Downforce Relay
KE7 - Third EH Hydraulics Temperature Relay
KE8 - KE8 Diverter-Continuous Lockout Relay
KE9 - Third EH A Lockout Relay
KE10 - Third EH B Lockout Relay
|
PP71895,000145F-19-20200608 |