Using Front Hitch Lift Arms—Category 1 and 1N—If Equipped
-
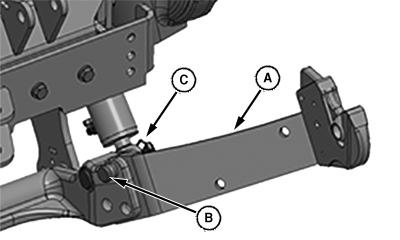
LV23644-UN-07JAN15A - Lift Arm
B - Lift Arm Pin
C - Locking Pin
Place lift arm (A) into lift frame fork. Insert upper lift arm pin (B) through fork and lift arm, secure with locking pin (C). -
Category 1 lift arms may be installed in fixed position or float position. If installing category 1N lift arms, proceed to next step.
-
NOTE: If torsion tube is to be installed, arms must be installed in fixed position, not float position.
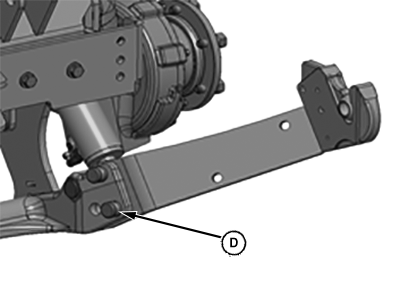
LV23645-UN-07JAN15D - Lift Arm Pin
Category 1 lift arms: To install lift arms into float position, insert second lift arm pin (D) into forward lower hole. -
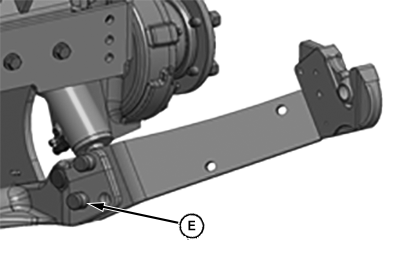
LV23646-UN-07JAN15E - Lift Arm Pin
Category 1 lift arms:To install lift arms into fixed position, insert second lift arm pin (E) into rearward lower hole.
-
-
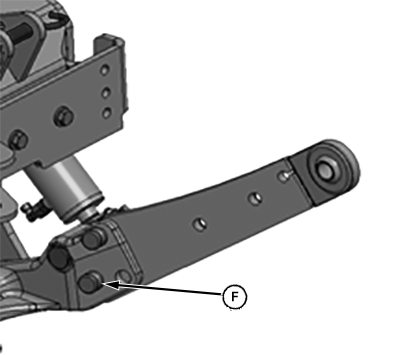
LV23647-UN-07JAN15F - Lift Pin
If installing category 1N lift arms, position lower lift arm pin (F) into rearward lower hole.
For Category 1N Lift Arms and Category 1N A-Frame:
When using category 1N A-frame with a PTO driven front implement, verify clearance between A-frame and PTO drive line before operating implement.
Implements may be lower during operation than when sitting on a flat surface. Clearance to drive line should be verified when lift arms are at the lowest possible position.
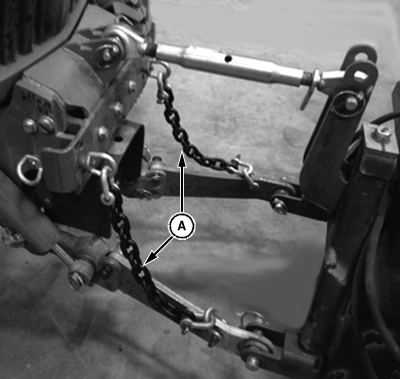
LV23648-UN-07JAN15
CAT 1N
A - Chain
If necessary, chains may be used to limit the lower travel of implements to prevent interference with drive line. Connect chains (A) to lift arms and tractor as shown. With implement in lowest operating position, verify clearance between A-frame and drive line, adjust chains as required.|
UP00731,00002C4-19-20150108 |