Replacing Fuel Filter
Fuel Filter Removal
 Fuel vapors are explosive and flammable:
- Do not smoke while handling fuel.
- Keep fuel away from flames or sparks.
- Shut off engine before servicing.
- Cool engine before servicing.
- Work in a well-ventilated area.
- Clean up spilled fuel immediately.
-
Park machine safely on a hard level surface.
-
Tip seat forward.
-
Hold onto seat and remove all screws (A).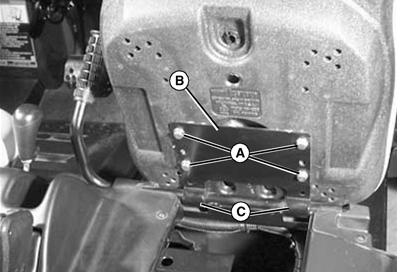
MXAL45715-UN-09APR13 -
Remove seat and seat bracket (B) from seat bushings (C).
-
Remove seven flange head screws (A) retaining console cover.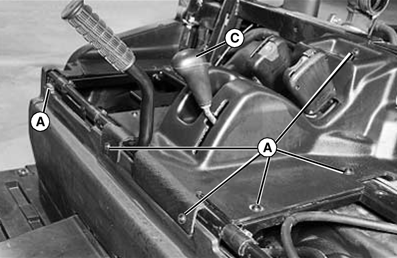
MXAL45716-UN-09APR13 -
Carefully pry cap (B) from shift knob.
-
Remove lock nut (C) securing shift knob to lever.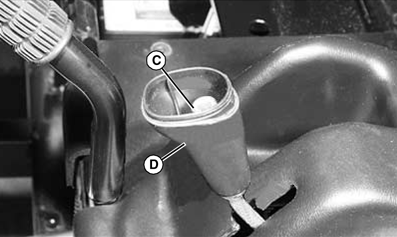
MXAL45717-UN-09APR13 -
Remove knob (D).
-
Remove console.
-
Remove two fasteners (E).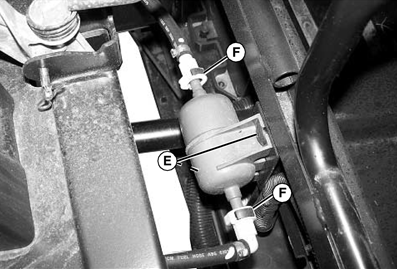
MXAL45718-UN-09APR13 Cover connections with a cloth while disconnecting
fuel line to avoid fuel spray from residual pressure in system -
Wrap a cloth around fittings (F).
-
Pull colored tab (F) up, then press couplers inward to release.
-
Plug hoses and secure in a raised position to avoid spillage.
Fuel Filter Installation
-
Install new filter with flow direction arrow (A) pointing towards passenger side.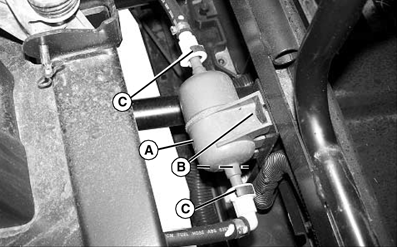
MXAL45719-UN-09APR13 -
Secure filter to frame with two fasteners (B).
-
Push fittings (C) over filter ends until locked in place.
-
Install console cover over shift lever (D) and seat belt buckles (E).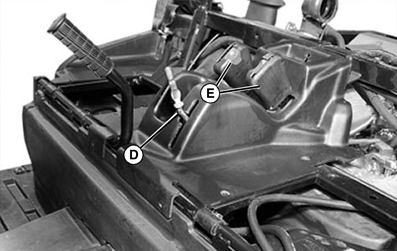
MXAL45720-UN-09APR13 -
Install shift knob (F) to lever and secure with locknut (G). Tighten nut to specifications.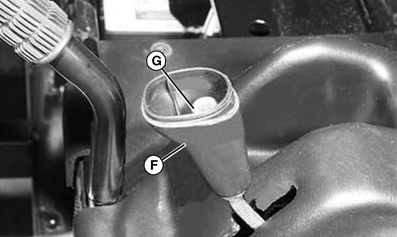
MXAL45721-UN-09APR13 -
Install cap to shift knob.
-
Align cover with captive nuts. Secure console cover with seven flange head screws (H).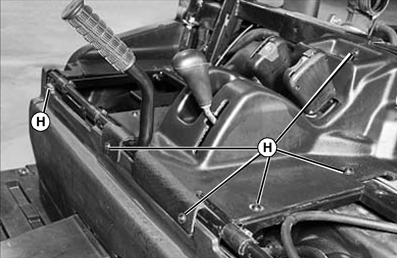
MXAL45722-UN-09APR13 -
Position seat bushings (I) on support rail so tabs face rearward.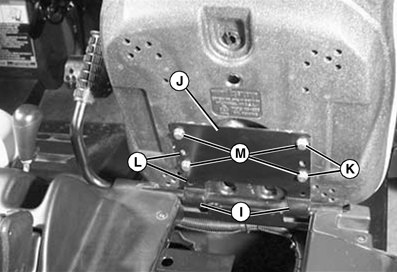
MXAL45723-UN-09APR13 -
Position seat bracket (J) onto support rail so hinges fit around bushing tabs.
-
Rotate seat bracket upward. Position bottom of seat against bracket and align holes with holes in seat.
-
Slide seat to the forward (K) or rearward (L) position.
-
Install original screws (M) to secure seat.
-
Tighten seat bracket hardware.
|
KL66860,00000BB-19-20160913 |