Checking Spark Plug
 Avoid injury! Touching hot surfaces can burn skin.
The engine, components, and fluids are hot if the engine has been
running. Allow the engine to cool before servicing or working near
the engine and components.
Avoid injury! Touching hot surfaces can burn skin.
The engine, components, and fluids are hot if the engine has been
running. Allow the engine to cool before servicing or working near
the engine and components.
-
Park the machine safely. (See Parking Safely in Safety section.)
-
Raise and secure the cargo box with latch support.
-
From under the cargo box, disconnect spark plug wire (A).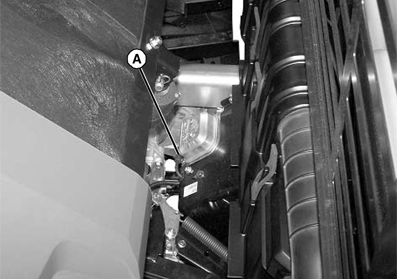
MXAL47344-UN-16APR13 -
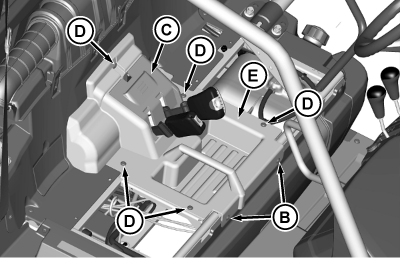
MXT016189-UN-02NOV15Picture Note: Seats removed for better view.
Remove two TORX® head screws (B). -
Tilt seats forward.
-
Remove access cover (C).
-
Remove five Torx® head screws (D) and remove center panel (E).
-
Disconnect spark plug wire under the panel.
-
Remove spark plugs using appropriate spark plug socket.
-
Inspect spark plugs for:
- Cracked porcelain.
- Pitted or damaged electrodes.
- Other wear or damage.
-
Clean spark plugs carefully with a wire brush.
-
In Canada, replace with a resistor spark plug only.
Replace spark plugs if necessary.
-
Check and adjust spark plug gap (F):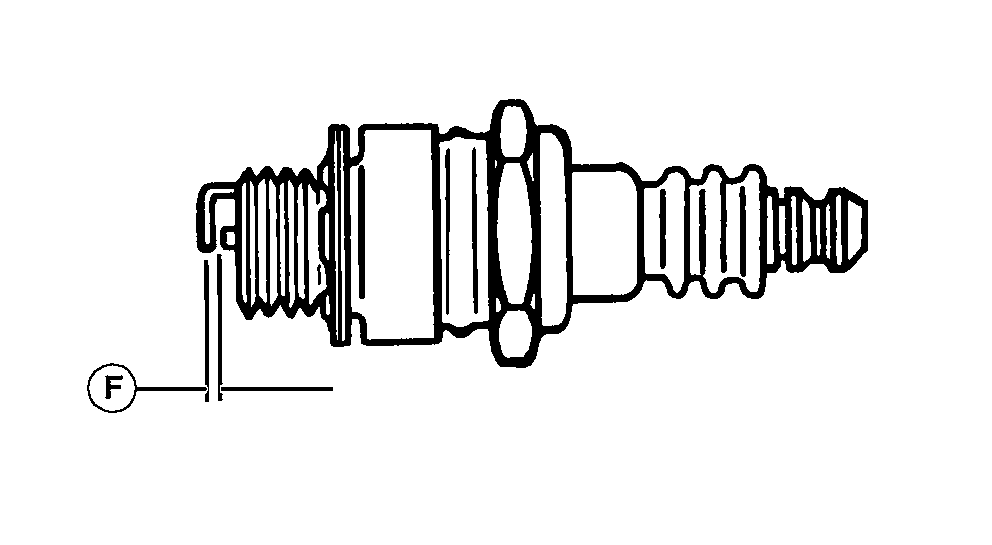
MXAL47346-UN-16APR13- See Specifications for gap distance.
-
Install and tighten spark plugs. Tighten to specification.
Spark Plug Torque 20.3 N·m (180 lb·in) -
Install spark plug wires.
-
Install center panel with five Torx® head screws.
-
Install access cover.
-
Lower seat and install two remaining Torx® head screws on the center panel.
-
Lower the cargo box.
|
TORX is a trademark of Camcar/Textron |
SB31882,000018E-19-20180424 |