Replacing Discharge Chute Cables
Replacing Right Cable
-
Avoid damage! Hydraulic cylinder plunger must be in the retracted position (all the way in the cylinder) when beginning this procedure.
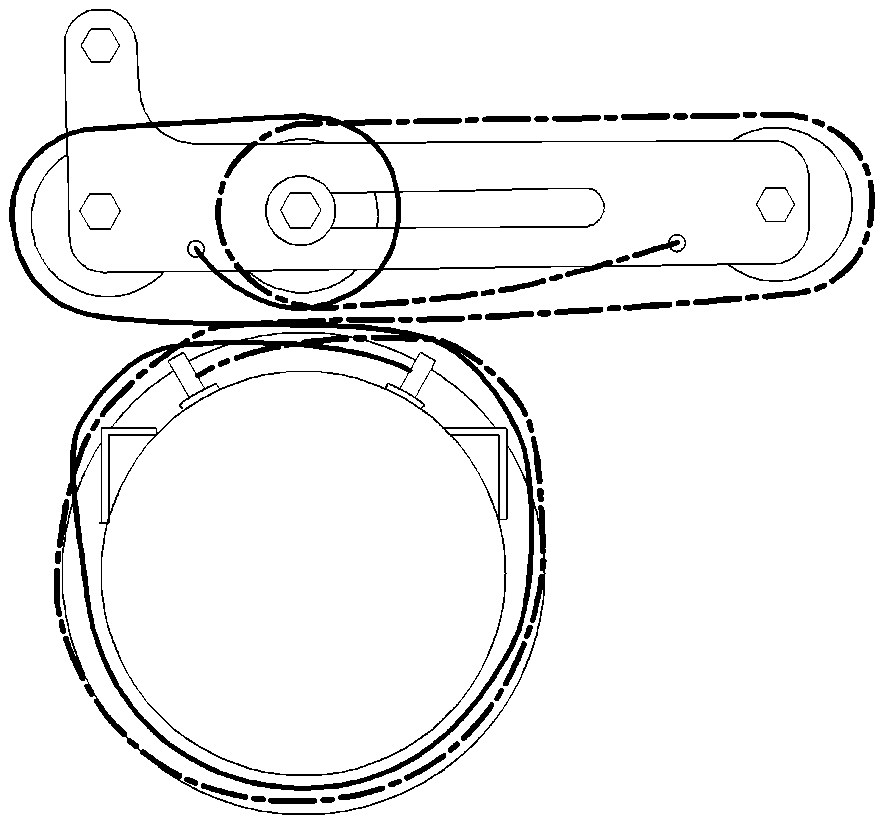
For ease of assembly and proper cable routing, replace one cable at a time. Route right cable around attachment first.
Rotate discharge chute to the right (as viewed from seat) to retract hydraulic cylinder plunger.
-
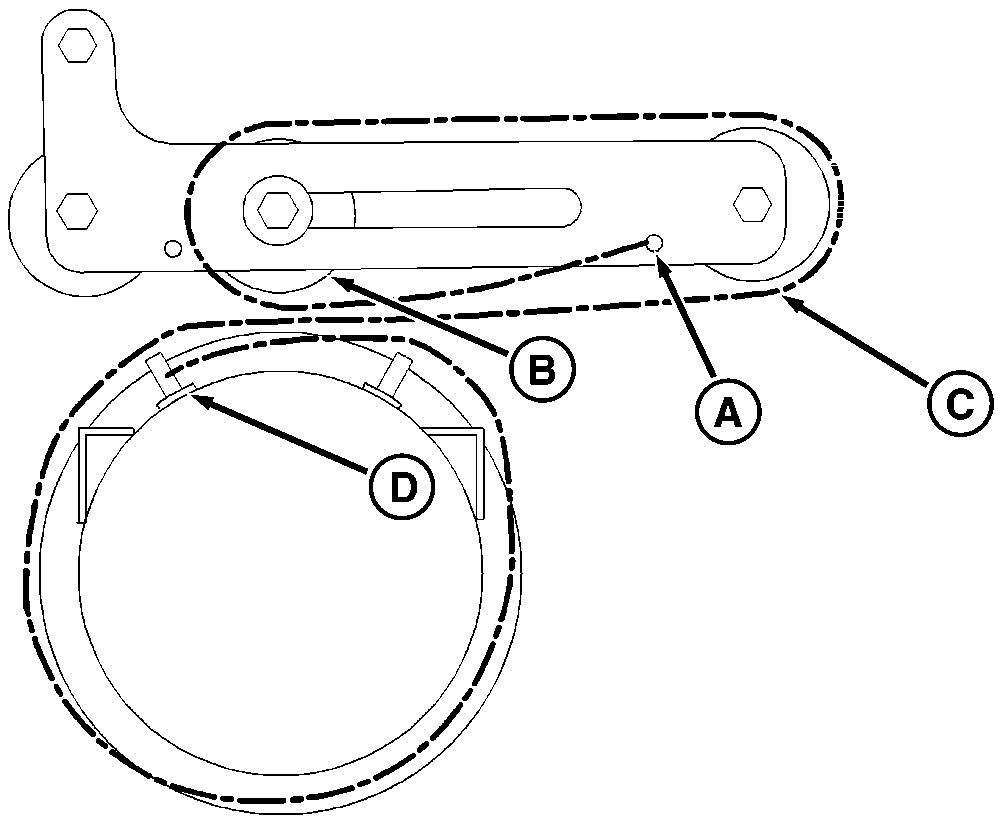
Standing at rear of attachment, insert cable through hole (A).
MXT013834-UN-24MAR15 -
Wrap cable around middle pulley (B), and around right pulley (C).
-
Wrap cable counterclockwise around discharge chute and place it around threaded stud, behind washer and locknut (D).
Replacing Left Cable
-
Avoid damage! Hydraulic cylinder plunger must be in the retracted position (all the way in the cylinder) when beginning this procedure.
For ease of assembly and proper cable routing, replace one cable at a time. Route right cable around snowblower first, then rout left cable.
Rotate discharge chute to the right (as viewed from seat) to retract hydraulic cylinder plunger.
-
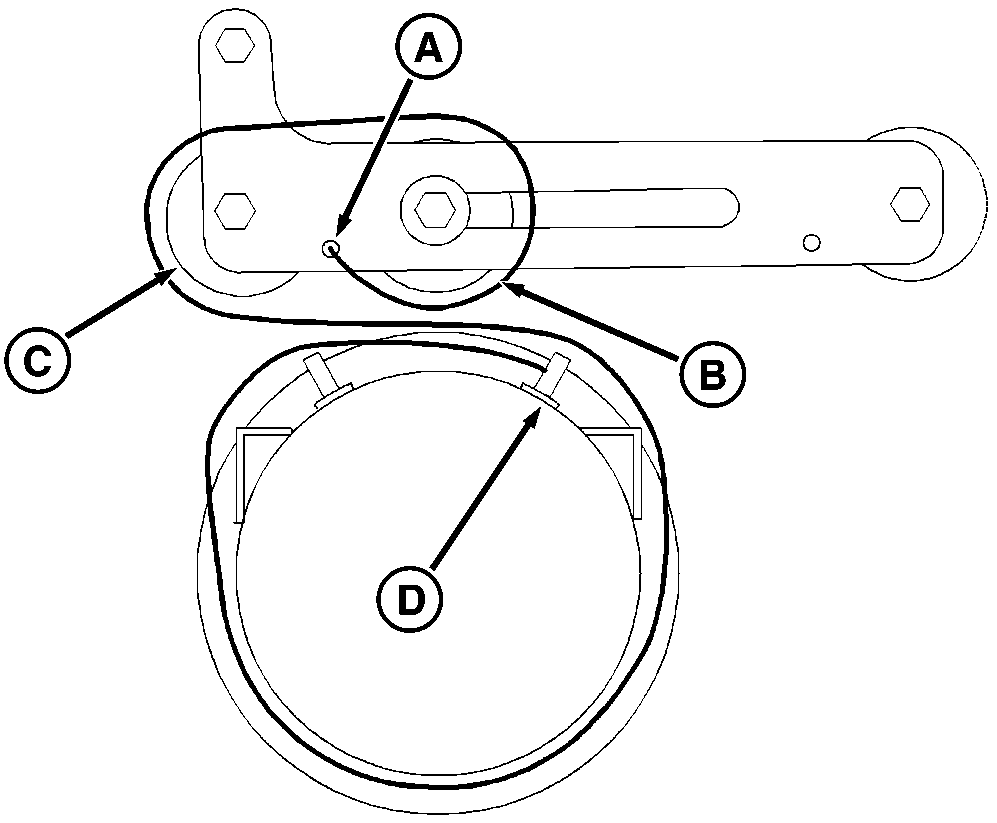
Standing at rear of attachment, insert cable through hole (A).
MXT013835-UN-06MAY15 -
Wrap cable around middle pulley (B), and round left pulley (C).
-
Wrap cable clockwise around discharge chute and place it around threaded stud, behind washer and locknut (D).

MXT013836-UN-06MAY15
Cover Assembly
-
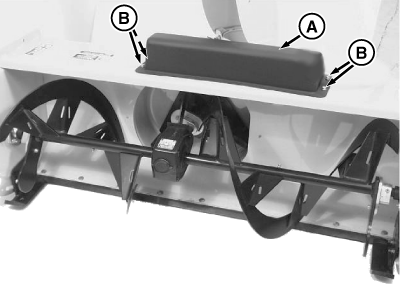
Avoid damage! Make sure you install the long cap screws through the black cable shield and bracket.
Install cable shield (A) and angle bracket and fasten with four cap screws (B) and locknuts.
MXT013831-UN-24MAR15 -
Tighten locknuts.
|
MX52301,0000A25-19-20150526 |