Positioning Hitch Pins-Lift-Type

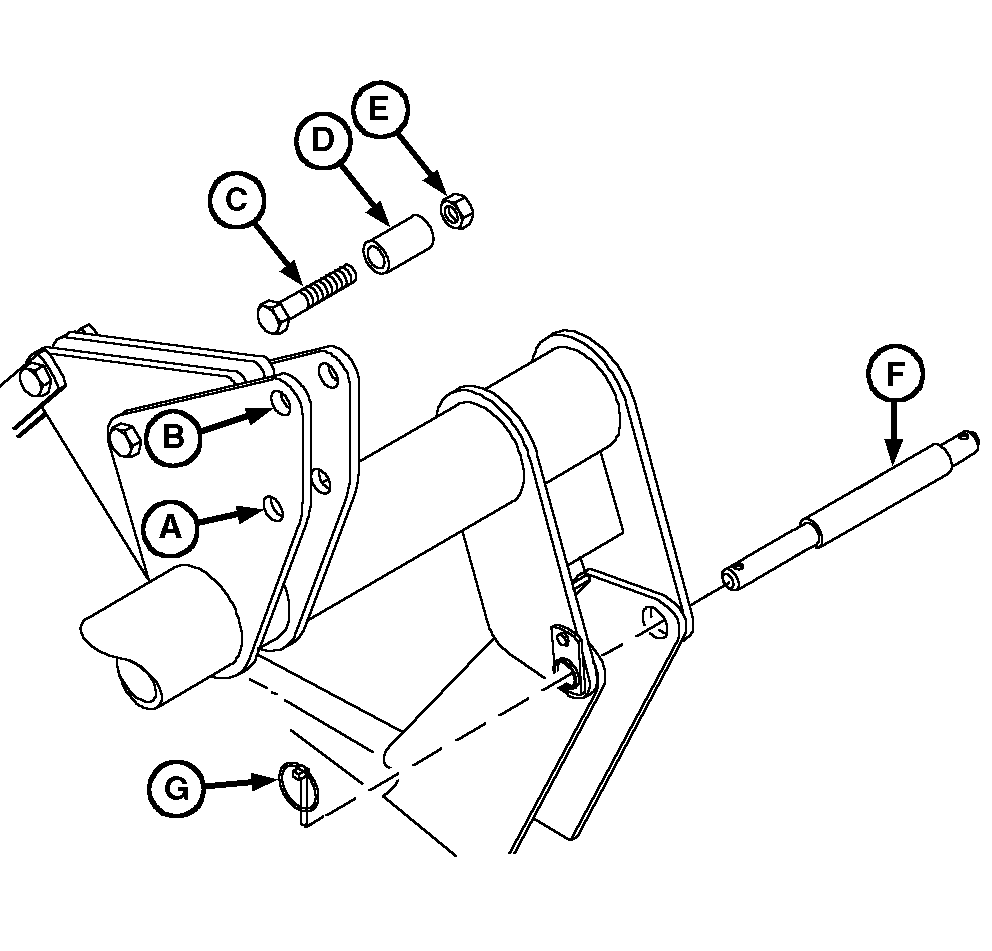
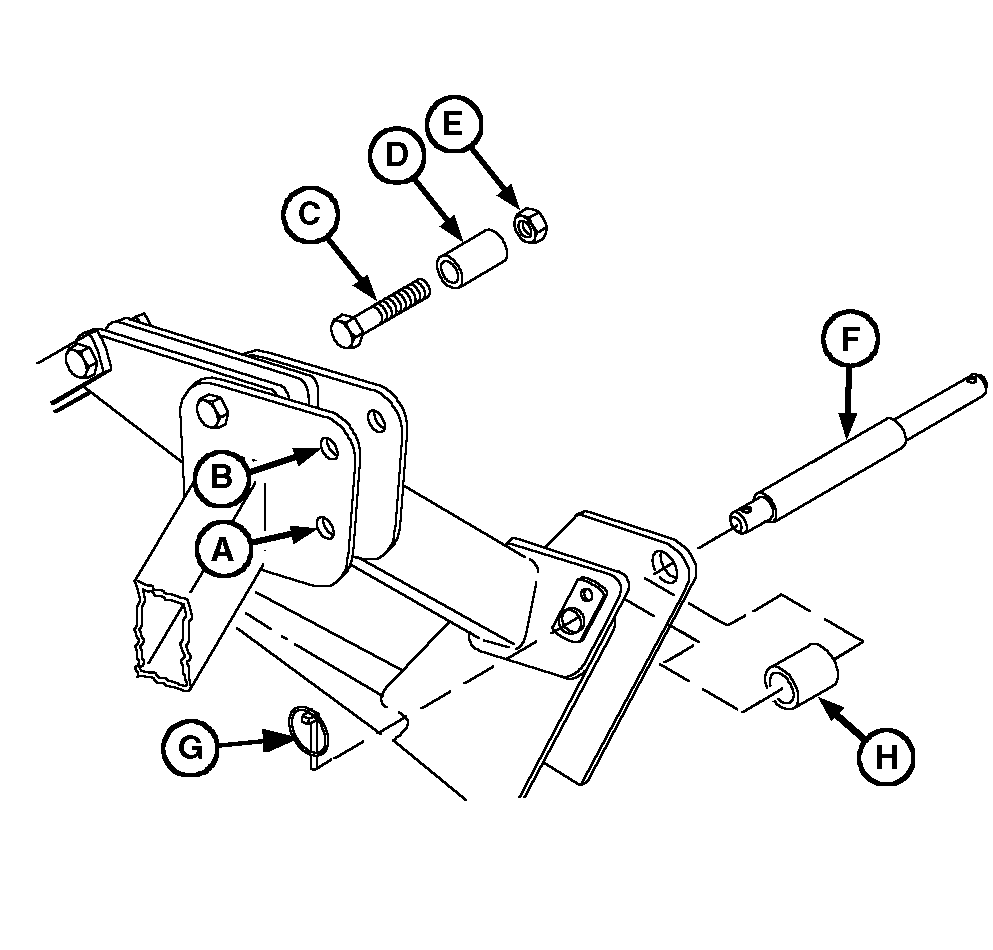
NOTE: Install hitch pin assemblies at both ends of hitch. Left-hand side shown.

1. Category 3N with Quick Coupler, Category 2 and 3; Install parts (F and G) as shown.

NOTE: Spacer (H) is not provided with machine. Order two 28H2678 Spacers from service parts.

Category 3N without Quick Coupler; Install parts (F-H).

2. Center link positions:

  • Category 2, 3 or 3N without Quick Coupler; Attach center link to top hole (B).

    NOTE: For category 3 or 3N use parts (C-E). As an alternative, a 25.4 mm (1 in.) pin can be used in place of cap screw (C) and lock nut (E).

  • Category 2 with Quick Coupler; Install parts (C-E) in bottom hole (A).
  • Category 3 or 3N with Quick Coupler; Install parts (C-E) in top hole (B).


A-Hole
B-Hole
C-Cap Screw, M20 x 60 mm
D-Spacer, 25 x 31 x 52 mm
E-Lock Nut, M20
F-Hitch Pin
G-Quick-Lock Pin
H-Spacer, 1-1/2 x 1.9 x 3 in.

W03070

Category 2-Without Quick Coupler

W03641

Category 2-With Quick Coupler, Category 3 and 3N

AG,OUMX005,1001 -19-03AUG99-1/1