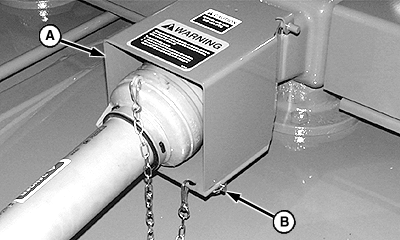
Freeing Slip ClutchIMPORTANT: Friction type clutches will seize up if left unused for a period of time, especially in humid or damp conditions. Slip the clutch using the following procedure before operating the cutter after periods of non-use. 1. Remove two quick-lock pins (B) and raise PTO shield (A).
|
|
AG,OUMX005,909 -19-29JUN99-1/5 |
|
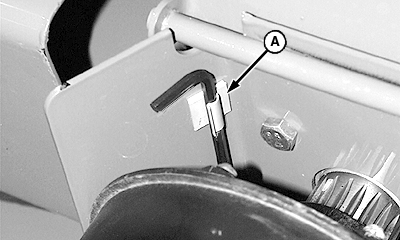
2. Remove hex wrench from clip (A).
|
|
AG,OUMX005,909 -19-29JUN99-2/5 |
|
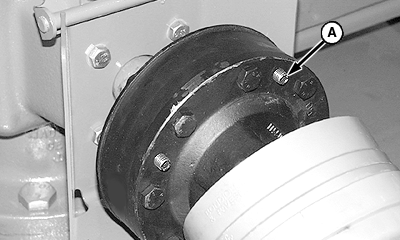
3. Tighten (turn IN, clockwise) four set screws (A) to remove pressure from clutch plates.
|
|
AG,OUMX005,909 -19-29JUN99-3/5 |
|
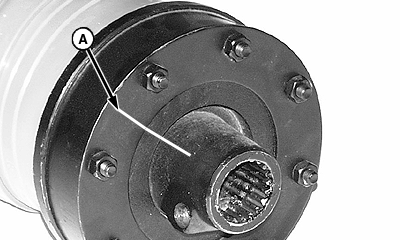
NOTE: For a visual aid in checking for clutch slippage, mark across face of belleville spring, inner plate and drive hub using chalk. Driveline removed for illustration purposes. 4. Make a chalk mark (A) across spring, plate and hub. 5. Start tractor engine, run at 1400-1500 rpm and engage PTO for 2-3 seconds allowing the clutch to slip. 6. Disengage the PTO and allow components to stop rotating. Repeat at least three times. 7. Engage tractor parking brake and/or place transmission in "Park". 8. Disengage PTO, shut off tractor engine and remove key. 9. Wait until all moving parts have stopped. 10. Check the chalk marks. The chalk marks SHOULD NOT be aligned if clutch has slipped.
|
|
AG,OUMX005,909 -19-29JUN99-4/5 |
|
|
|
AG,OUMX005,909 -19-29JUN99-5/5 |


