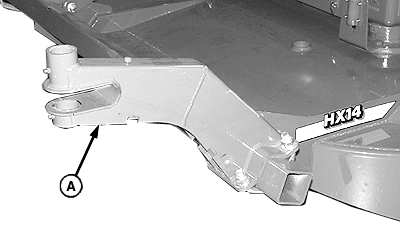
Install Axle Supports, Spindles and TailwheelsNOTE: Machine is equipped with two tailwheel supports. Perform the following procedures on BOTH tailwheel supports. Right-hand side shown. 1. Install axle support (A) on beam using two M20 V-bolts and four lock nuts. Leave lock nuts loose. 2. Slide axle support along beam until centered on beam as shown or position at desired wheel spacing. Tighten lock nuts to specifications. Specification
|
|

AG,OUMX005,975 -19-09JUL99-1/3 |
|
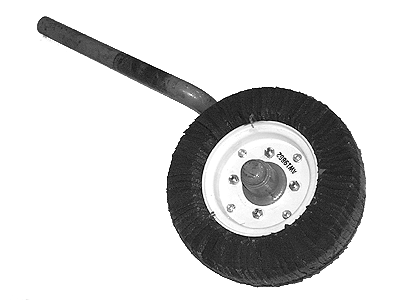
NOTE: There are two types of 1/2 in. wheel nuts in bag of hardware: 3. Install tailwheel on hub using four 1/2 x 1-1/2 in. round head bolts and nuts.
Tighten wheel mounting hardware to specifications. Specification
|
|
AG,OUMX005,975 -19-09JUL99-2/3 |
|
4. Wrap a lifting strap around rear axle beam and attach to a hoist. 5. Apply multipurpose grease to pivoting surface of spindle (C). 6. Raise rear of machine and install tailwheel and spindle assembly (C), two washers (A), clamp (B) and M20 x 100 mm cap screw and lock nut. Position clamp as shown. 7. Lower rear of machine and tighten lock nut on clamp (B). 8. Repeat on opposite side.
|
|

AG,OUMX005,975 -19-09JUL99-3/3 |