Install Hitch and Bellcrank
|
|
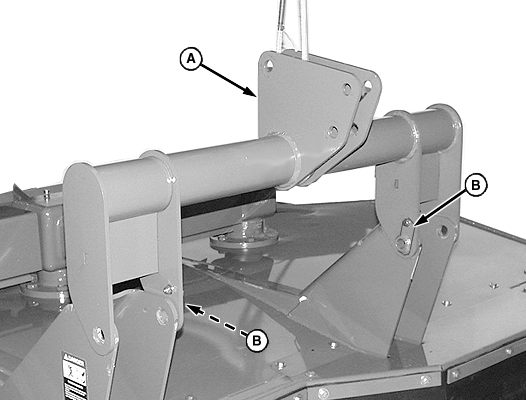
1. Wrap a lifting strap around hitch (A) and attach to a hoist. 2. Position hitch between masts as shown. |
3. Install guides (B) using an M10 x 30 mm cap screw and lock nut. |
AG,OUMX005,976 -19-09JUL99-1/6 |
|
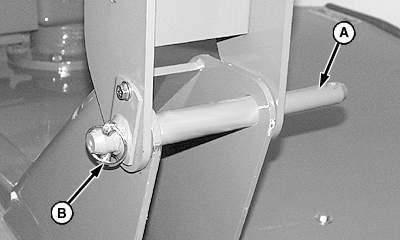
NOTE: Install hitch pins according to tractor hitch type. See Preparing the Cutter section for correct hitch pin positions. Hitch pin illustrated is in position for a tractor with a Quick Coupler hitch 4. Install hitch pins (A) and quick-lock pins (B).
|
|
AG,OUMX005,976 -19-09JUL99-2/6 |
|
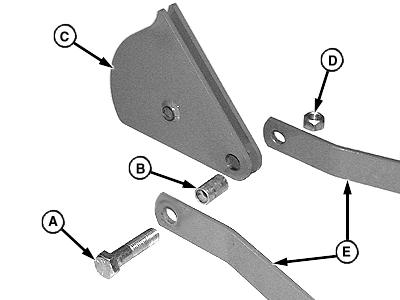
NOTE: Short arm of brace attaches at hitch. Long arm of brace attaches at rear of cutter. 5. Assemble braces (E) and bellcrank (C) using 1 x 1-1/4 x 2 in. spacer (B), 1 x 4 in. cap screw (A) and 1 in. lock nut (D).
|
|
AG,OUMX005,976 -19-09JUL99-3/6 |
|
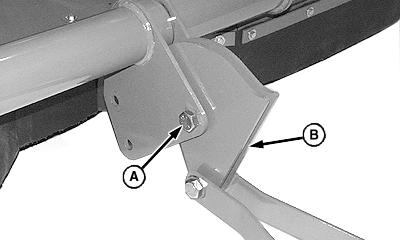
6. Lower hitch toward front of machine and align bellcrank and brace assembly (B) with holes in top of hitch. Install 1 x 4 in. cap screw and lock nut (A). Tighten lock nut until bellcrank can pivot with some resistance. 7. Using a hoist, pivot hitch assembly toward rear of machine.
|
|
AG,OUMX005,976 -19-09JUL99-4/6 |
|
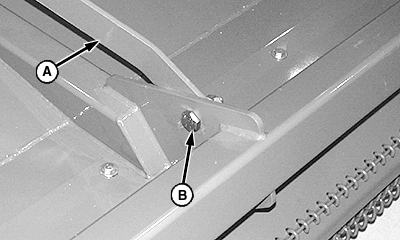
8. Attach braces (A) to deck using 21 x 29 x 21 mm spacer, M20 x 60 mm cap screw and lock nut (B).
|
|
AG,OUMX005,976 -19-09JUL99-5/6 |
|
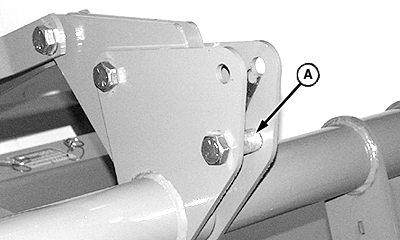
9. Install 1 x 1-1/4 x 2 in. spacer, 1 x 4 in. cap screw and lock nut (A) through top or bottom hole in hitch.
|
|
AG,OUMX005,976 -19-09JUL99-6/6 |