Prepare the Loader1. Remove shipping banding and wire.2. Cut paint mask rings (A) off all cylinders.
|
|

OUMX005,000144D -19-21SEP01-1/11 |
|
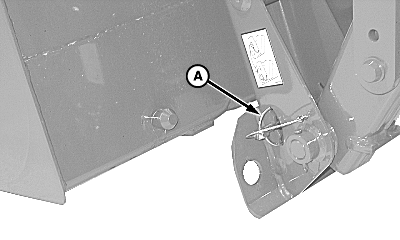
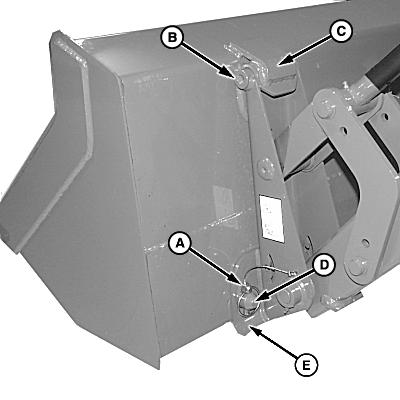
Install Bucket/Attachment
1. Remove pin (A) from each side of attachment holder. 2. Roll top of bucket back and align hook (C) with holder pin (B). 3. Using lifting straps, raise front of loader high enough to allow pin (D) to locate into holder strap (E) on each side of attachment. 4. Install pin (A) into pin (D) on each side of attachment.
|
|
OUMX005,000144D -19-21SEP01-2/11 |
|
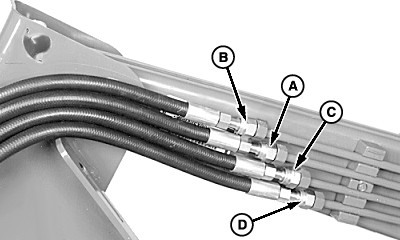
Install Hydraulic Hoses
IMPORTANT: For more efficient use of tractor hydraulics, an orifice has been installed in the fitting for head-end of lift cylinder (GREEN cap). The lift circuit orifice slows the lowering and improves control of lift arms. To prevent premature failure of hoses, be sure there are no twists or bends in hoses, follow correct procedure for installation. Check that all O-rings are in position. Lubricate with hydraulic oil or petroleum jelly. 1. Install nylon protector sleeve (flared end first) over four hoses.NOTE: To assure proper torque on fittings, install and tighten hoses to fittings closest to mast first. 2. Connect hoses to fittings. Tighten to specifications. Specification
3. Install colored dust cap on coupler end to match function as follows:
NOTE: Doubling of sleeve is done by attaching sleeve to hoses with tie band approximately 50 mm (2 in.) from fittings, then folding the sleeve inside itself. 4. Double sleeve about 150 mm (6 in.) (E) and cover fittings. 5. Install tie band (F) by lacing tie band through holes in protective sleeve. |
|

OUMX005,000144D -19-21SEP01-3/11 |
|
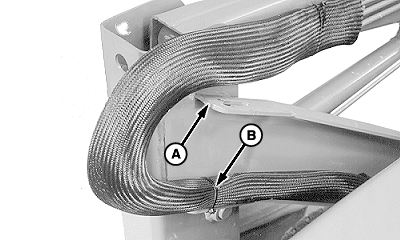
6.
Press lines into clamp and tighten cap screw to secure lines to boom.
7. Pull sleeve toward quick-couplers, attach with tie band, double about 50 mm (2 in.) and install second tie band (G) lacing it through protective sleeve. 8. Secure sleeve to hoses with tie bands (H). |
OUMX005,000144D -19-21SEP01-4/11 |
|
9.
After loader has been mounted on tractor
, route hoses as shown to avoid contact with loader frame at location (A).
10. Using tie band (B), secure hose bundle to left-hand mast.
|
|
OUMX005,000144D -19-21SEP01-5/11 |
|
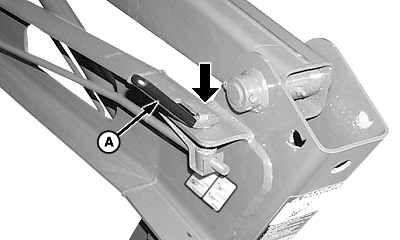
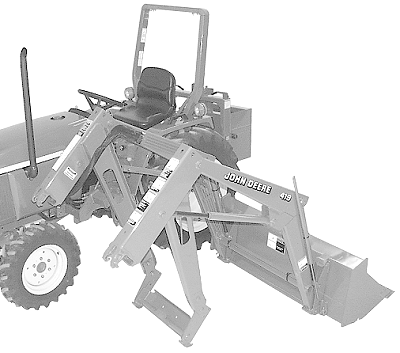
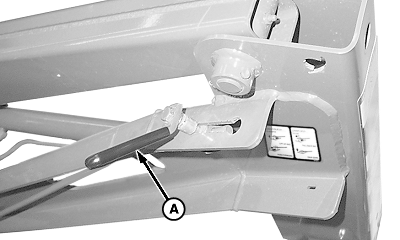
Position Loader to Mount on Tractor
IMPORTANT: Make sure loader latch (A) is in locked position. 1. Drive tractor to side of loader and shut off engine. IMPORTANT: Avoid damaging hoses or pulling them out of couplers during assembly. Route hoses as shown. 2. Route hoses (B) between loader mast (C) and parking stand (D), as shown. 3. Cut wires that fasten lift cylinders to masts.
|
|

OUMX005,000144D -19-21SEP01-6/11 |
|
4. Relieve system pressure. |
|
 CAUTION:
To help prevent injury from escaping hydraulic oil under pressure, relieve pressure in the system. Move control lever back and forth and side-to-side several times.
CAUTION:
To help prevent injury from escaping hydraulic oil under pressure, relieve pressure in the system. Move control lever back and forth and side-to-side several times.
OUMX005,000144D -19-21SEP01-7/11 |
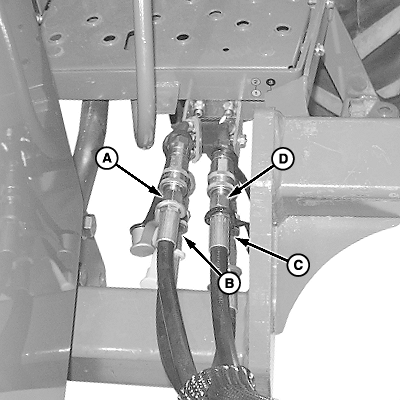
5.
Connect couplers matching colored caps on hoses and colors on coupler plate as outlined below:
|
|
OUMX005,000144D -19-21SEP01-8/11 |
|
IMPORTANT: The weight of the 1250 mm (49 in.) and 1350 mm (53 in.) buckets may not be enough to act as a counterbalance with the weight of the boom when extending the cylinders. When cylinders are extended boom is supposed to raise, if weight is not placed in bucket, the bucket may raise instead. 6. Place a minimum of 25 kg (55 lb) weight in the bucket before extending the lift cylinders. 7. Extend lift cylinders to raise loader into mounting position. 8. Shut off tractor engine. |
|
OUMX005,000144D -19-21SEP01-9/11 |
|
9. Relieve system pressure. 10. Disconnect couplers. |
|
OUMX005,000144D -19-21SEP01-10/11 |
|
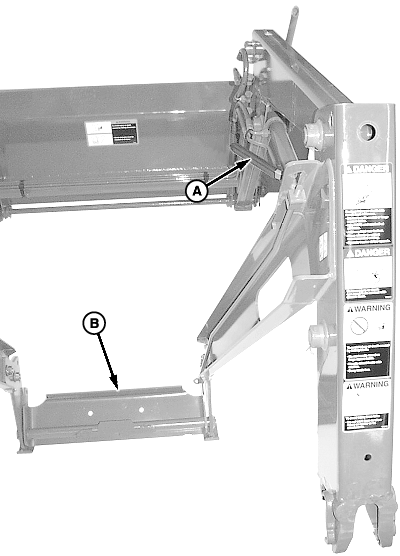
11.
Place lever (A) in unlatched position and latch plate (B) will flip forward.
|
|
OUMX005,000144D -19-21SEP01-11/11 |