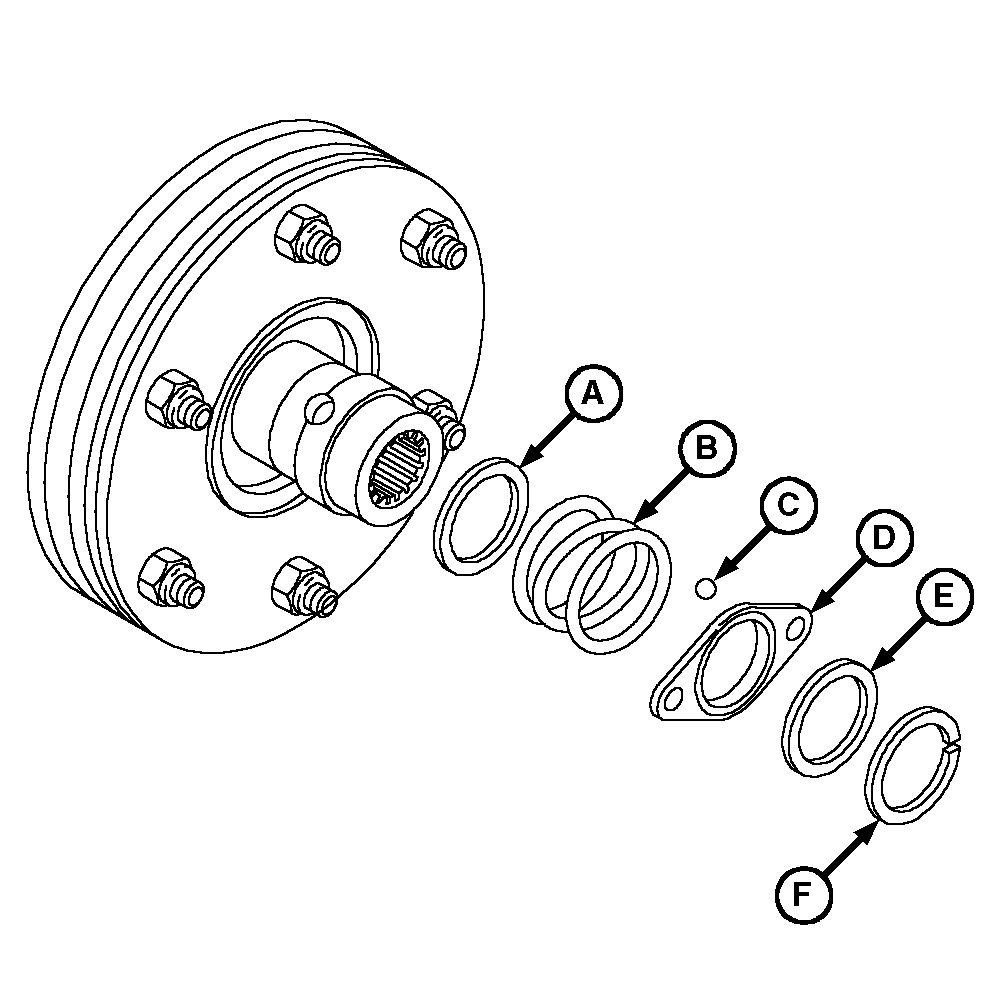
Disassembling and Inspecting Slip Clutch-MX5 and MX61. Remove PTO driveline. (See procedure in this section.)NOTE: Parts (A-F) are replaced as a kit. 2. Remove locking collar assembly as follows: a. Pull back on locking collar (D). b. Remove snap ring (F). c. Remove parts (A-E).
|
|
OUO6077,0001606 -19-22AUG02-1/3 |
|
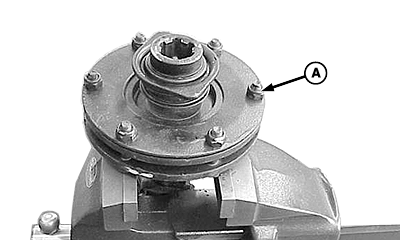
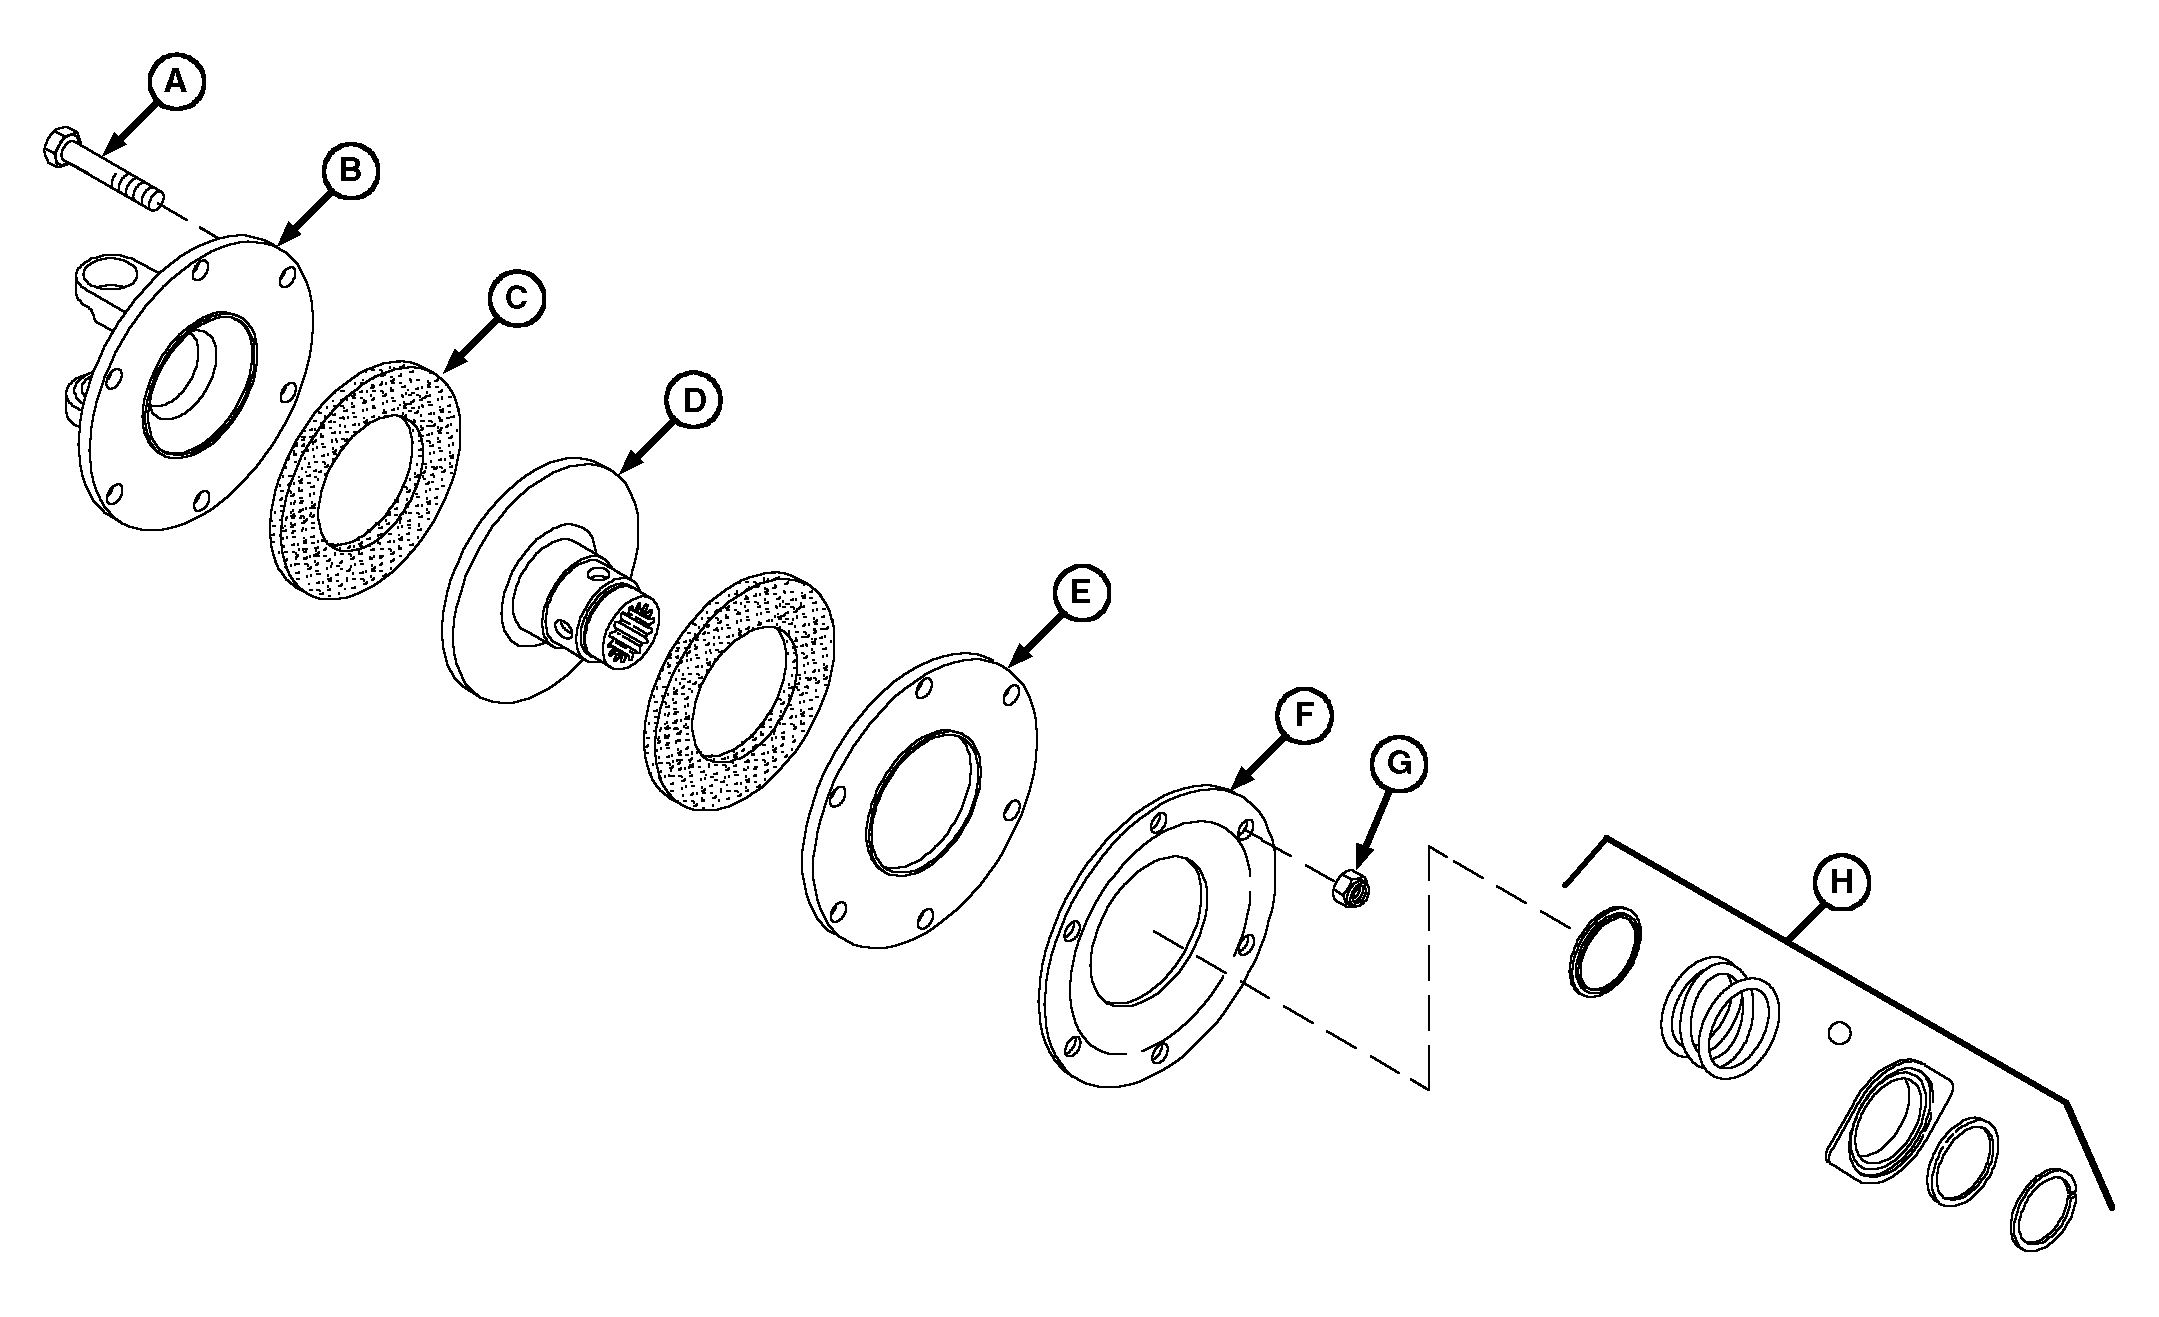
NOTE: Belleville springs, which are part of the clutch, keep tension on all components. When disassembling, release tension by loosening hardware progressively. 3. Place clutch in vise and remove cap screws and lock nuts (A) until tension is relieved. 4. Friction disks may appear to be part of the hub or yoke, tap lightly on edge to separate.
|
|
OUO6077,0001606 -19-22AUG02-2/3 |
|
|
|
|
|
| 5. Inspect clutch components for wear or damage. Repair or replace parts as necessary. |
OUO6077,0001606 -19-22AUG02-3/3 |