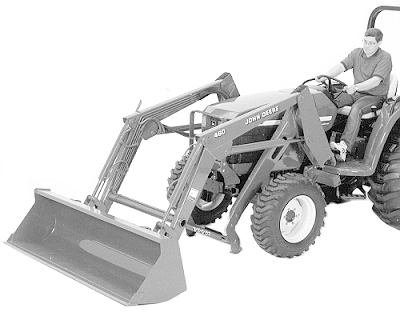
Attaching Loader1. Drive tractor slowly, straight into loader.2. Align masts with rear frames. |
|
OUO6038,000195A -19-23MAY05-1/11 |
|
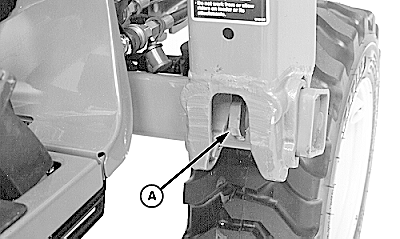
3.
460 Loader only;
Drive tractor forward until front axle contacts stop plates (A).
4. Engage tractor parking brake and/or place transmission in PARK. 5. Shut off tractor engine and remove key.
|
|

OUO6038,000195A -19-23MAY05-2/11 |
|
6. Move control lever(s) back and forth and side-to-side (if applicable) several times to relieve system pressure. (See your tractor Operator's Manual.) |
|
 CAUTION:
To help prevent injury from escaping hydraulic oil under pressure, relieve pressure in the system before connecting hydraulic hoses.
CAUTION:
To help prevent injury from escaping hydraulic oil under pressure, relieve pressure in the system before connecting hydraulic hoses.
OUO6038,000195A -19-23MAY05-3/11 |
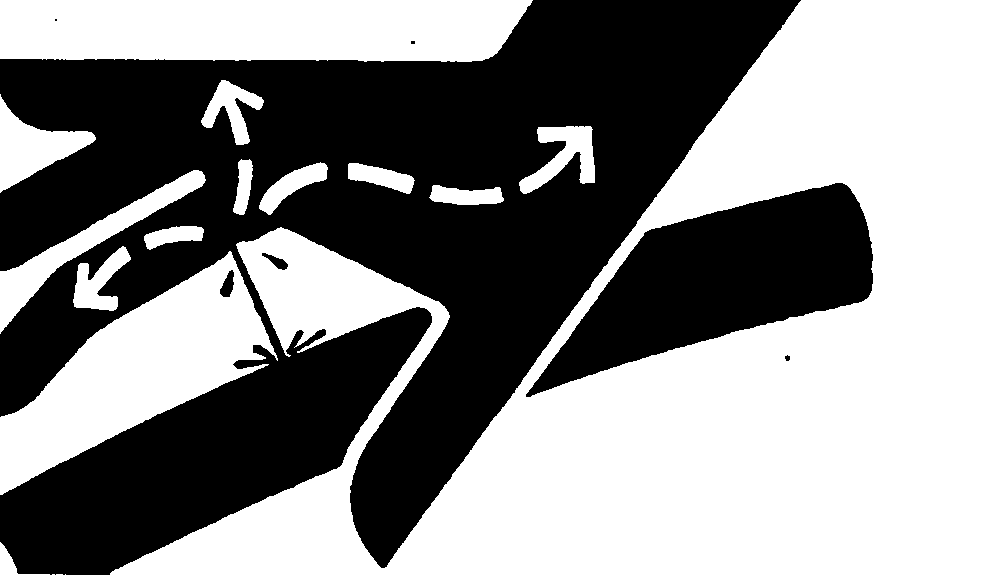
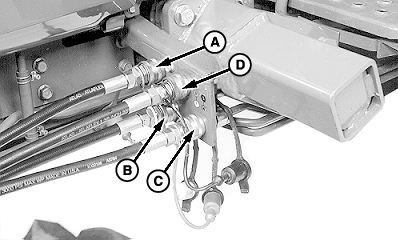
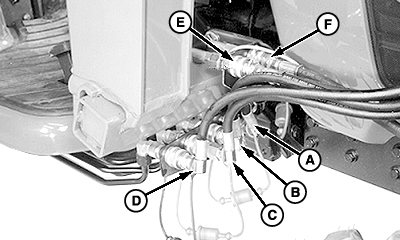
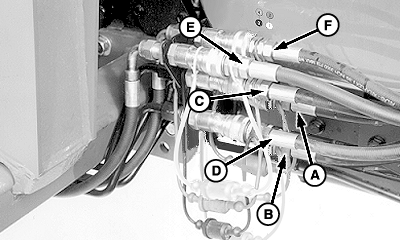
7.
Connect color-coded couplers on hoses matching numbers and/or colors on decal by coupler plate.
|
|
|||||||||||||||||||||||||||||||||||
OUO6038,000195A -19-23MAY05-4/11 |
|
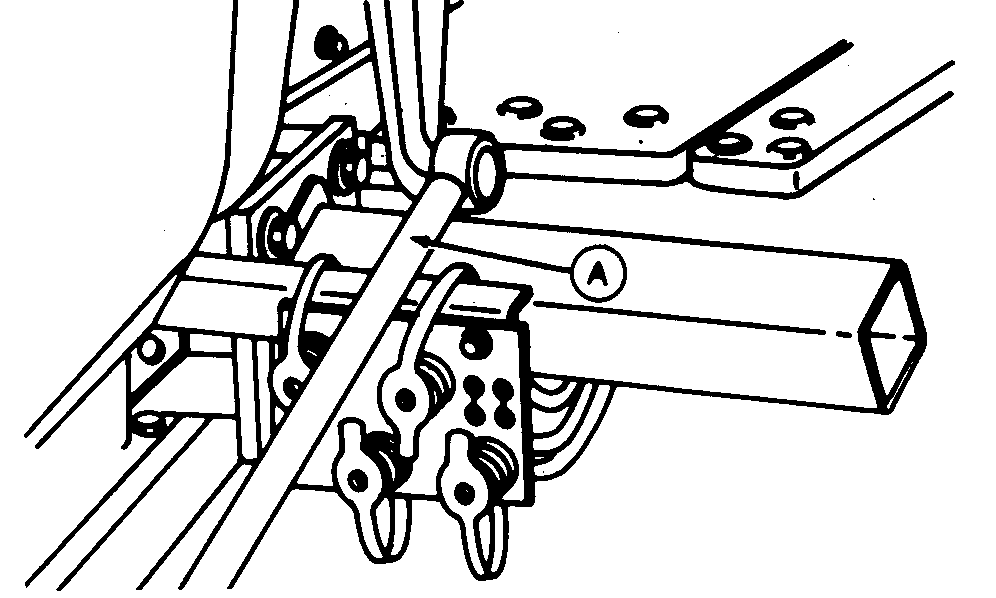
IMPORTANT: To prevent hose damage, be sure hoses are routed correctly. 8. 970 and 1070 Tractors with drag link: a. Route two hoses on each side of drag link (A). b. Check to be sure there is no interference with drag link when steering wheel is turned.
|
|
OUO6038,000195A -19-23MAY05-5/11 |
|
NOTE: It may be necessary to drive tractor forward slowly to keep masts/frames in line while performing the following procedures. 9. Start tractor engine. 10. Slowly retract lift cylinders. Masts will lower into mounting frames. 11. Be sure notches in bottom of masts align with tab (A) on each mounting frame.
|
|
OUO6038,000195A -19-23MAY05-6/11 |
|
12.
Fully retract lift cylinders raising front wheels slightly off ground. Parking stand will raise into front weight bracket.
13. Check that latch plate has risen fully and is tight against bottom of front weight bracket. |
|
OUO6038,000195A -19-23MAY05-7/11 |
|
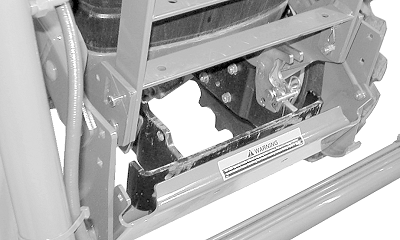
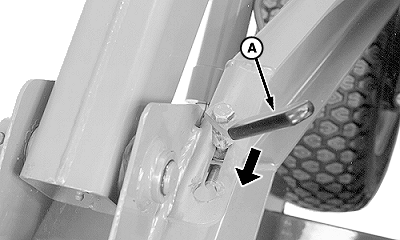
14.
Pull rearward on latch handle (A). Handle will drop down in hole.
NOTE: If handle does not drop into hole freely, adjustment of latch rod may be necessary. (See CHECKING AND ADJUSTING LATCH PLATE AND LOCKING LEVER in Service section.)
|
|
OUO6038,000195A -19-23MAY05-8/11 |
|
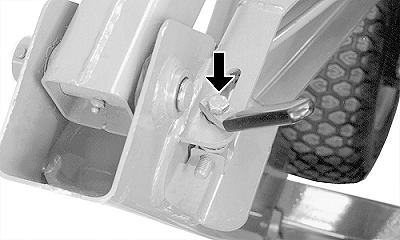
15.
Pull back and drop latch handle down, locking plate over front weight bracket.
IMPORTANT: To help prevent damage to loader and/or tractor, be sure latch plate is fully engaged, this plate holds front of loader onto tractor. 16. Check to be sure latch plate is FULLY engaged. 17. If latch plate cannot be engaged, see Service section for adjustments. 18. Engage tractor parking brake and/or place transmission in PARK. 19. Shut off tractor engine and remove key. |
|
OUO6038,000195A -19-23MAY05-9/11 |
|
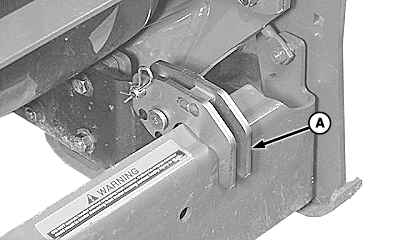
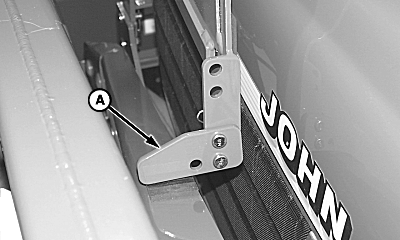
20.
Lower latch plate retainer (A) as shown. Fasten with pin and spring pin.
|
|
OUO6038,000195A -19-23MAY05-10/11 |
|
21.
If equipped with XTRA ARMOR™ Hood Guard;
Lower latch (A), as shown, on both sides.
|
|
OUO6038,000195A -19-23MAY05-11/11 |