Attaching Loader1. Drive tractor slowly, straight into loader.2. Align masts with mounting frames. 3. Engage tractor parking brake and/or place transmission in PARK. 4. Shut off tractor engine and remove key. |
|

OUO6038,0001B4B -19-16SEP04-1/9 |
|
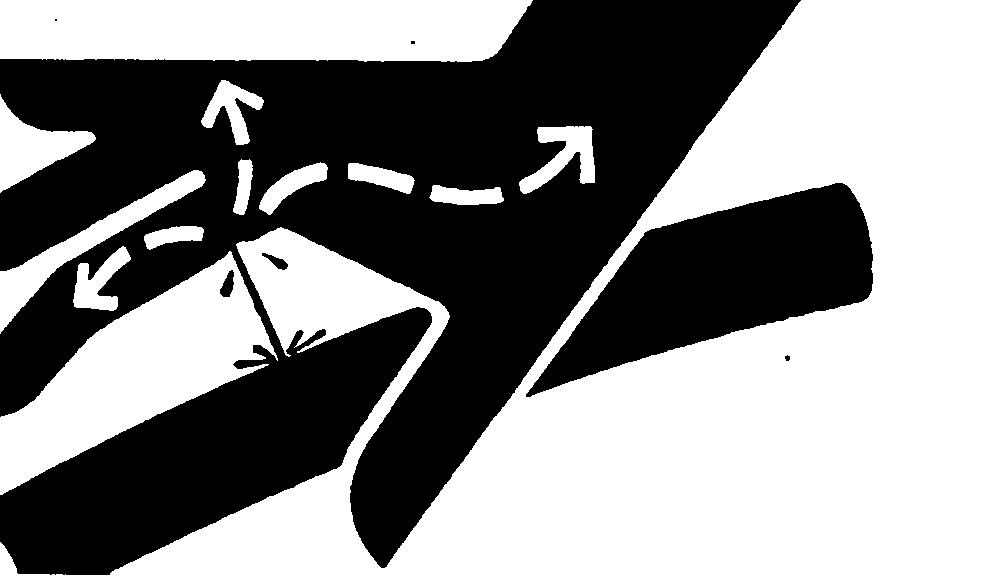
5. Move control lever(s) back and forth and side-to-side (if applicable) several times. (See your tractor Operator's Manual.) |
|
 CAUTION:
To help prevent injury from escaping hydraulic oil under pressure, relieve pressure in the system.
CAUTION:
To help prevent injury from escaping hydraulic oil under pressure, relieve pressure in the system.
OUO6038,0001B4B -19-16SEP04-2/9 |
|
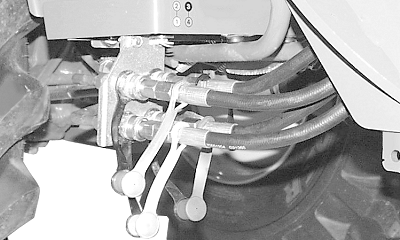
NOTE: Hose connections are identified by matching the color-coded cap on the hose end with the same color-coded plug on the control valve coupler. If caps are missing, see IDENTIFYING HOSE CONNECTIONS in Service section. 6. Connect hoses using color-coded dust caps matching numbers and/or colors on decal by coupler plate. |
|
OUO6038,0001B4B -19-16SEP04-3/9 |
|
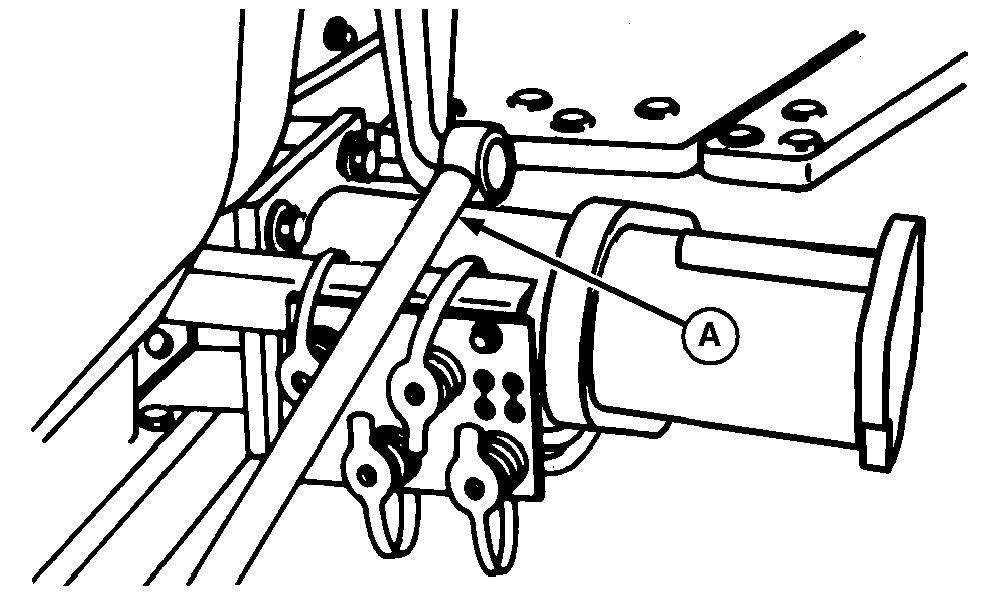
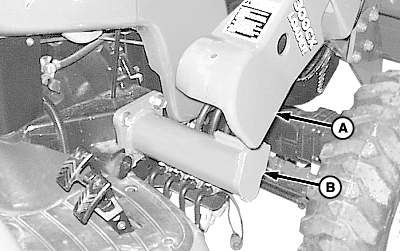
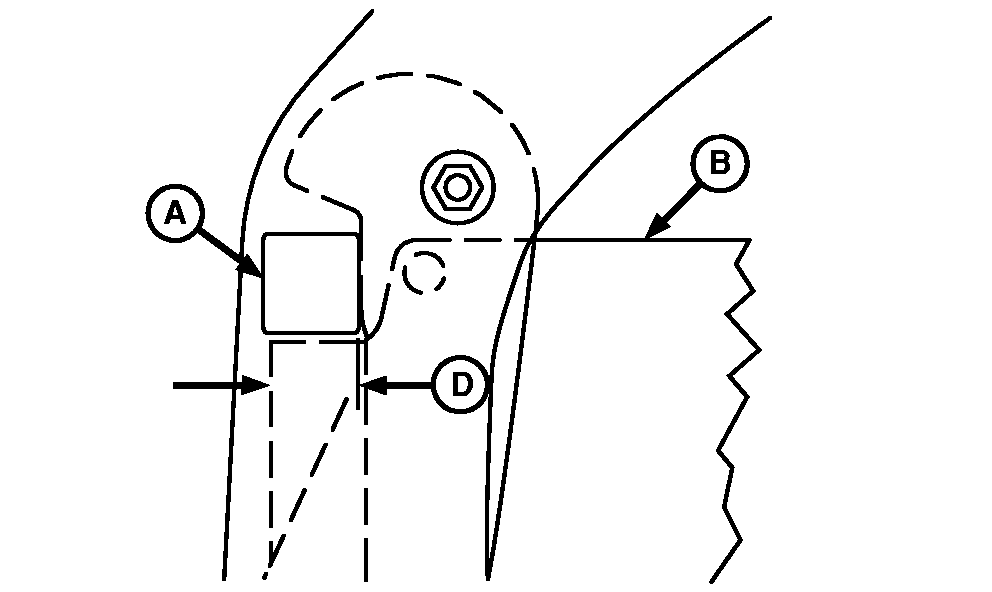
IMPORTANT: To prevent hose damage, be sure hoses are routed to avoid interference with drag link. 300X Loader on 870 tractor and 300CX Loader on 970 tractor with drag link: a. Route two hoses on each side of drag link (A). b. Turn steering wheel from side-to-side to be sure there is no interference with drag link.
|
|
OUO6038,0001B4B -19-16SEP04-4/9 |
|
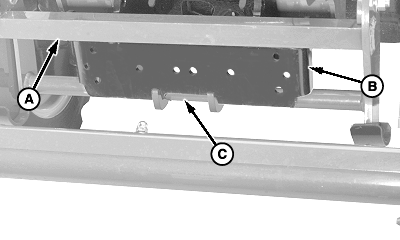
NOTE: It may be necessary to drive tractor forward slowly to keep masts/frames in line while performing the following procedures. 7. Be sure end plates (B) on each mounting frame are aligned with inside guide of each mast (A). 8. Start tractor engine. 9. Release parking brake and/or place transmission in NEUTRAL.
|
|
OUO6038,0001B4B -19-16SEP04-5/9 |
|
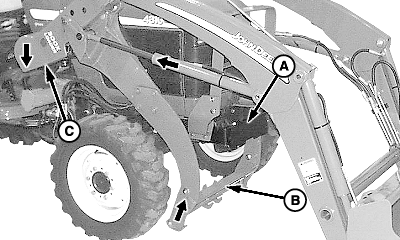
IMPORTANT: Make sure masts are fully seated on frame tubes. 10. Slowly retract lift cylinders. Masts (C) will lower onto mounting frames and parking stand (B) will raise to front weight bracket (A). 11. Dump bucket 10°-20°. 12. Retract lift cylinders raising front wheels 25-50 mm (1-2 in.) off ground. (Do not retract lift cylinders completely.)
|
|
OUO6038,0001B4B -19-16SEP04-6/9 |
|
IMPORTANT: Make sure there is no dirt or debris between bottom of front weight bracket (B) and bottom bar (C) of parking stand. Top bar (A) of parking stand should rest on top of front weight bracket with at least 20 mm (0.787 in.) of engagement. 13. Check that bottom bar (C) of frame is securely hooked against bottom of front weight bracket (B) and top bar (A) rests on top of front weight bracket with engagement within specification. If engagement is not within specification, see CHECKING PARKING STAND/WEIGHT BRACKET ENGAGEMENT in Service section. Specification
|
|
OUO6038,0001B4B -19-16SEP04-7/9 |
|
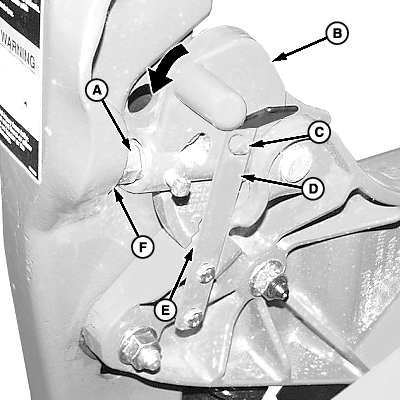
IMPORTANT: On both sides, make sure latch (B) is fully seated against brace pad (E) and latch pin (C) is engaged with secondary latch (D). 14. Place latch (B) on both sides of loader in "Locked" position by pulling rearward on handle to engage latch pin (C) with secondary latch (D). Cap screw (A) should contact mast pad (F). If not, see "Checking Parking Latch Cap Screw Adjustment" procedure in EVERY 50 HOURS of Lubrication and Maintenance section.
|
|
OUO6038,0001B4B -19-16SEP04-8/9 |
|
15.
300;
Make sure hose bundle (A) is routed to avoid contact with loader or tractor.
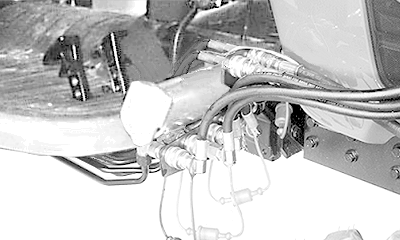
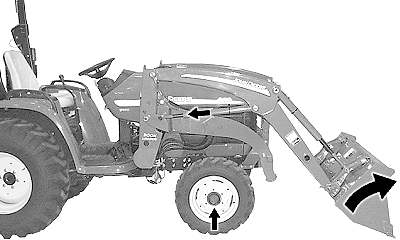
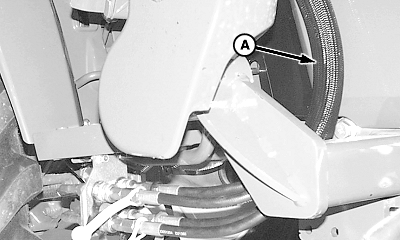
300X and 300CX only; Make sure hose bundle (A) is routed to avoid contact with tractor. If hose support (B) was previously detached from parking stand (C), reinstall it using spring locking pin (D). 16. Extend lift cylinders and lift bucket from ground to ensure loader is properly mounted. 17. Install ballast box. (See Preparing the Tractor section.) 18. Engage tractor parking brake and/or place transmission in PARK. 19. Shut off tractor engine and remove key.
|
|

OUO6038,0001B4B -19-16SEP04-9/9 |