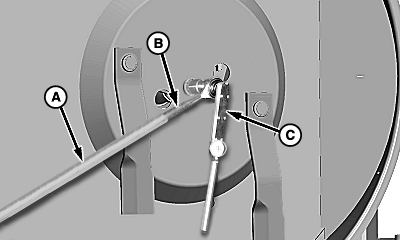
Every 50 HoursTightening Blade Holder HardwareBefore servicing machine, refer to LUBRICATING AND MAINTAINING MACHINE SAFELY at the beginning of this section. IMPORTANT: Operating with a loose blade holder can cause damage to the splined connection. To ensure proper seating between the blade holder and output shaft, two initial tightenings are required. Retighten after one hour and again after the first day of operation. In severe cutting conditions, recheck torque every 50 hours. Tighten blade holder hardware after one hour of operation and again after the first day of operation. In severe cutting conditions recheck torque after every 50 hours of operation. NOTE: This procedure should be followed for wing and center body blade holders. With wing raised and locked, center body raised and locked, and safety stands in place it provides easiest and safest access. 1. If equipped with Blade Pan Retention Device: Remove snap ring (E) and locking ring (D).2. Tighten blade holder hardware to specification using a torque wrench (C), torque multiplier (B) and a long piece of pipe (A). Position pipe into a corner of the machine. Specification
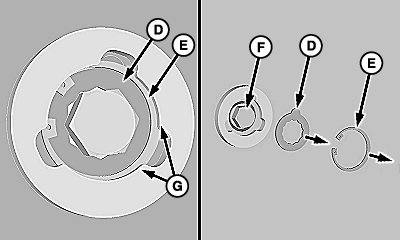
IMPORTANT: Make sure snap ring (E) is fully seated under shoulder (G) of retaining ring. 3. If equipped with Blade Pan Retention Device: Install locking ring (D) over head of cap screw and install snap ring (E). |
|
OUO6077,0001463 -19-23MAY07-1/4 |
|
Tightening Blade Hardware
1. Locate blade hardware under access holes. IMPORTANT: Operating with loose blade hardware will damage the blade holder and blades. Whenever the blades have been removed or replaced, the hardware must be retightened after the first eight hours of operation. NOTE: Blade bolt tightening requires a 1-1/2 in. socket with extension and torque multiplier. 2. Tighten hardware to specifications. Specification
|
|

OUO6077,0001463 -19-23MAY07-2/4 |
|
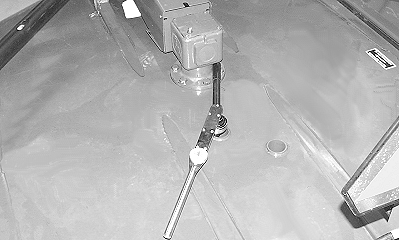
Tightening Gear Case Hardware
IMPORTANT: To help prevent structural damage caused by loose hardware, tighten gear case hardware as specified. Check torque after first 8 hours of use and every 50 hours thereafter. NOTE: This procedure should be followed for wing and center body gear cases. With wing raised and locked, center body raised and locked, and safety stands in place it provides easiest and safest access. 1. Before servicing machine, refer to LUBRICATING AND MAINTAINING MACHINE SAFELY at the beginning of this section.2. Using wrench (B) and torque wrench (A), tighten hardware to specifications. Specification
3. Follow same procedure for opposite wing and center. |
|

OUO6077,0001463 -19-23MAY07-3/4 |
|
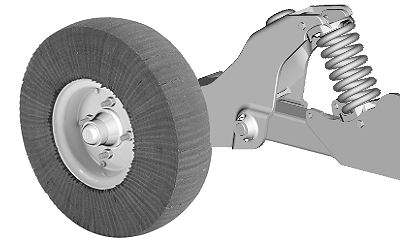
Tightening Wheel and Wheel Support Hardware
Check for loose or missing hardware. Tighten wheel hardware to specifications. Specification
|
|
OUO6077,0001463 -19-23MAY07-4/4 |