Remove Shipping Dunnage and Parts1. Remove shipping wires from PTO driveline and safety chain.2. Remove shipping wires from blades and blade holders. 3. Remove all parts wired to rotary cutter.
DO NOT remove wing lock pins until shipping bands have been cut and hydraulic cylinders and hoses have been fully charged with oil. 4. Attach hydraulic hoses to tractor. (See ATTACHING TO TRACTOR HYDRAULIC SYSTEM in Attaching and Detaching section.) |
|
 CAUTION:
DO NOT cut any banding on rotary cutter until machine is attached to tractor.
CAUTION:
DO NOT cut any banding on rotary cutter until machine is attached to tractor.
OUO6077,0001487 -19-17APR06-1/6 |
|
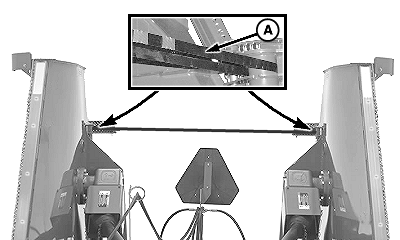
5. Cut metal band (A) from rear of wings.
|
|
OUO6077,0001487 -19-17APR06-2/6 |
|
6. Operate control lever enough to relieve weight from wing lock pins. 7. Move control lever to "NEUTRAL" position. |
|
OUO6077,0001487 -19-17APR06-3/6 |
|
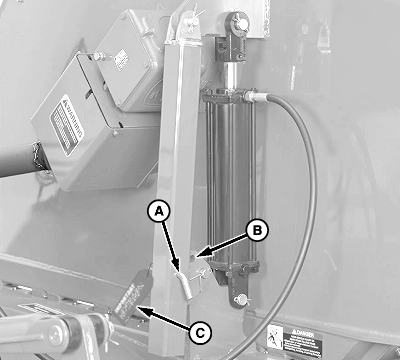
8. Remove quick-lock pin and wing lock pin (A) on wing(s) to be lowered. 9. Remove and discard "IMPORTANT" tag (C) from quick-lock pin. 10. Place wing lock pin in storage hole (B) and fasten with quick-lock pin. 11. Move control lever to lower wing(s) (do not enter FLOAT).
|
|
OUO6077,0001487 -19-17APR06-4/6 |
|
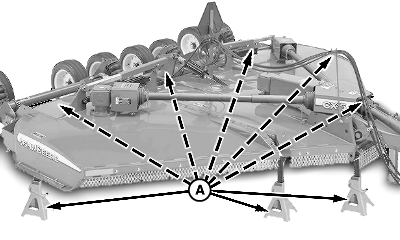
12. Lower wings onto safety stands (A).
|
|
OUO6077,0001487 -19-17APR06-5/6 |
|
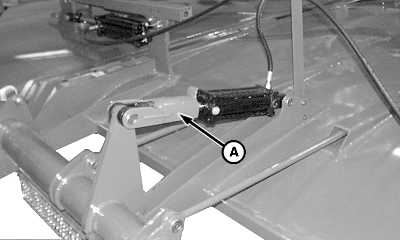
13.
Make sure transport lock (A) is ENGAGED, as shown.
|
|
OUO6077,0001487 -19-17APR06-6/6 |