Adjusting Cutting Height and Angle
1.
Lower machine until rear wheel just touches or is slightly above ground.
|
|
 CAUTION:
Help prevent bodily injury or death caused by entanglement in rotating driveline or blades. Entanglement in rotating driveline or being struck by blades can cause serious injury or death. Before making any adjustments:
CAUTION:
Help prevent bodily injury or death caused by entanglement in rotating driveline or blades. Entanglement in rotating driveline or being struck by blades can cause serious injury or death. Before making any adjustments:

OUO6077,0001555 -19-05MAR02-1/6 |
|
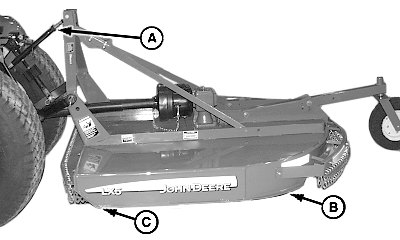
2.
Using rockshaft control lever, position front of cutter at desired cutting height at location (A).
|
|

OUO6077,0001555 -19-05MAR02-2/6 |
|
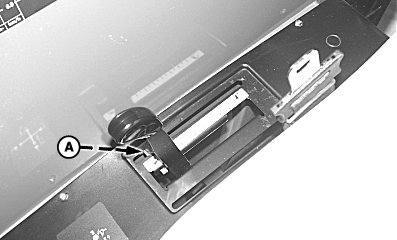
3.
Adjust depth stop (A). (See your tractor Operator's Manual.)
|
|
OUO6077,0001555 -19-05MAR02-3/6 |
|
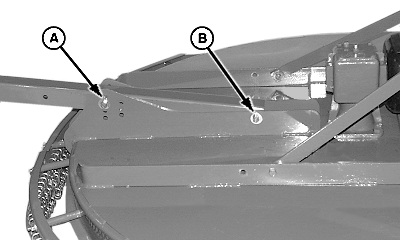
4.
Adjust center link (A) so rear of cutter (B) is 25 mm (1 in.) higher than front (C).
NOTE: Maintain this angle at all cutting height positions to reduce power requirements and produce the best cutting results.
|
|
OUO6077,0001555 -19-05MAR02-4/6 |
|
5.
Lower tailwheel to support rear of cutter in position.
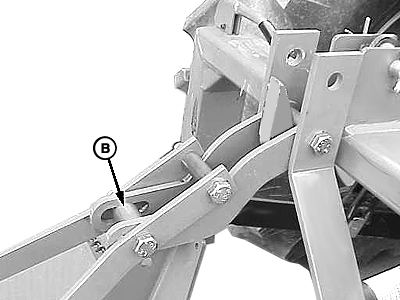
6. Install cap screw, washers and lock nut (A) into one of seven holes (B) that aligns with hole in wheel support. 7. Tighten cap screw and lock nut (C). NOTE: The tailwheel supports the rear of the machine and the draft links support the front to allow the cutter to follow the ground contour.
|
|

OUO6077,0001555 -19-05MAR02-5/6 |
|
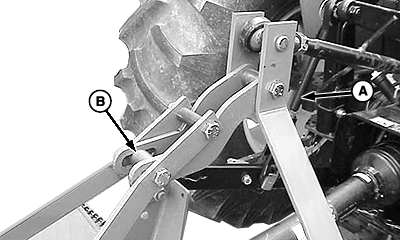
IMPORTANT: Loosening the center link may allow the driveline to contact the cutter frame or tractor tires to contact the foot guards or chain shield. Raise the cutter slowly and check for interference. Lengthen tractor lift links to provide clearance to full height. NOTE: Lift height may also be limited by installing stops on rockshaft control lever bracket. 8. Lengthen tractor lift links (A), if necessary, to provide clearance. 9. Adjust tractor center link until bushing (B) is centered in slot, as shown.
|
|
OUO6077,0001555 -19-05MAR02-6/6 |