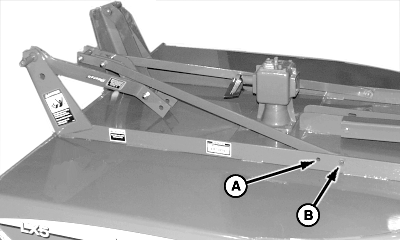
Assemble HitchNOTE: LX4 and LX5 Cutters; There is a choice of "HIGH" or "LOW" position for hitch pins. Choose the correct position for your tractor and application. (See SELECTING HITCH PIN POSITION in Preparing the Cutter section.) 1. Rotate hitch up.NOTE: All cutters are shipped with hitch pins in the "HIGH" position. 2. LX4 and LX5; Relocate brace position from hole (B) to hole (A). Tighten cap screws to specifications. LX6; Only the "HIGH" position is used. |
|
OUO6077,000155E -19-05MAR02-1/3 |
|
3.
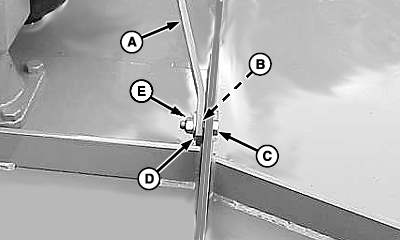
Attach brace (A) to frame using M12 x 40 cap screw (C), bushing (B), 13 x 37 x 3mm washer (D) and M12 lock nut (E). Tighten cap screw to specifications.
Specification
4. Repeat on opposite brace.
|
|
OUO6077,000155E -19-05MAR02-2/3 |
|
5.
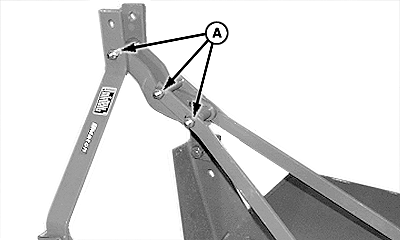
Tighten all link and brace hardware (A).
|
|
OUO6077,000155E -19-05MAR02-3/3 |