Attach Loader
-
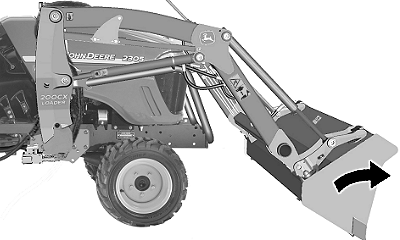
Drive tractor slowly, straight into loader.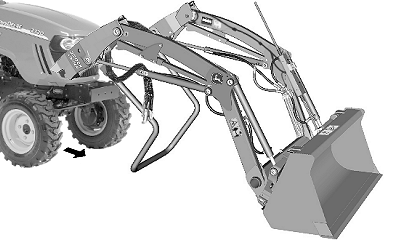
W22560-UN-21MAY12 -
Align masts with mounting frames.
-
Engage tractor parking brake and/or place transmission in PARK.
-
Shut off tractor engine and remove key.
-
 CAUTION:
To help prevent injury from escaping hydraulic oil under pressure, relieve pressure in the system.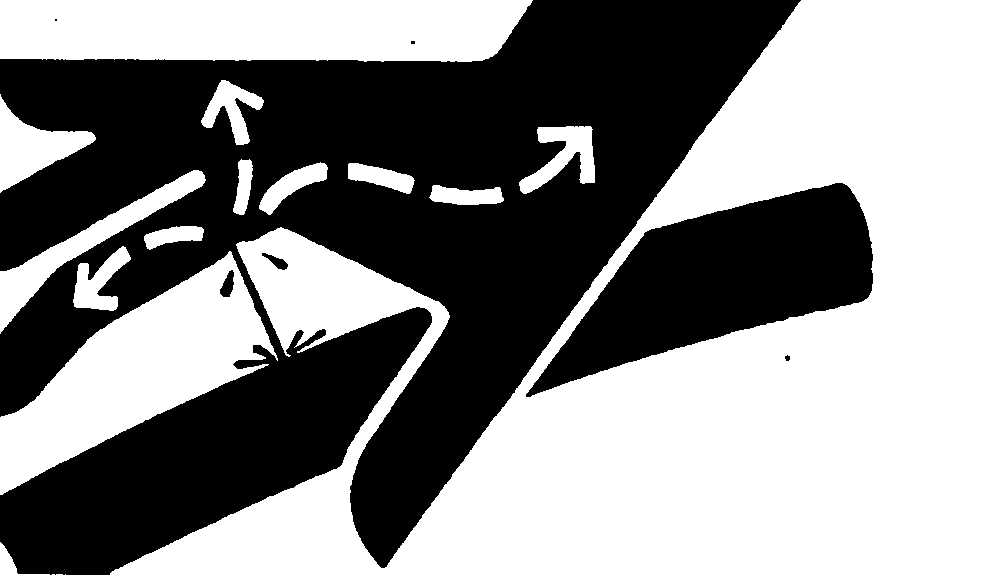
X9811-UN-23AUG88Move control lever(s) back and forth and side-to-side (if applicable) several times. (See your tractor Operator's Manual.)
-
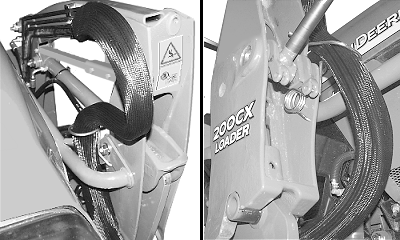
W22561-UN-21MAY12A - Hose Guide
Make sure hoses and wiring harness are routed through hose guide (A), as shown. -
IMPORTANT:
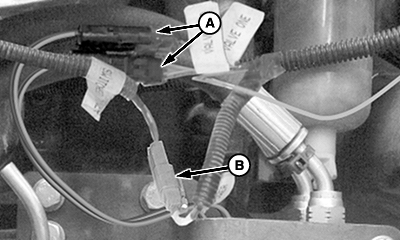
W22503-UN-16MAY12A - Connectors, Valves
B - Connector, Power
To prevent damage to the wiring harness, make sure harness is and clear of any protruding objects when driving tractor forward into loader.Connect anti-spill power connector (B) and valve connectors (A).
-
Connect hoses by matching color-coded dust caps, plugs or tie bands.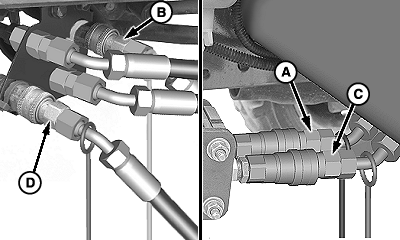
W22578-UN-01JUN12Key
Color
Hydraulic Function
A
Black
Bucket Cylinder—Rod End
B
Yellow
Bucket Cylinder—Head End
C
Blue
Lift Cylinder—Head End
D
Red
Lift Cylinder—Rod End
-
CAUTION:
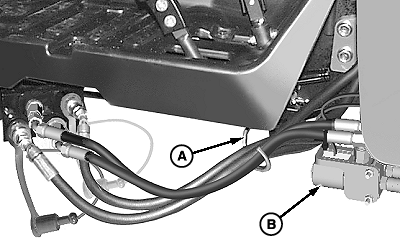
W22562-UN-21MAY12A - Hose Guide
Help prevent personal injury caused by unexpected loader movement. Anticipated loader movement responds to control lever only if hoses are connected correctly.NOTE: Hose connections are identified by matching the color-coded cap on the hose end with the same color-coded plug on the control valve coupler. If caps are missing, see IDENTIFYING HOSE CONNECTIONS in Service section.
Route hoses from loader and valve assembly (B) through hose guide (A).
-
NOTE: It may be necessary to drive tractor forward slowly to keep masts/frames in line while performing the following procedures.
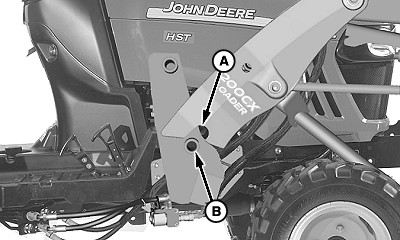
W22563-UN-04JUN12Right-Hand Side Shown
A - Notch
B - Bushing
Be sure bushing (B) on mounting frame is aligned with notch (A) in masts. -
Start tractor engine.
-
Release parking brake and/or place transmission in NEUTRAL.
-
IMPORTANT: Make sure masts are fully seated on mounting frames.
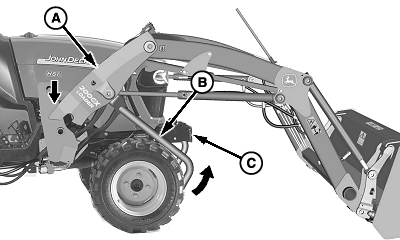
W22564-UN-21MAY12A - Mast
B - Parking Stand
C - Weight Bracket
Slowly retract lift cylinders. Masts (A) will lower onto mounting frames and parking stand (B) will raise up below weight bracket (C). -
W22566-UN-22MAY12
Dump bucket 10—20° and retract lift cylinders until loader masts move back and latches lock over mounting frame bushings.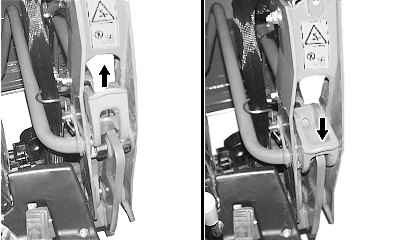
W22567-UN-22MAY12 -
Extend lift cylinders and lift bucket from ground to ensure loader is properly mounted.
-
Add appropriate ballast. (See Preparing the Tractor section.)
-
Engage tractor parking brake and/or place transmission in PARK.
-
Shut off tractor engine and remove key.
|
OUO6038,00020D3-19-20120606 |