Detach Loader
-
 CAUTION:
To help prevent personal injury caused by a falling loader, always detach on a hard, level surface. Loader MUST be equipped with a bucket or attachment.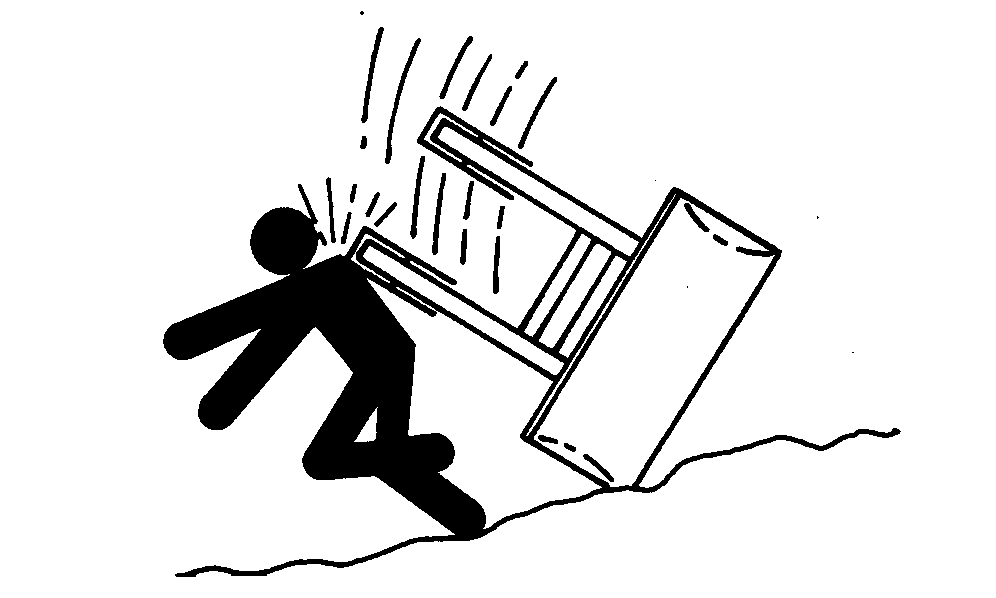
W14000-UN-05OCT88DO NOT allow bystanders nearby while detaching loader.
To prevent serious injury, allow only the operator to attach loader.
Dump bucket 40° below level.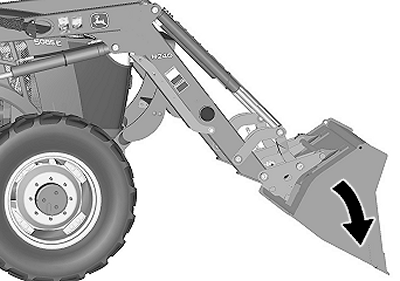
W26642-UN-12MAR15 -
Lower bucket to ground, applying slight downward pressure. Do not raise tires off ground.
-
Place transmission in PARK and shut off engine.
-
W24098-UN-05AUG13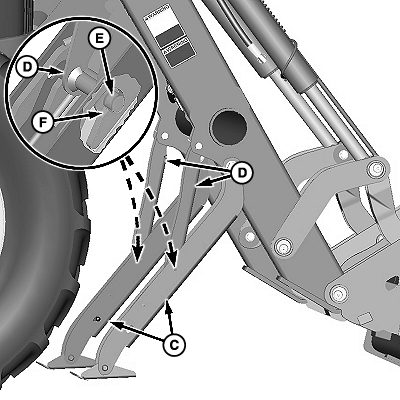
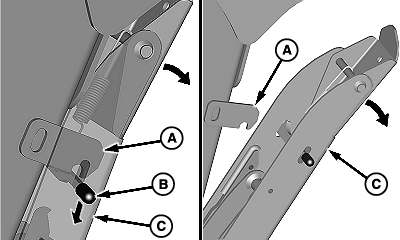
W24099-UN-05AUG13A - Latch Plate (1 each side)
B - Latch (1 each side)
C - Parking Stand (1 each side)
D - Supports
E - Pin (1 each side)
F - Hook (2 per parking stand)
Lower Parking Stands:-
Push latch (B) down to release parking stand (C) from latch plate (A).
-
Lower parking stand until pin (E) on support (D) rests in hooks (F) inside parking stand.
-
Repeat Steps a and b on opposite side.
-
-
NOTE:
W24100-UN-24SEP13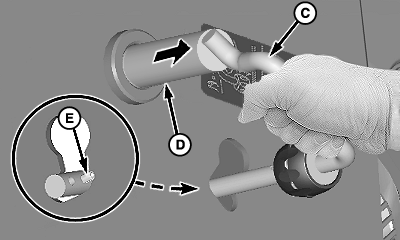
W24101-UN-24SEP13Left-Hand Side Shown
A - Knob
B - Pin
C - Handle
D - Mast Pin
E - Stop
It is not necessary to remove mast pins from loader.If pins are removed and hole alignment is lost, slightly roll bucket forward and backward to realign.
Disengage mast pins as follows:
-
Pull knob (A) back from mast.
-
Rotate handle (C) downward until pin (B) is aligned with bottom hole in mast.
-
IMPORTANT: To prevent damage to pins when detaching, make sure that pins are fully disengaged from mounting frames.
Pull handle and mast pin (C and D) until stop (E) rests against inside surface of mast, as shown.
-
Repeat Steps a—c on opposite side.
-
-
Start tractor engine.
-
Place transmission in NEUTRAL to allow tractor movement.
-
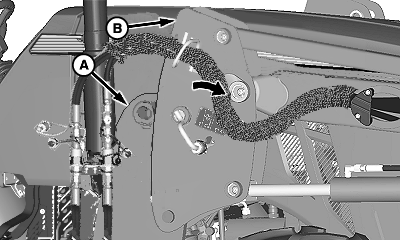
W26643-UN-12MAR15Right-Hand Side Shown
A - Mounting Frame (1 each side)
B - Mast (1 each side)
Extend lift cylinders until masts (B) move forward approximately 50 mm (2 in.) away from mounting frames (A). -
NOTE: If further clearance is necessary, slightly extend lift cylinders while rolling back bucket.
Slowly roll bucket back until stands contact ground. Continue to roll back bucket until loader lifts out of mounting frames. Drive ahead as necessary to keep hoses slack.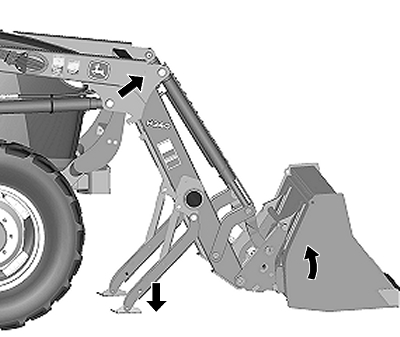
W26644-UN-12MAR15 -
Place transmission in PARK and shut off engine.
-
CAUTION: Escaping fluid under pressure can penetrate the skin
causing serious injury. Avoid the hazard by relieving pressure before
disconnecting hydraulic or other lines.
If an accident occurs, see a doctor immediately. Information is available from Deere & Company Medical Department in Moline, Illinois, U.S.A.
To prevent personal injury caused by unexpected movement, lower loader to ground before relieving pressure.
Tractors with SCV (finger pad control) operated loader: With engine running, quickly move loader control levers to FLOAT, one at a time, and hold for at least one minute.
-
CAUTION: Lock out SCV control levers before detaching loader
to prevent loader movement and possible personal injury.
Lock out SCV control levers. (See procedure in Controls section.)
-
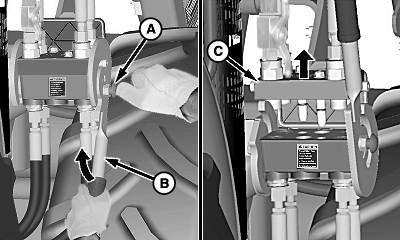
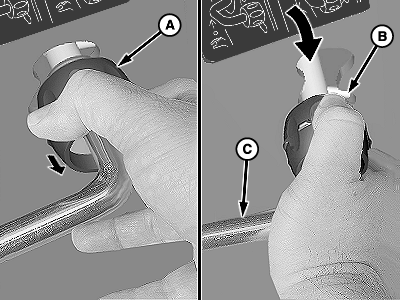
W24104-UN-10FEB14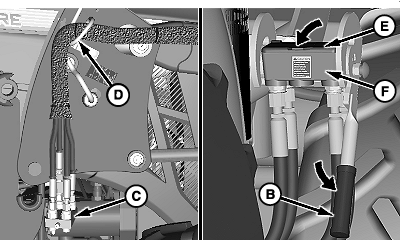
W24105-UN-10FEB14A - Knob
B - Handle
C - Coupler, Loader Half
D - Hose Support
E - Cover
F - Coupler, Tractor Half
Disconnect hydraulics using multicoupler:-
Shut off engine.
-
Relieve pressure in hydraulic system: Turn key to ON position. Do not start tractor engine. Move loader control lever in all directions several times. (See your tractor operator’s manual for specific procedures about relieving hydraulic pressure.)
-
Push knob (A) IN and rotate handle (B) upward to disconnect couplers.
-
Hang hoses with loader coupler (C) from hose holder (D) as shown.
-
Close protective cover (E) on tractor coupler (F) and rotate handle downward until locked.
-
-
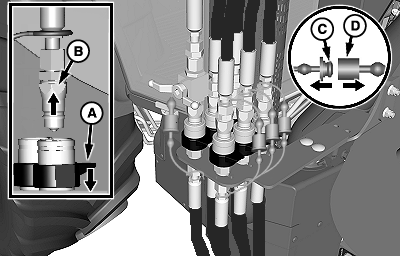
W26448-UN-14NOV14
W24108-UN-18OCT13A - Coupler, Male
B - Coupler, Female
C - Plug (4 or 6 used)
D - Cap (4 or 6 used)
E - Hose Holder
Disconnect hydraulics using mid-mount couplers:-
Relieve pressure in hydraulic system: Shut off engine. Turn key to ON position. Do not start tractor engine. Move loader control lever in all directions several times. (See your tractor Operator’s Manual for specific procedures about relieving hydraulic pressure.)
-
Pull apart all plugs and caps (C and D).
-
Push and hold collar on female coupler (B).
-
Disconnect male coupler (A).
-
Release collar on female coupler.
-
Place cap on hose end and insert plug into coupler.
-
Repeat Steps c—f for remaining hose connections.
-
Hang hoses with couplers from hose holder (E) as shown.
-
-
Start engine, place transmission in REVERSE, and move tractor slowly away from loader.
|
OUO6064,000133E-19-20150312 |