Attach 220R Loader
-
Start engine.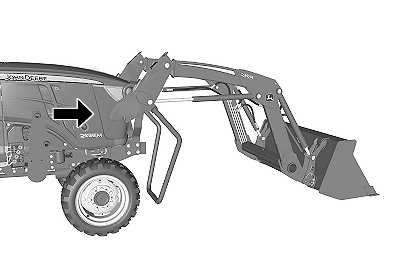
W27550-UN-08JUL16 -
Drive forward and center tractor between loader masts, continue forward aligning masts with mounting frames.
-
Engage parking brake and place transmission in PARK.
-
Shut off engine.
-
Relieve hydraulic pressure. (See Relieve Pressure in Hydraulic System in the Controls section of this Operator’s Manual.)
-
W27019-UN-09SEP15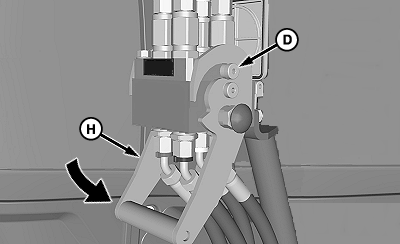
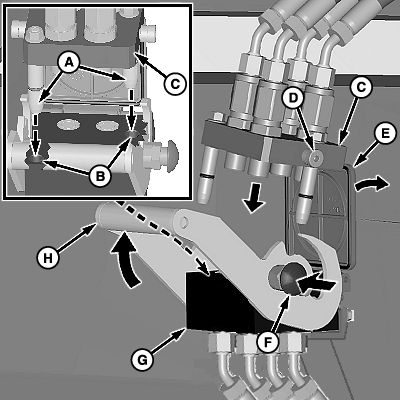
W27020-UN-09SEP15A - Locating Pins
B - Holes
C - Coupler, Loader Half
D - Pin (1 each side)
E - Cover
F - Red Knob
G - Coupler, Tractor Half
H - Handle
Connect Hydraulics—Multicoupler-
Raise cover (E).
-
Push in red knob (F) and rotate handle (H) upward, as shown.
-
IMPORTANT: Multicoupler mating halves must align properly or damage to couplers can occur.
Place loader coupler (C), into tractor coupler (G) by aligning pins (A) with holes (B).
-
Rotate handle (H) downward to engage pins (D) on loader coupler. Continue to rotate handle all the way down until a “click” is heard, locking couplers together.
-
-
 CAUTION:
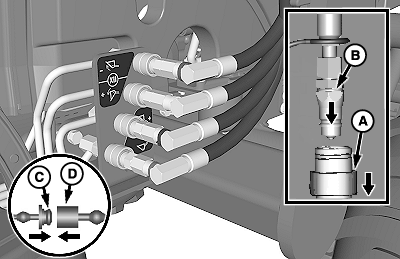
W27052-UN-09SEP15A - Coupler, Female (4 used)
B - Coupler, Male (4 used)
C - Cap (4 used)
D - Plug (4 used)
Help prevent personal injury caused by unexpected loader movement. Anticipated loader movement responds to multi-function lever only if hoses are connected correctly.IMPORTANT: To avoid damage to the loader hoses, route hoses above mounting frames.
NOTE: Match the color-coded cap with the same color-coded plug. If caps or plugs are missing, see IDENTIFYING HOSE CONNECTIONS in Service section.
Connect Hydraulics—Quick Couplers
-
Remove protective cap from hose and plug from coupler.
-
Push back collar on female coupler (A) and insert male coupler (B).
-
Connect cap (C) and plug (D) together.
-
Repeat procedure for all hose connections.
Cap and Plug Color
Hydraulic Function
Black
Bucket Cylinder—Rollback
Yellow
Bucket Cylinder—Dump
Blue
Lift Cylinder—Raise
Red
Lift Cylinder—Lower
-
-
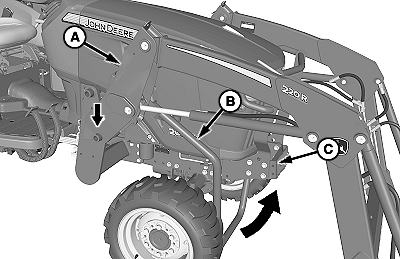
W27165-UN-10DEC15Right-Hand Side Shown
A - Notch
B - Bushing
Start engine. -
If necessary, continue to drive forward keeping bushing (B) on mounting frame in alignment with notch (A) in masts.
-
Place transmission in NEUTRAL.
-
IMPORTANT:
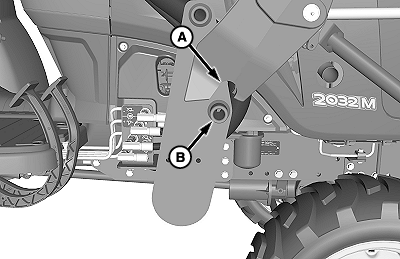
W27551-UN-08JUL16A - Mast
B - Parking Stand
C - Weight Bracket
Make sure that masts are fully seated on mounting frames.Retract lift cylinders. Masts (A) lower onto mounting frames and parking stand (B) raises up below the weight bracket (C).
-
W27552-UN-08JUL16
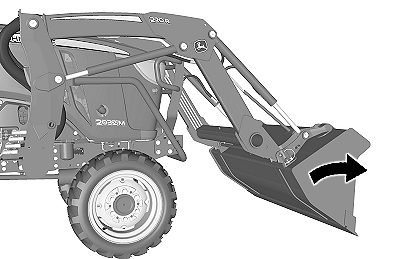
Use a combination of extending the bucket cylinders and retracting the lift cylinders until loader masts move back and latches lock over mounting frame bushings.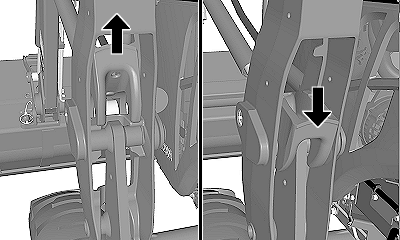
W27056-UN-10SEP15 -
Verify proper attachment, retract lift cylinders until tractor wheels raise off the ground then raise loader to lift the bucket from the ground.
|
OUO6064,00014F9-19-20160718 |