Kernel Processor Quick Removal
|
Removal Process
|
Place forage harvester on a plane and stable area. Move adapter frame of feed roll housing into vertical position. |
 CAUTION:
Before carrying out any adjustment or service work, disengage all drives, shut off engine and wait until all moving parts have stopped.
CAUTION:
Before carrying out any adjustment or service work, disengage all drives, shut off engine and wait until all moving parts have stopped.
OUCC002,00020F0 -19-04NOV05-1/12 |
|
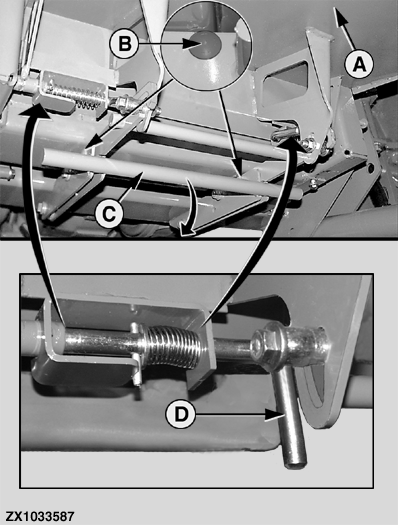
To open feed plate (A), remove screw (B) on both sides first. Pull down locking device (C). Disengage the feed plate (A). To do this, pull the latches (D) in, turn them through 90° and leave them in this position.
|
|
OUCC002,00020F0 -19-04NOV05-2/12 |
|
On machine up to SN 508099, pull locking device (A) to the rear and secure it onto its retainer hook.
|
|
OUCC002,00020F0 -19-04NOV05-3/12 |
|
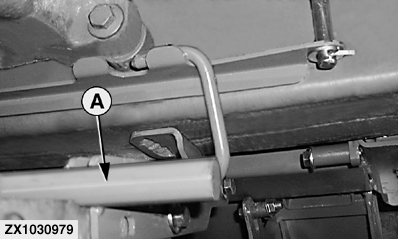
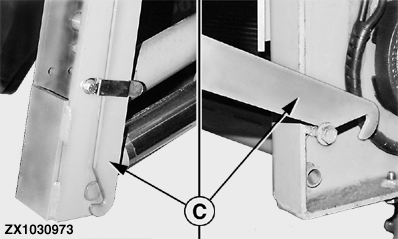
Loosen linkage (C) on both sides and hang up at the kernel processor hooks.
|
|
OUCC002,00020F0 -19-04NOV05-4/12 |
|
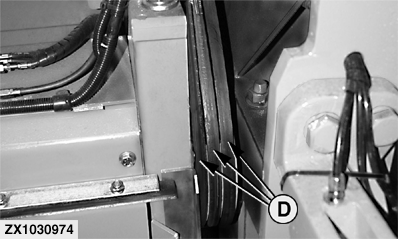
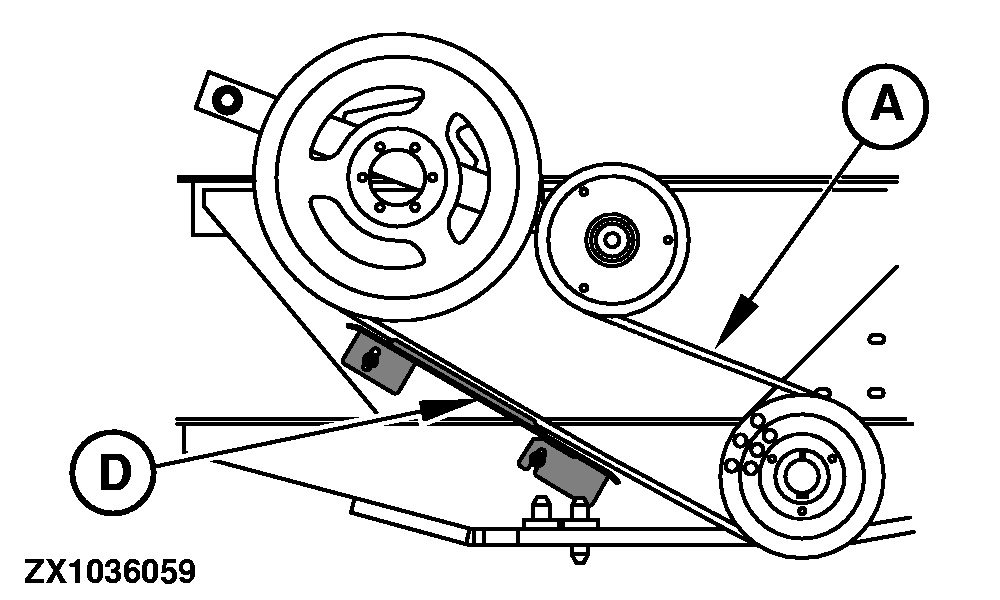
Remove the kernel processor drive belts (D).
|
|
OUCC002,00020F0 -19-04NOV05-5/12 |
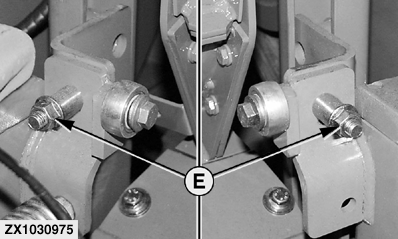
|
Remove the two fixing screws (E).
|
|
OUCC002,00020F0 -19-04NOV05-6/12 |
|
Electrical Lifting Motor (Option) If equipped with an electrical lifting option, turn the switch key to accessories position (do not start the engine). Press the liquid injection pump switch twice (double press), the liquid injection output of the control unit will be powered regardless whether field operating mode is active or not. |
|
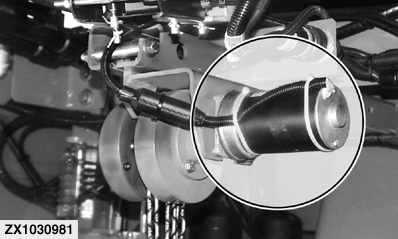
OUCC002,00020F0 -19-04NOV05-7/12 |
|
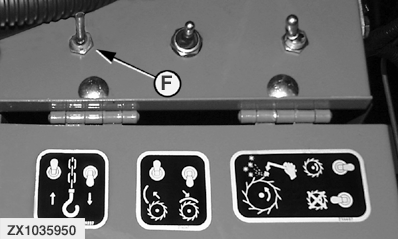
NOTE: Disconnect the liquid injection pump when using the kernel processor electric lift function. NOTE: For detailed description of kernel processor electric lift function, see Switches - Underneath The Operator's Station in Section Operator's Station. Lower kernel processor by means of switch (F) until the chain is fully unrolled. Hang out the two linkages.
|
|
OUCC002,00020F0 -19-04NOV05-8/12 |
|
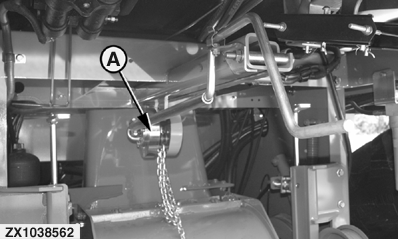
Chain Hoist Lower kernel processor by means of chain hoist (A) until the chain is fully unrolled. Hang out the two linkages. Start engine to raise the cutterhead. Roll out the kernel processor from under the cutterhead and feed rolls to the front of the forage harvester. Unhook kernel processor from lifting chain hook. Roll up the chain. |
|
OUCC002,00020F0 -19-04NOV05-9/12 |
|
Install Process
Place forage harvester on a plane and stable area. Fully raise the cutterhead. Orientate the kernel processor so that the electrical motors face to the forage harvester. If Forage Harvester Is Equipped With Electrical Lifting Motor NOTE: When pressing the liquid injection pump switch twice (double click), the liquid injection output of the control unit will be powered regardless whether field operating mode is active or not. Remove hose from pump or unplug pump, if equipped. Double-click the liquid injection pump switch to enable the kernel processor lifting by means of electrical motor. |
|
OUCC002,00020F0 -19-04NOV05-10/12 |
|
Lifting the Kernel Processor Fully unroll the chain. Hook the lifting chain to the attaching point. With kernel processor underneath the forage harvester, move adapter frame of feed roll housing into vertical position. Raise kernel processor until it is secured in work position (lever of kernel processor locking device must be in work position):
Reverse the order of removal process to complete the install process.
|
|
OUCC002,00020F0 -19-04NOV05-11/12 |
|
IMPORTANT: Make sure that drive belts (A) are correctly arranged on guide (D). Tighten fixing screws (E) as specified: Specification
|
|
OUCC002,00020F0 -19-04NOV05-12/12 |