Area Counter Functions
|
|
|
|
|
|
|
The area counter will be activated when the ignition switch is in the accessory or on position. In order to operate correctly, the following conditions must be met: 1.
Number of rows greater than 0
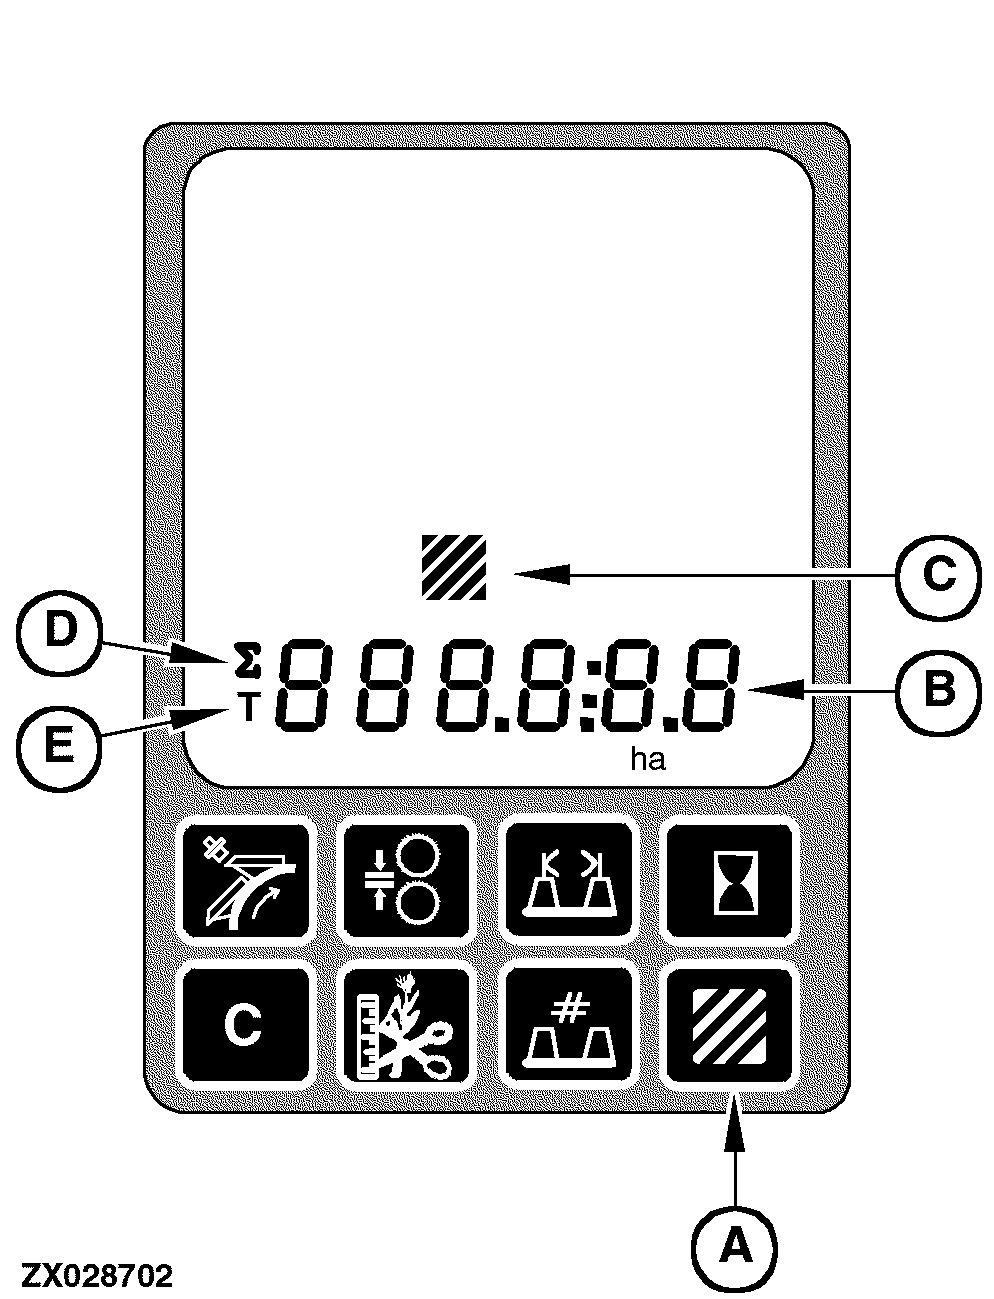
The area counter displays the following data on the digital display line (B): |
1.
Area per field with relevant statistics of area/hour and fuel consumption/area
To display area data press the area counter switch (A). |
OUZXMAG,0001D83 -19-30SEP04-1/4 |
|
NOTE: If the switch (A) is pressed at least two seconds, the area per field value will be displayed on the digital display line (B) along with the area units (ha or acre) and the area counter icon (C) will also be displayed continuously. To recover the manual header control display (default display), press switch (A) again. The area counter information is displayed in the following sequence (see table opposite). |
|
OUZXMAG,0001D83 -19-30SEP04-2/4 |
|
|
|
|
|
|
|
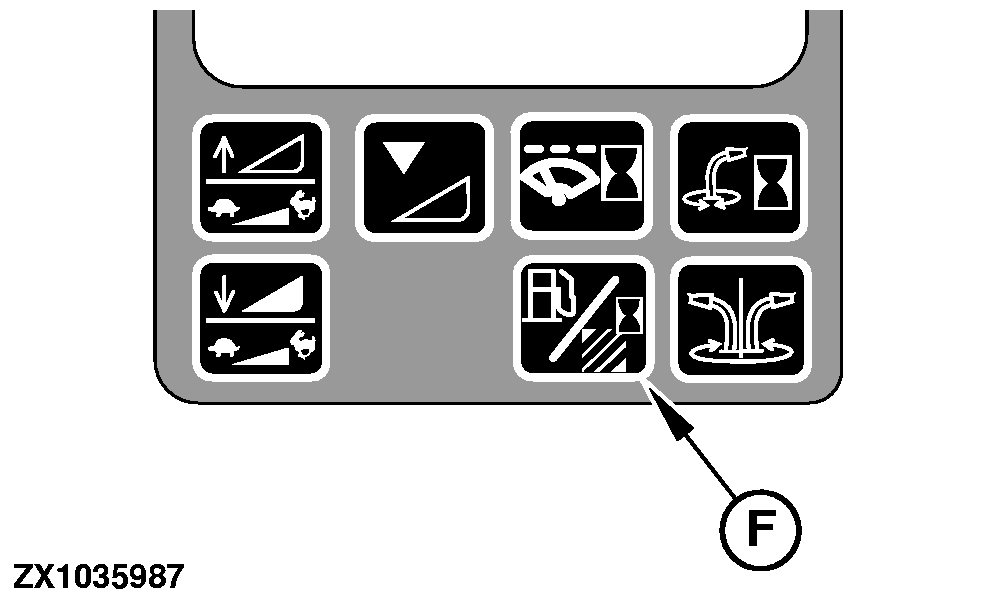
The first time that switch (A) is pressed, the area per field value will be displayed on the digital display line (B) along with the area units (ha or acre) and the area counter icon (C) will also be displayed. Successively pressing the statistic switch (F) at this time will display the statistics for this field (area per hour and fuel consumption). Pressing the switch (A) for the second time will result in the area per day value being displayed (summation symbol (D) and area units are also displayed). Successively pressing the statistic switch (F) at this time will display the statistics for this day (area per hour and fuel consumption). Pressing the switch (A) for the third time will result in the total area value being displayed (total symbol (E) |
and area units are also displayed). Successively pressing the statistic switch (F) at this time will display the statistics for this total area (area per hour and fuel consumption).
Pressing the switch (A) for the fourth time will result in the current area per hour value being displayed along with the area units (ha or acre). NOTE: Pressing the statistic switch (F) at this time will not display statistics (see table above). Pressing the switch (A) for the fifth time will result in the travel distance value being displayed along with the distance units (miles or km). |
OUZXMAG,0001D83 -19-30SEP04-3/4 |
|
NOTE: Pressing the statistic switch (F) at this time will not display statistics (see table above). To cycle through the area and travel distance values, continue to press the area counter switch (A). While area counter information is being displayed on the |
digital display line (B), the units will flash if the area calculations have stopped for any of the above mentioned reasons. This will give a feedback that the area measurements have stopped. The units will not stop flashing until the area calculations have resumed. |
OUZXMAG,0001D83 -19-30SEP04-4/4 |