Clock Calibration
The clock calibration must be performed when battery was disconnected or the battery switch was moved to OFF position.
Preparations For Clock Calibration:
-
Battery is connected
-
Battery switch is in ON position
|
|
|
|
AG,OUZXMAY,203 -19-17FEB00-1/8
|
|
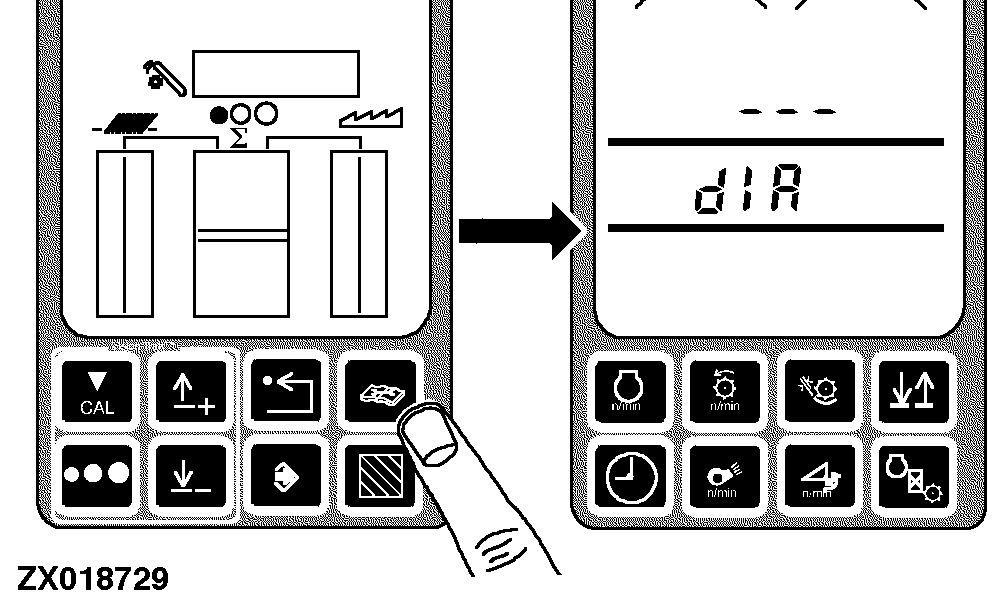
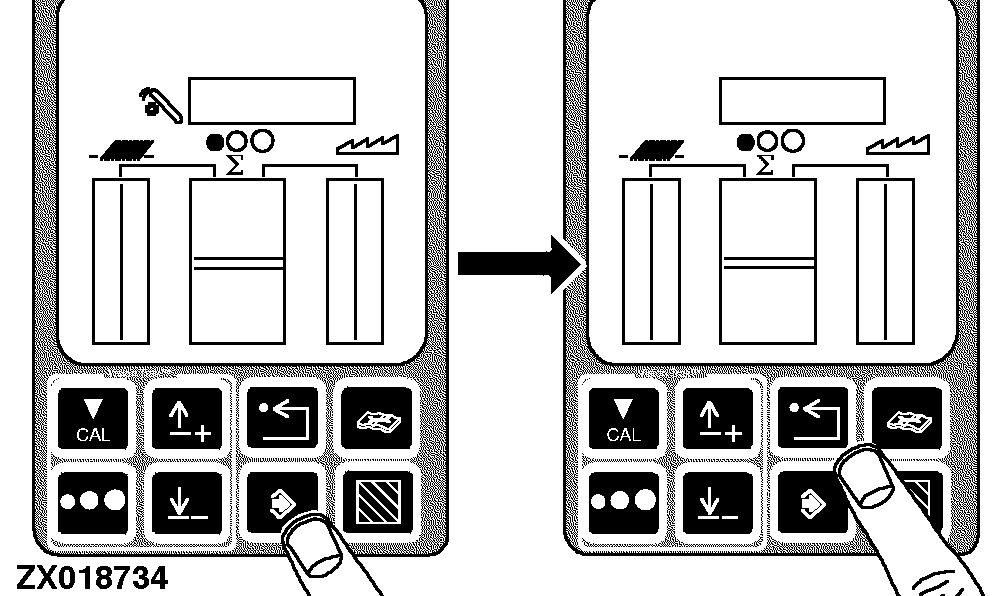
Press the diagnostic switch. dIA will appear on the triple display tachometer.
|
|
|
|
AG,OUZXMAY,203 -19-17FEB00-2/8
|
|
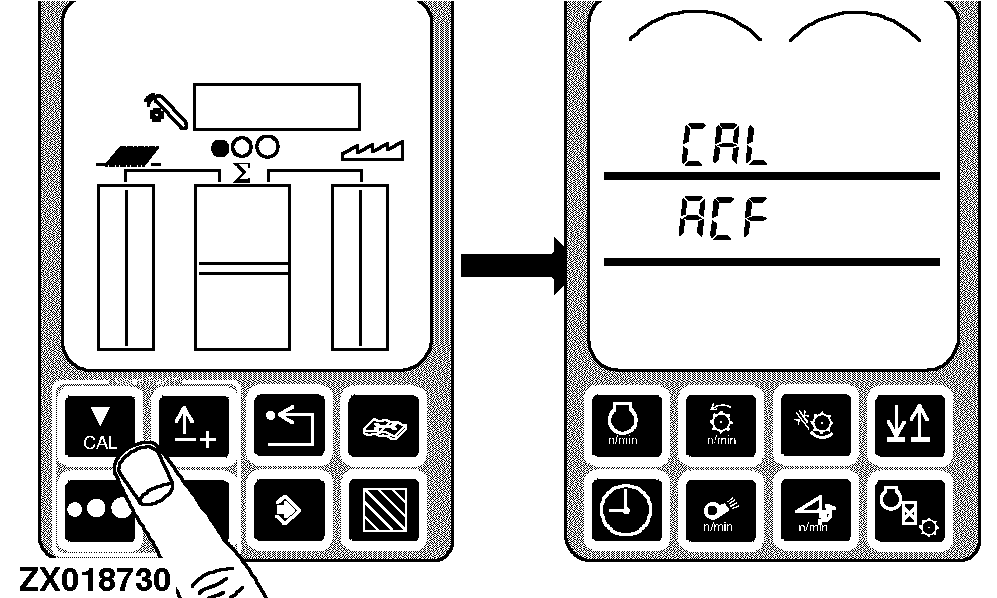
Press the calibration switch. CAL and ACF will appear on the tachometer.
|
|
|
|
AG,OUZXMAY,203 -19-17FEB00-3/8
|
|
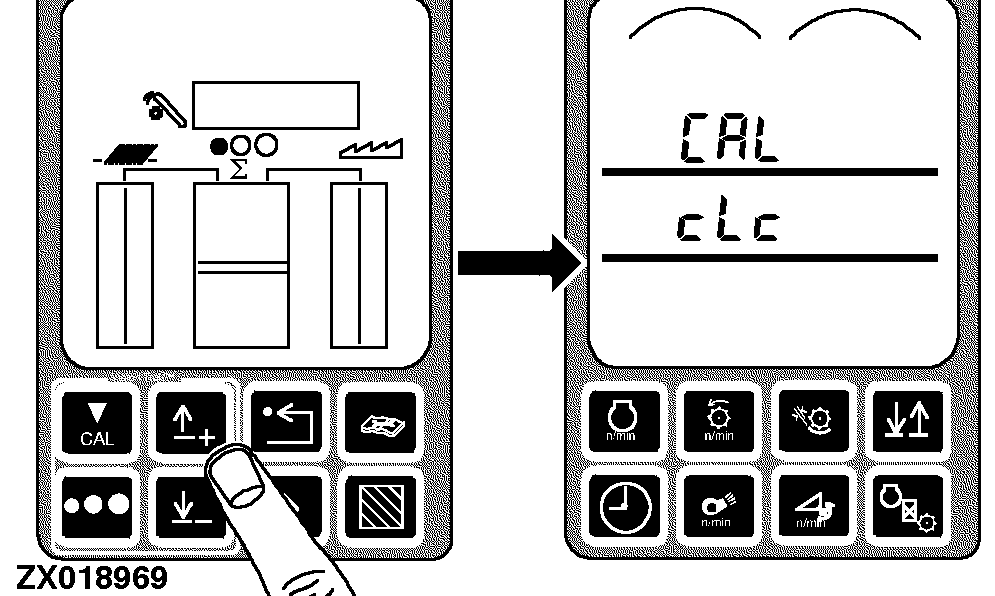
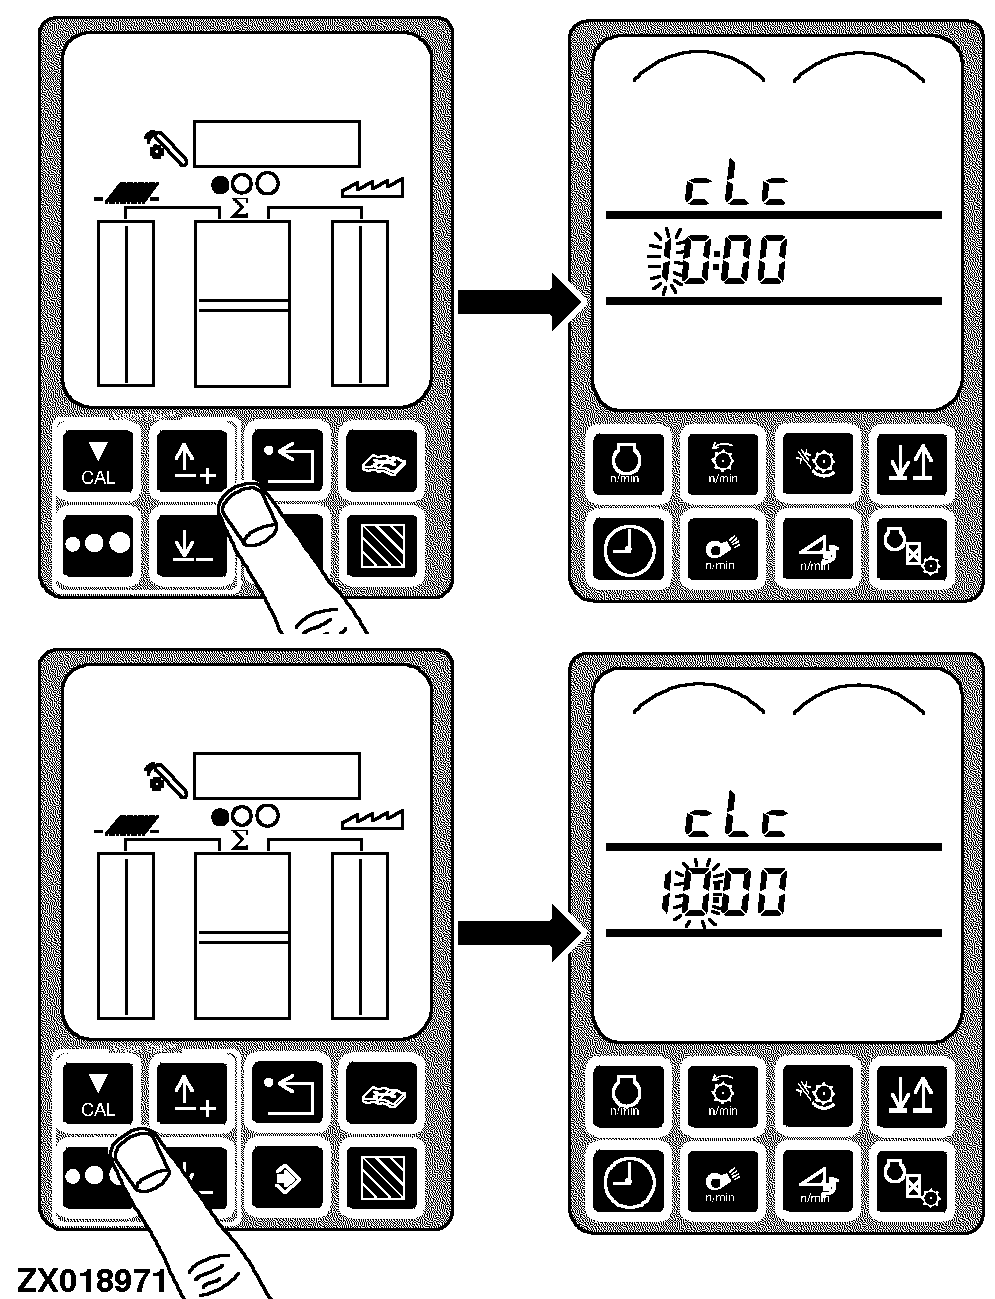
Press the up or down arrow keys until CAL and cLc appears on the tachometer.
|
|
|
|
AG,OUZXMAY,203 -19-17FEB00-4/8
|
|
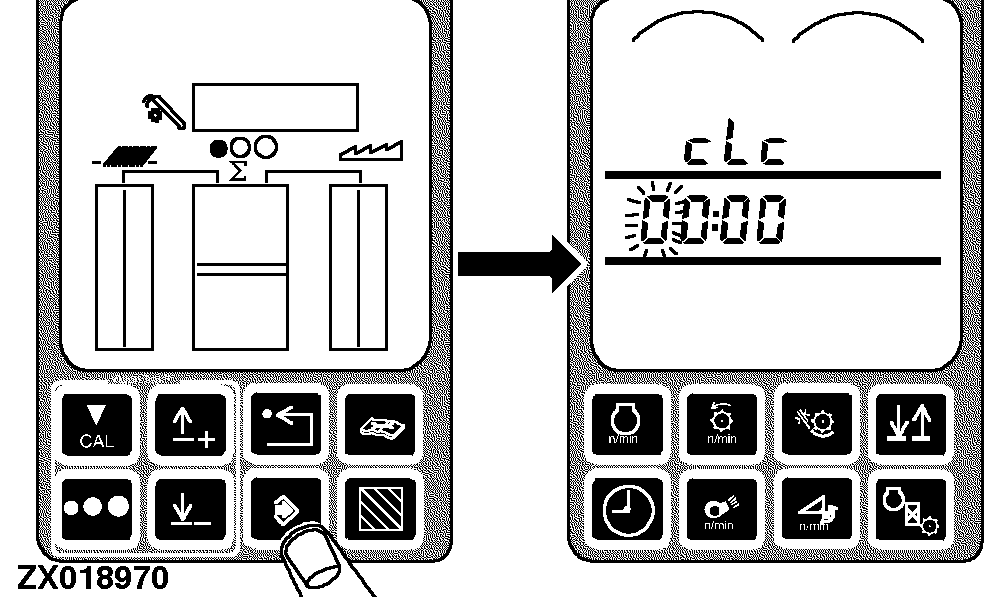
Press the enter switch to access the clock calibration mode. cLc and 00:00 will appear on the tachometer and the first digit will flash.
|
|
|
|
AG,OUZXMAY,203 -19-17FEB00-5/8
|
|
Press the up or down arrow keys to adjust. Press the calibration switch, the second digit will flash.
Continue in the same manner until the fourth digit will flash.
|
|
|
|
AG,OUZXMAY,203 -19-17FEB00-6/8
|
|
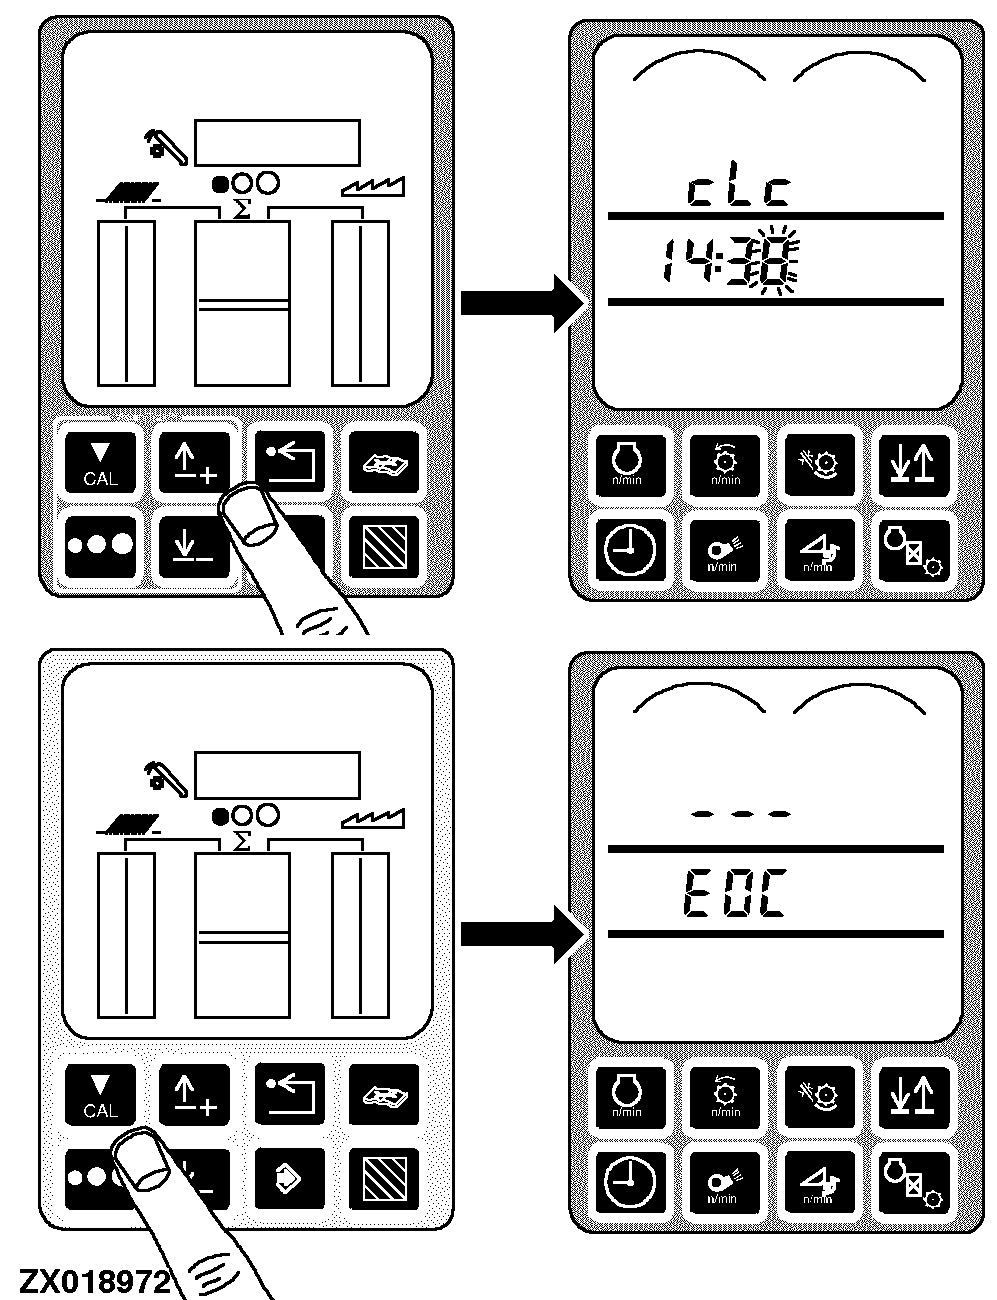
Press the up or down arrow keys to adjust.
Press the calibration switch. EOC will appear on the tachometer.
|
|
|
|
AG,OUZXMAY,203 -19-17FEB00-7/8
|
|
Press the enter switch to store the calibration value or press the back arrow switch to abort calibration (and not save values).
Press back arrow switch to return to normal operation.
|
|
|
|
AG,OUZXMAY,203 -19-17FEB00-8/8
|
|