Header CalibrationThe header calibration procedure must be performed when a header is initially hooked up and when header height sensors or the pressure sensor are replaced. If the header has no height sensors, this procedure can be used to set the feeder house angle at which the header is on the ground, to calibrate the display for return-to-cut operation. See the angle sensor calibration procedure for calibrating the tilt angle sensor. This procedure also performes the float calibration if the header has sensors Prepare Header For Calibration:
|
OUZXMAG,0001860 -19-04OCT02-1/10 |
|
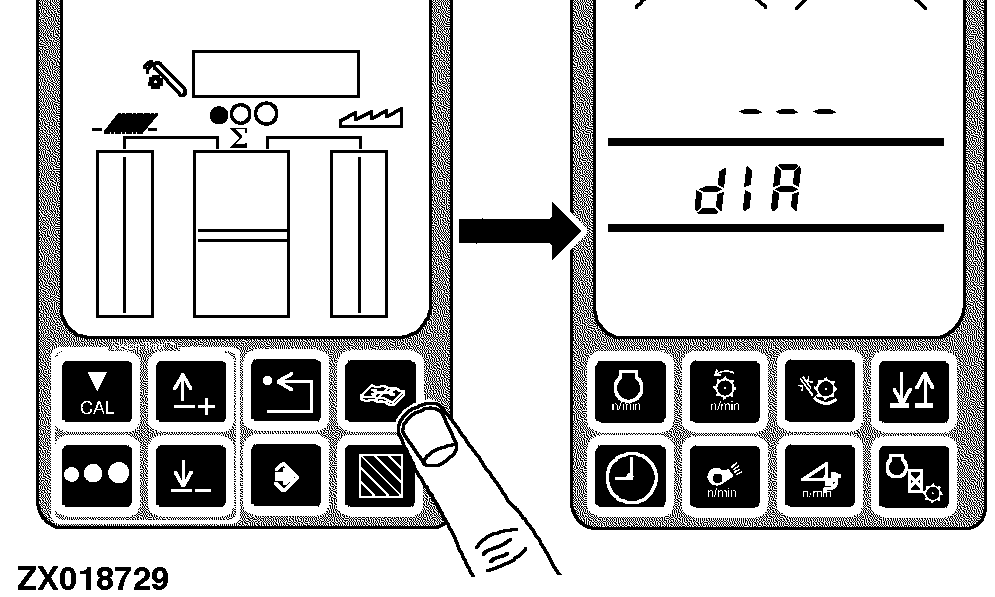
1- Press the diagnostic switch. dIA will appear on the triple display tachometer. |
|
OUZXMAG,0001860 -19-04OCT02-2/10 |
|
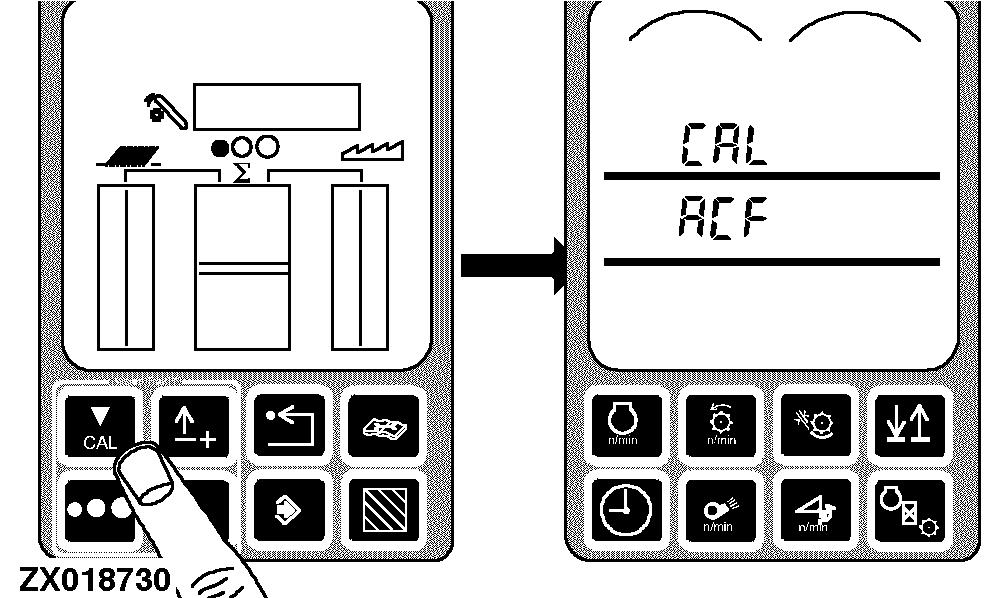
2- Press the calibration switch. CAL and ACF will appear on the tachometer. |
|
OUZXMAG,0001860 -19-04OCT02-3/10 |
|
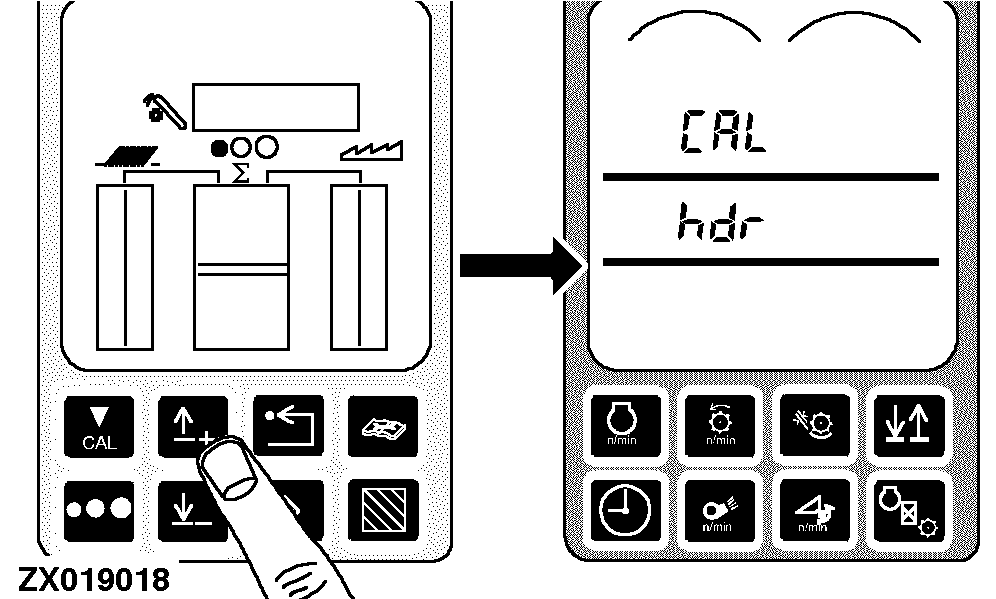
3- Press the up or down arrow switch to access the hdr calibration mode. CAL and hdr appear on the tachometer. |
|
OUZXMAG,0001860 -19-04OCT02-4/10 |
|
4- The header may be moved with the header lift switch on the multifunction lever. Lower the header until it rests on the ground. Tilt the header if necessary so that the ends of the header contact the ground at the same time. |
|

OUZXMAG,0001860 -19-04OCT02-5/10 |
|
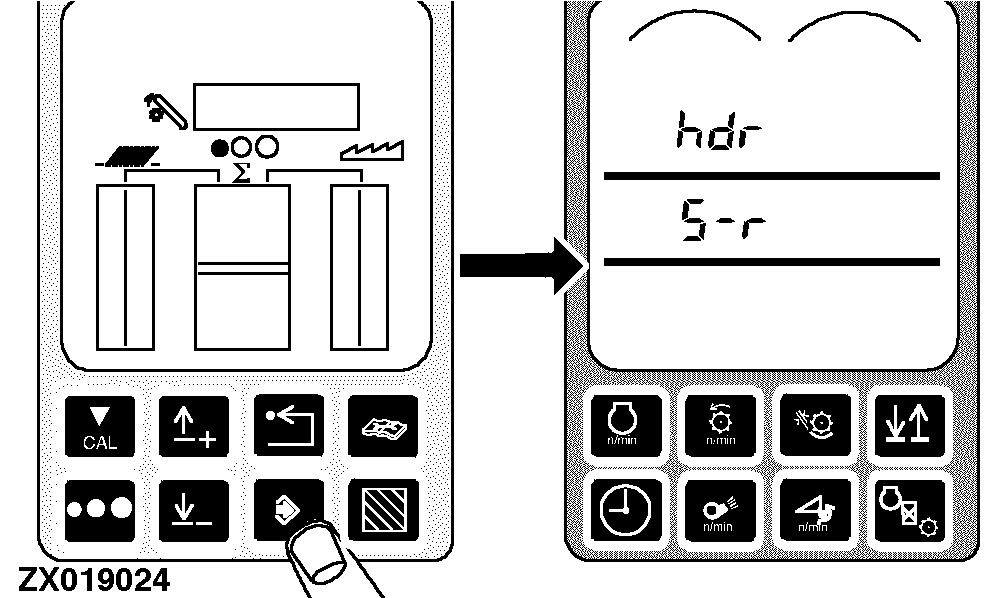
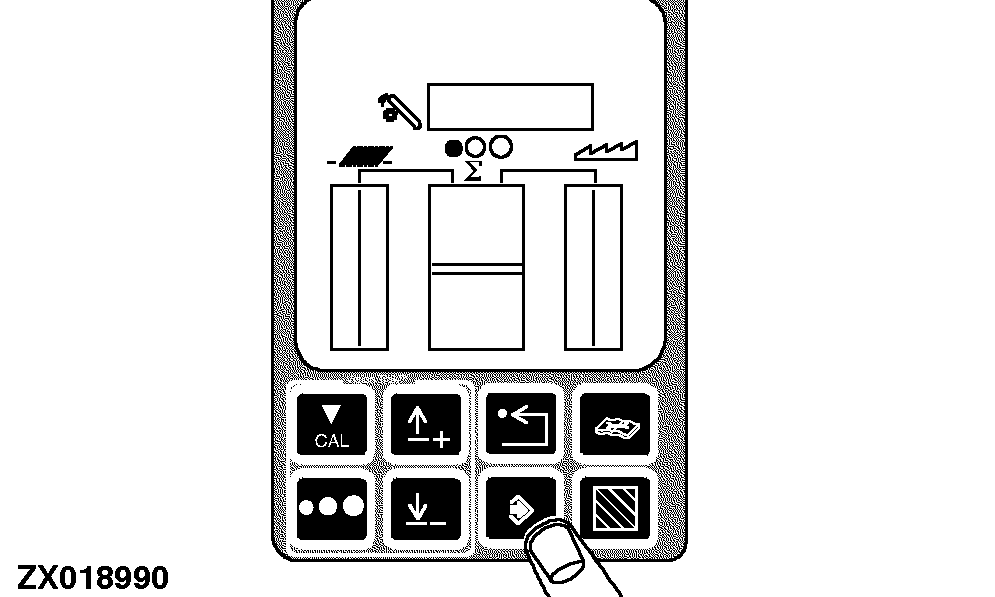
5- Press the enter switch. hdr and S-r should appear on the tachometer. If the header has no height sensors and is being calibrated for the display for return to cut only, go to step 6. Otherwise skip the step 6 and go to step 7. |
|
OUZXMAG,0001860 -19-04OCT02-6/10 |
|
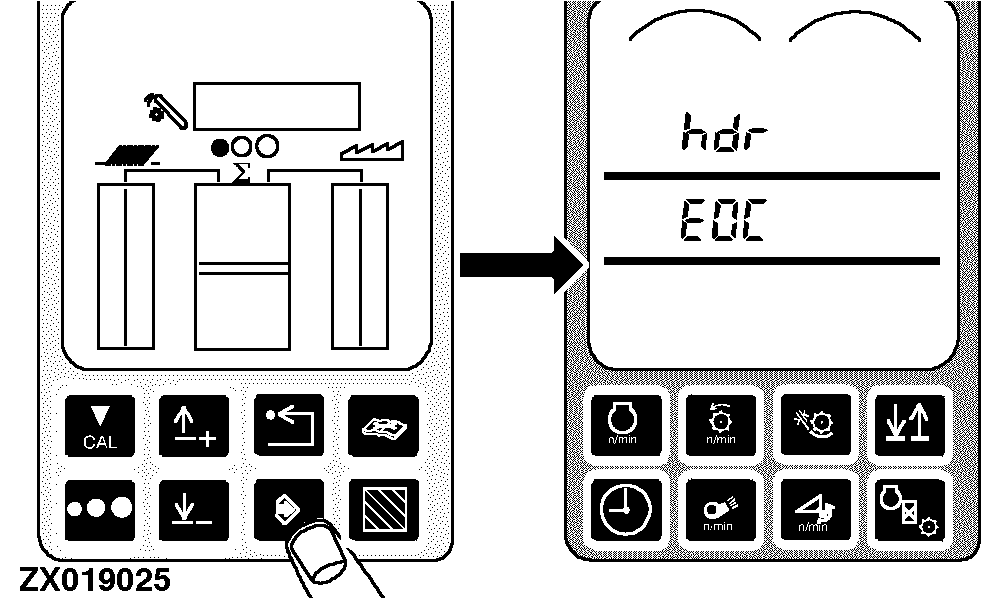
6- Press the enter switch. hdr and EOC should appear on the tachometer. Skip to the step 9. |
|
OUZXMAG,0001860 -19-04OCT02-7/10 |
|
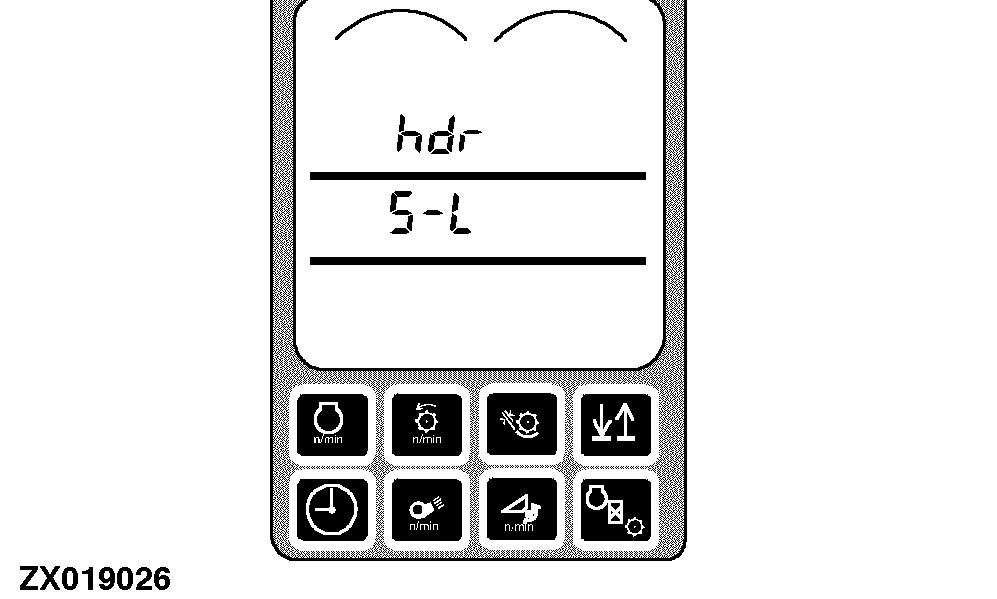
IMPORTANT: In case of header without sensors, perform the float calibration (Flo)! See "Float Calibration (For Header Without Sensors)" in this section. 7- Press and hold the header lift switch (slow raise) on the multifunction lever. The header will slowly rise until the height sensors lose contact with the ground. After the header stops moving, the tachometer should display hdr and S-L. |
|
OUZXMAG,0001860 -19-04OCT02-8/10 |
|
8- Press and hold the header lift switch (slow lower) on the multifunction lever. The header will lower until it rests on the ground. After the header stops moving, the tachometer should display hdr and EOC. |
|

OUZXMAG,0001860 -19-04OCT02-9/10 |
|
9- Press the enter switch to store all end of calibration (EOC) values which did not have errors. If no errors occurred during calibration, the following will be displayed:
If any errors occurred during calibration, previous calibration values are kept and the following will be displayed:
Press the back arrow switch twice to return to normal operation. For header with sensors: - Height calibration is complete. - Float calibration is complete. For header without sensors: - Perform float calibration (FLO). See "Float Calibration (For Header Without Sensors)" in this section. |
|
OUZXMAG,0001860 -19-04OCT02-10/10 |