21-Inch Walk-Behind Rotary Mowers
Introduction
Product Identification
Safety
Operating
Handle and Cutting Height Controls
Forward Travel (JS61 and JS63)
Replacement Parts
Service Intervals
Service
Troubleshooting
Storing Machine
Assembly
Specifications
Warranty
John Deere Quality Statement
Service Record

Operating
Engine Controls
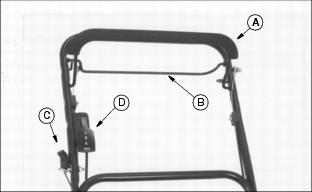
Handle Controls
B - Traction Clutch Lever (JS61 and JS63)
Handle and Cutting Height Controls
ADJUSTMENTS
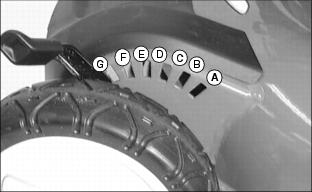
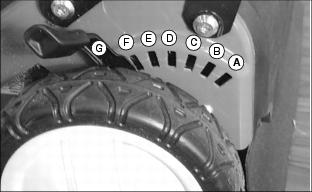
Adjusting Cutting Height
NOTE: Adjust both levers to same height except for LOWEST cutting height (A). This adjustment improves mulching performance at lowest cutting height:
· Put front wheel levers in 25 mm (1 in.) notch: First rear notch.
· Put rear wheel levers in 38 mm (1-1/2 in.) notch: Second rear notch.
To help move rear wheel lever:
1. Lift lower handlebar slightly with one hand to take some weight off wheel.
2. Move height adjustment lever to desired position with other hand.
Adjusting Handle Height
Upper Handle:
NOTE: Upper handle height can be independently adjusted to two positions.
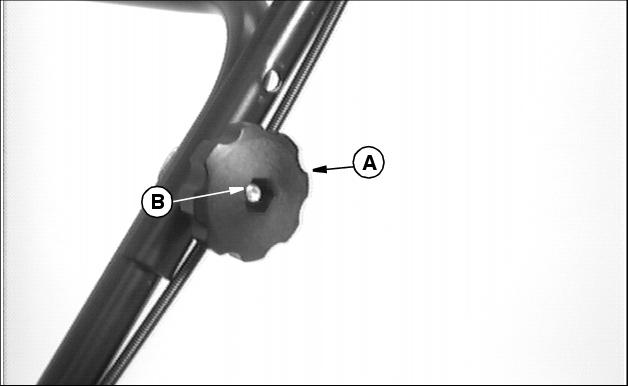
1. Remove knob (A) and bolt (B) from each side of upper handle.
2. Move handle to desired height.
3. Install bolt through matching holes in upper and lower handles on each side.
4. Install and tighten knob (A).
Lower Handle:
NOTE: Lower handle height can be independently adjusted to three positions.
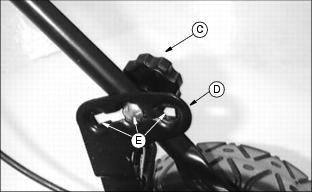
1. Loosen knob (C) approximately 25 mm (1 in.) on each side of handle.
NOTE: Carriage bolts must travel within slotted adjustment brackets and come to rest within one of the three height setting positions (E) before tightening.
2. Pivot handle to a desired height within slotted adjustment bracket (D).
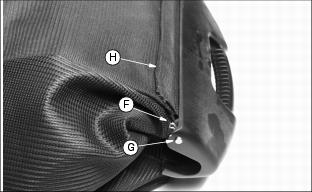
3. If bag prevents lowering of handle, remove clip (F) to remove rod (G). Remove rod from lower position (H) and insert in upper position as shown to lengthen bag.
4. Tighten knob (C) on each side of handle.
Starting Engine
Run engine only in a ventilated area. If engine is run in an enclosed area, open doors to bring in outside air. |
IMPORTANT: Avoid damage! To help prevent damage to recoil starter and band brake, do not start engine: |
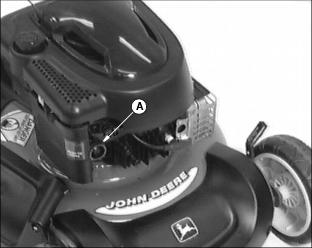
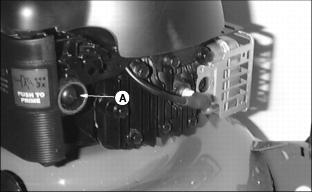
1. Prime engine by pressing primer bulb (A):
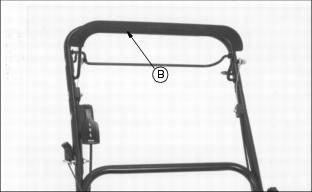
2. Hold blade control lever (B) against handle.
3. Pull starter handle until you feel resistance. Then pull fast and steady.
4. When engine starts, return rope slowly.
Forward Travel (JS61 and JS63)
To Travel Forward:
To Stop Forward Travel:
NOTE: Rear wheels will make a clicking noise when mower is pushed forward. This indicates that the drive train is operating correctly.
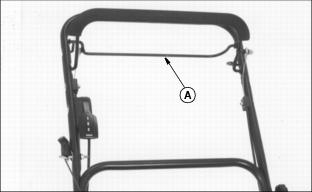
Release lever (A). Release traction clutch lever before turning the mower.
Travel Speeds (JS61 and JS63)
Travel speed: (JS61)
· 1st Gear: 3.9 km/h (2.4 m.p.h.)
Travel speeds: (JS63)
· 1st Gear: 3.1 km/h (1.9 m.p.h.)
· 2nd Gear: 3.9 km/h (2.4 m.p.h.)
· 3rd Gear: 5.0 km/h (3.1 m.p.h.)
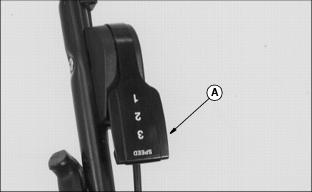
To change travel speeds: (JS63)
NOTE: Mower travel speed can be changed when the traction clutch lever is engaged and the mower is moving forward.
· Raise or lower speed control lever (A) to engage desired gear.
Stopping Engine
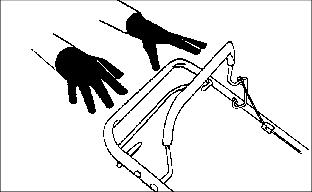
Release handle and levers:
IMPORTANT: Avoid damage! If blade does not stop within 3 seconds after you release blade stop lever, see your John Deere dealer |
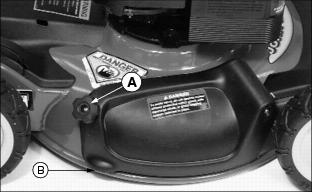
Using Side Discharge Chute
1. Release blade control lever to stop engine.
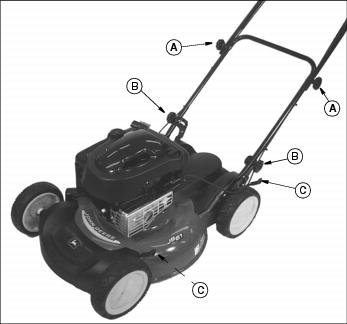
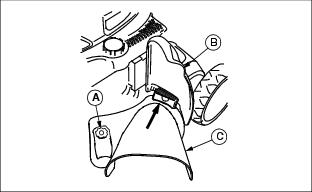
2. Remove mulch guard knob (A).
3. Lift and hold spring loaded mulch guard (B) up.
4. Install side discharge chute (C).
· Slide side discharge chute under mulch guard mounting bracket.
· Reinstall and tighten knob (A).
Using Grass Bag
NOTE: Bag may wear and deteriorate. Check condition of bag often. Use a John Deere bag or equivalent to comply with safety specifications.
1. Release blade control lever to stop engine.
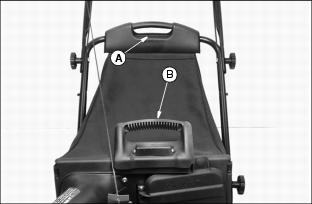
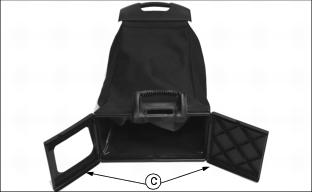
2. Grasp handle (A) and handle (B) from left side of mower. Lift bag off mower.
3. Lower front of bag. Raise rear of bag grasping handle (A) and handle (B).
4. Allow doors (C) to swing open. Shake contents of bag to empty out.
Mowing Tips
Before beginning to mow, be sure deck is level and proper cutting height is selected.
When you mow an area for the first time, travel SLOW and cut HIGH so you can:
· Learn the best mowing pattern.
· Help prevent hitting objects hidden in the grass.
Try to mow grass only when it is dry: Wet grass may plug mower and leave a trail of grass clumps.
Use a travel speed that fits the conditions:
· Travel SLOW when you mow thick, tall grass.
· FAST travel or sharp turns may produce stripes or uneven cut. Slow down. Short, fast turns may scuff ground and pull grass out by the roots.
· Travel at MODERATE speed when you mow a thin stand of grass.
Mow often enough so you cut only 1/3 of grass blade in one mowing. Cutting grass too short may kill grass and let weeds grow easily.
Aerate lawn to help stimulate soil organisms and root growth.
To Avoid Scalping
· Pay attention to the way you mow: scalping can be eliminated.
· If mower scalps easily, cutting height may be too low for ground conditions-especially on lawns with many small mounds and ridges.
· Mow over ridges and through shallow ditches straight-on, not at an angle.
Keep blade sharp: A dull blade will tear grass; tips of grass will then turn brown.
Check lawn regularly for uneven cut. If cut is uneven:
· Mower may not be level. Adjust cutting height levers.
Bagging Tips
For best performance, bagger needs good airflow. To help increase airflow:
· Keep underside of deck and chute clean.
· Clean bag often with water from garden hose, from outside to inside of bag. Let bag dry before use.
· Mower may leave a trail of clippings.
· Clippings may blow out from under deck.
Bagging and Composting
Many communities will no longer haul lawn clippings and leaves to landfills. Bagging and composting clippings and leaves is one way to solve this problem.
Clippings from grass bag may also be used as mulch, or sheet compost, between garden rows and around trees and shrubs. This mulch will:
· Add nutrients to soil as it decays.
· Help keep soil temperature down during hot weather.
You may compost clippings and leaves in various ways. See garden magazines or clubs for information, or go to your local library for help.
Finished compost is crumbly. It is rich in soil nutrients, and can be spread on your lawn. Compost may also be worked into soil. It adds humus to soil and improves soil texture, making soil looser and easier to work.
Mulching Tips
· You do not have to rake or bag grass or leaves.
· Lawn holds moisture better during dry weather.
· Soil temperatures stay down during hot weather.
· Mulch adds nutrients to soil, and reduces need for fertilizer.
Mulching does not make thatch. Frequent shallow watering and fertilizer application produce thatch from roots that grow close to surface.
Be careful when you mulch leaves in Fall. Grass needs sunlight in Fall to help store food for Winter. A thick layer of mulched leaves can prevent sunlight from getting to grass and smother it. You may have to mow with grass bag to remove this layer.
Mulch leaves only when they are dry.
Mulching wet or damp grass or leaves may cause problems:
· Clippings and leaves may build up on the underside of the mower deck.
· Cut grass and leaves may form clumps.
· Leaves may not be cut into small bits.
· Engine will work harder and use more fuel.
· Clean underside of mower deck after mulching wet or damp grass.
If possible cut only top 1/3 of grass at a time.
Use a different mowing pattern each time you mow. Overlap mowing paths 50-100 mm (2-4 in.) instead of cutting a full swath with each pass.
Operate mower at a slower ground speed. Mulching takes more power.
Keep blade sharp. Check it often.
If clippings are not dispersed evenly or quality of cut is marginal, raise cutting height one or more positions.
After Mowing
· STOP engine. Let it cool. This will help prevent starting a fire when you store the mower.
· Remove and shake bag to remove all clippings. This will help to prevent deterioration of bag and starting a fire.
· Clean top of deck, engine, and chute with brush or compressed air, if possible. This will help to prevent buildup and starting a fire.
· Spray under deck with water under pressure to remove corrosive lawn chemicals and buildup.

