![]()
21-Inch Walk-Behind Rotary Mowers
Introduction
Product Identification
Safety
Operating
Replacement Parts
Service Intervals
Service
Troubleshooting
Storing Machine
Assembly
Specifications
Warranty
John Deere Quality Statement
Service Record

Assembly
Identify Parts
Unfold Handles
1. Carefully remove mower from shipping carton.
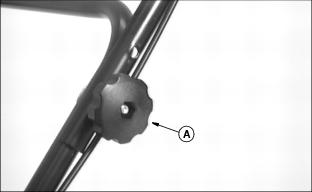
2. Loosen knob (A) approximately 25 mm (1 in.) on each side of upper handle.
3. Remove knob, special headed bolt and washer (B) from each side.
4. Carefully pull folded handle assembly rearward.
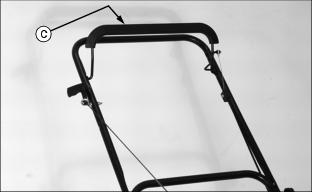
5. Put rear of mower in the lowest cutting height with adjusting lever (C). Do this for both sides.
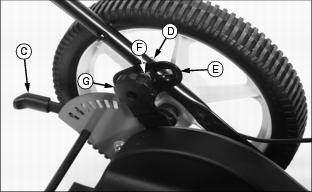
6. Install special headed bolt (D) from the outside.
7. Rotate slotted bracket (E) until center hole is aligned with special headed bolt.
8. Install flat washer (F) and knob (G). Use the same adjusting hole on each side. Tighten both knobs (G) to secure handle.
9. Pivot upper portion of handle assembly to a straight and aligning position. Hold handle and tighten knob (A) on each side.
Install Starter Rope
NOTE: To make installation of the starter rope onto the rope guide easier, hold the blade control lever against the handle while pulling the starter rope.
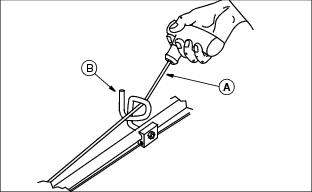
Pull and install starter rope (A) onto rope guide (B) mounted on the right side of the handle.
Adjust Mower Cutting height
NOTE: The front and the rear of the mower should be level. Both front and rear adjusting levers should be positioned in the same height adjusting slot.
Put mower in the mid-range of the cutting height adjustment:
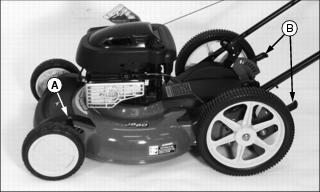
· Use adjusting lever (A) to change front of mower.
· Use adjusting levers (B) to change rear of mower.
Add Engine Oil
IMPORTANT: Avoid damage! ENGINE IS SHIPPED WITHOUT OIL. You MUST add oil before running the engine. See Service section for correct oil application. |
1. Park mower on a level surface.
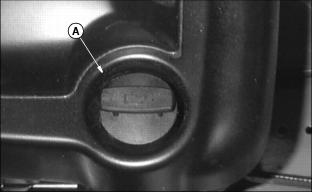
2. Turn oil dipstick (A) 1/4 turn to the left. Remove dipstick.
3. Add 0.5 L (16 oz) oil into dipstick tube.
4. Install dipstick. Turn dipstick 1/4 turn clockwise and tighten.
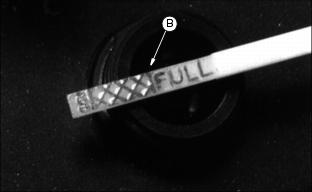
6. Check oil level. Oil should be to the FULL mark (B). If not, add oil.
7. Install and tighten dipstick.
8. Remove "NO OIL" tag from top of engine.
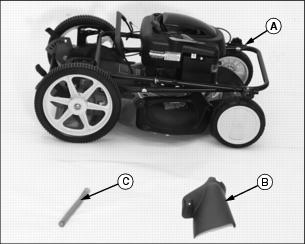
Install Side Discharge Chute
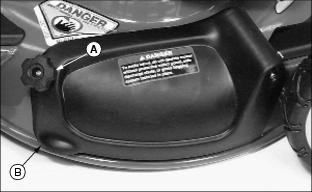
1. Remove mulch guard knob (A).
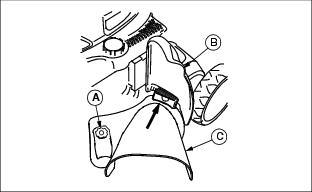
2. Lift and hold spring loaded mulch guard (B) up.
3. Slide side discharge chute (C) under mulch guard mounting bracket.
5. Reinstall and tighten knob (A).
Test Mower
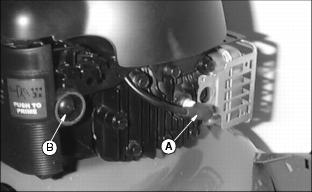
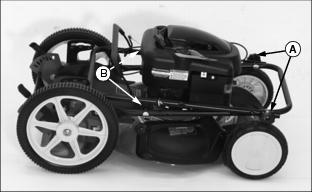
1. Connect spark plug wire (A) to spark plug.
2. Put enough fuel in fuel tank to test mower operation.
3. Press primer bulb (B) three times to prime engine.