Introduction
Product Identification
Safety
Operating
Replacement Parts
Service Intervals
Service Lubrication
Service Engine
Service Transmission
Service Electrical
Service Miscellaneous
Cleaning and Repairing Plastic Surfaces
Cleaning and Repairing Metal Surfaces
Troubleshooting
Storage
Assembly
Specifications
Warranty
John Deere Quality Statement
Service Record
Copyright© Deere & Company

Service Miscellaneous
Removing and Installing Seats
Removing
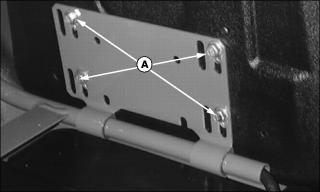
Picture Note: Operator seat shown.
2. Hold onto seat and remove all screws (A).
3. Remove seat and seat bracket from support rail.
Installing
NOTE: Apply silicone lubricant to inner surface of seat bushings to improve ease of seat rotation if desired.
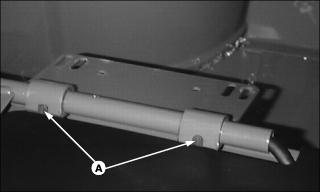
1. Position rubber seat bushings (A) on support rail so tabs face toward rear of vehicle.
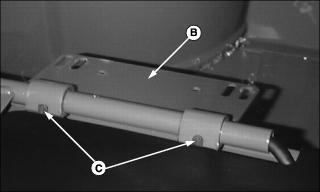
2. Position seat bracket (B) onto support rail so hinges (C) fit around rubber bushing tabs.
Picture Note: Operator seat shown.
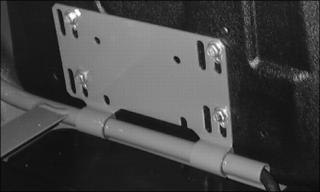
3. Rotate seat bracket upward. Position bottom of seat against bracket and align correct slots with holes in seat.
NOTE: Seat screws must be installed in correct slots in bracket. Always use set of slots closest to center of vehicle when installing seat.
4. Install original hardware to secure seat. Do not tighten completely.
5. Slide seat forward or rearward to desired position.
6. Tighten seat screws to 10 N·m (7 lb-ft).
Filling Fuel Tank
Use regular grade 87 octane unleaded fuel.
Add John Deere stabilizer to fuel before using it in your machine to prevent engine damage due to stale fuel. Follow directions on stabilizer container.
1. Park vehicle safely. (See Parking Safely in SAFETY section.)
2. Allow engine to cool several minutes before you add fuel.
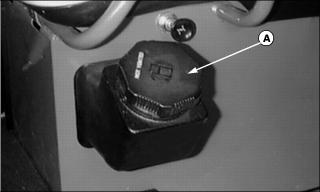
3. Clean area around fuel tank cap (A). Remove the cap.
4. Fill tank with fresh, stabilized fuel only to bottom of filler neck.
Cleaning and Repairing Plastic Surfaces
Do not attempt to paint over marks or scratches in plastic parts.
1. Rinse hood and entire machine with clean water to remove dirt and dust that may scratch the surface.
2. Wash surface with clean water and a mild liquid automotive washing soap.
3. Dry thoroughly to avoid water spots.
4. Spray PLEDGE® onto plastic surfaces and leave on for 30 to 60 seconds. (PLEDGE® is a Registered Trademark of S.C. Johnson, Co.)
5. Wipe off surface with cheese cloth to bring out lustre.
Cleaning and Repairing Metal Surfaces
Cleaning
Follow automotive practices to care for your vehicle painted metal surfaces. Use a high-quality automotive wax regularly to maintain the factory look of your vehicle's painted surfaces.
Repairing Minor Scratches (surface scratch):
1. Clean area to be repaired thoroughly.
2. Use automotive polishing compound to remove surface scratches.
3. Apply wax to entire surface.
Repairing Deep Scratches (bare metal or primer showing)
1. Clean area to be repaired with rubbing alcohol or mineral spirits.
2. Use paint stick with factory-matched colors available from your John Deere dealer to fill scratches. Follow directions included on paint stick for use and for drying.
3. Smooth out surface using an automotive polishing compound. Do not use power buffer.
Removing and Installing Hood
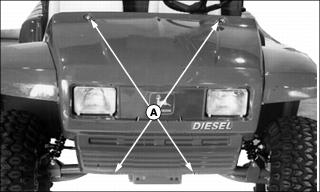
1. Remove four self-tapping screws (A) and lift hood up and off vehicle.
IMPORTANT: Avoid damage! Vibration of hood against headlight housing may cause headlight lamps to fail early. Allow clearance around headlight housings when installing hood. |
2. To install, tighten top screws first.
3. Push hood upward leaving space all around headlight housings.
Checking Wheel Bolt Torque
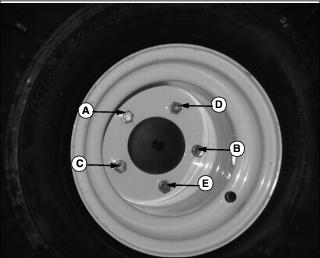
1. Tighten wheel bolts evenly in proper sequence (A), (B), (C), (D), and (E) until snug.
2. Finish tightening to 90 N·m (65 lb-ft) using a torque wrench.

