Compact Utility Tractor with Gear Transmission
Introduction
Safety Signs
Controls
Operating
Replacement Parts
Service Machine Safely
Service Intervals
Service Engine
Service Transmission
Service Electrical
Checking Battery Electrolyte Level
Replacing Instrument Panel Light Bulb
Service Miscellaneous
Troubleshooting
Storing Machine
Assembly
Specifications
Warranty
John Deere Service Literature
John Deere Quality Statement

Service Electrical
Cleaning or Replacing Battery
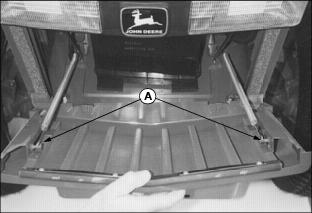
1. Pull out on grille and disconnect two springs (A) to remove grille. Open hood.
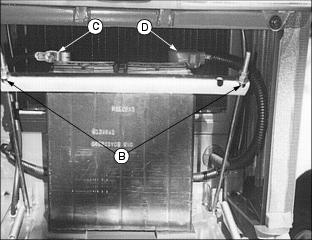
2. Loosen nuts (B) on hold-down bolts to remove hold-down. Remove hold-down.
3. Remove negative (black) cable clamp (C) from the battery.
4. Remove positive (red) cable clamp (D) from the battery.
5. If battery is very dirty, remove battery hold down (B), and clean battery case, terminals, cable ends, hold-down, and tray with a solution of 1 part baking soda to 4 parts water. Keep solution out of battery cells.
6. Rinse all parts with clean water. Let dry.
NOTE: If a new battery is required, install a replacement John Deere battery or an equivalent. (See your John Deere dealer.)
8. Connect positive (red) cable (D) to battery first, then the negative (black) cable (C).
9. Apply petroleum jelly on battery terminals to help prevent corrosion.
10. Install battery hold-down retainer and tighten hardware.
Checking Battery Electrolyte Level
1. Pull out on grille and disconnect the two springs (A) to remove grille. Open hood.
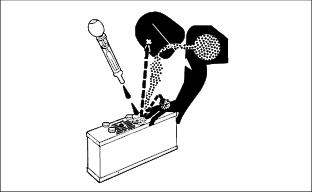
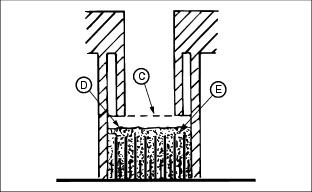
IMPORTANT: Avoid damage! DO NOT fill cells to the bottom of the filler neck (C). Electrolyte can overflow when battery is charged and cause damage. |
3. Electrolyte (D) should be 6 mm (1/4 in.) above plates (E).
4. Add distilled water if necessary.
Charging the Battery
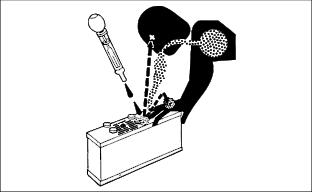
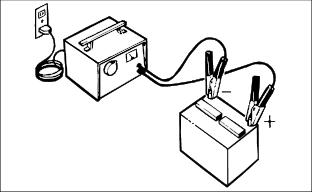
Follow instructions on the battery charger or in the charger operator's manual, or use the instructions below as a guide.
· Wait until the battery has warmed to room temperature. Do not charge a frozen battery.
· Check the electrolyte level of each cell. (See Checking Battery Electrolyte Level in this section.)
· Install the battery cap(s) on the battery.
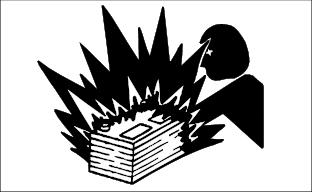
Turn OFF and unplug the charger before you connect cables to the battery or disconnect cables from the battery.
If the battery becomes warm to touch during charging:
· Stop charging the battery until it cools.
Remove and clean battery. (See Cleaning Or Replacing Battery in this section.)
Check electrolyte level. (See Checking Battery Electrolyte Level in this section.)
1. Connect positive (+) charger cable to positive (+) battery terminal.
2. Connect negative (-) charger cable to negative (-) battery terminal.
4. Charge battery. See CHARGING RATES below.
5. Unplug charger cord. Remove charger cables.
Charging Rates
See your battery charger or charger operator's manual for information on charging. Or read the information below to fully charge your battery.
For a charger with a CURRENT ADJUSTMENT CONTROL:
· Charge the battery for 6-8 hours.
For a charger with a switch for MAINTENANCE FREE, DEEP CYCLE, or NORMAL (CONVENTIONAL) setting:
· Use the MAINTENANCE FREE or DEEP CYCLE setting.
For a charger with SLOW CHARGE, FAST CHARGE, or BOOST CHARGE setting:
· DO NOT use the BOOST CHARGE setting.
· Use the SLOW CHARGE setting:
· For a charger rated at less than 10 amps.
· Use the FAST CHARGE setting:
· For a charger rated at 10 amps.
NOTE: Your charger may have an AUTOMATIC STOP to prevent charging the battery when the battery is fully charged OR is not in condition to take a charge.
Using Booster Battery
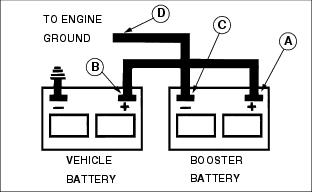
1. Connect positive (+) booster cable to booster battery positive (+) post (A).
2. Connect the other end of positive (+) booster cable to vehicle battery positive (+) post (B).
3. Connect negative (-) booster cable to booster battery negative (-) post (C).
4. Connect the other end of negative (-) booster cable (D) to engine ground away from battery.
Replacing Fuses
IMPORTANT: Avoid damage! When replacing fuses - use the proper replacement fuse or damage to the circuit may occur. |
1. Turn key switch to OFF position. Open hood and remove left side engine panel (A).
2. Pull cover (B) off fuse holder.
4. Pull defective fuse from socket.
7. Install left side engine panel. Lower hood.
Replacing Headlight Bulb
IMPORTANT: Avoid damage! Prevent premature failure when inspecting or replacing the headlight bulb assembly. Refrain from touching the assembly glass component with bare skin. |
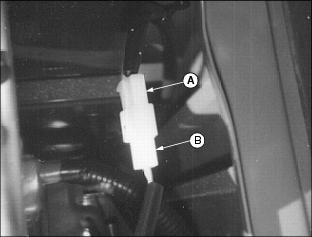
2. Disconnect wiring harness (A) from headlight bulb connector (B).
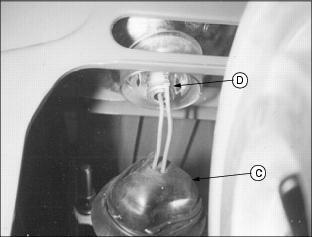
3. Pull back rubber protector (C) from assembly. Rotate headlight bulb assembly (D) left 1/3 turn and remove from headlight housing socket.
4. Install new headlight bulb assembly into housing socket and rotate right 1/3 turn into a locked position.
5. Replace rubber protector (C).
6. Connect wiring harness to headlight bulb connector.
7. Check lights. (See Using Light Switch in the Operating section.)
Replacing Taillight Bulb
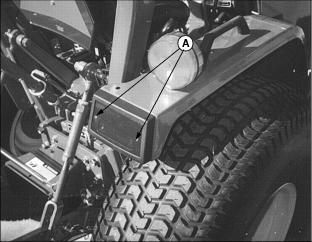
NOTE: Taillight can be serviced by removing the rear assembly lens.
1. Remove two screws (A) and lens from the taillight assembly.
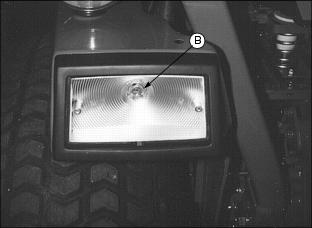
2. Pull bulb (B) to remove. DO NOT twist.
4. Check lights. (See Using Light Switch in the Operating section.)
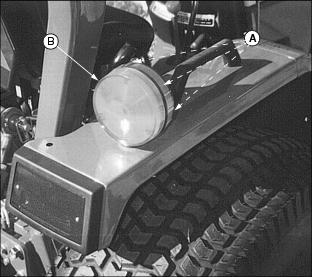
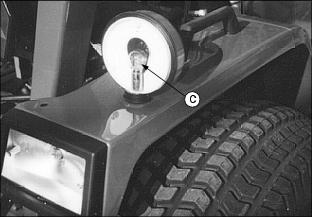
Replacing Warning Light Bulb
1. Remove three screws (A) and lens (B) from the warning light assembly.
2. Push down and rotate bulb (C) to remove.
4. Check lights. (See Using Light Switch in the Operating section.)
Replacing Instrument Panel Light Bulb
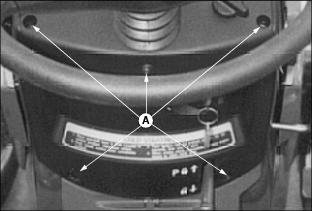
2. Remove five screws (A) from console panel below instrument panel.
3. Remove six instrument panel screws (B).
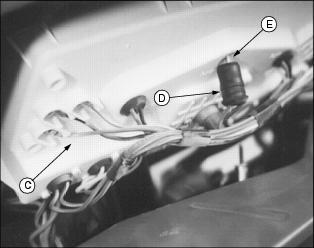
4. Carefully raise instrument panel (C).
5. Identify defective bulb location and remove bulb holder (D) from instrument panel socket.
6. Pull defective bulb from socket. DO NOT twist.
7. Push new bulb (E) into socket.
8. Install bulb holder into instrument panel.
9. Check lights. (See Using Light Switch in the Operating section.)
Adjusting Head Lights
1. Park tractor on a level surface at least 15 ft. away from a flat vertical surface.
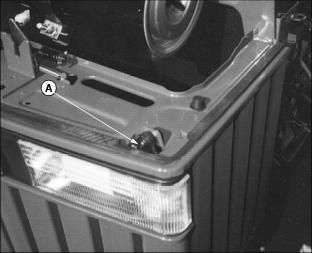
3. Turn head light screw (A) to adjust light beam up or down.


