Introduction
Safety Signs
Controls
Operating
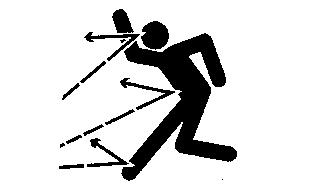
Rotating Blades are Dangerous - Protect Children and Prevent Accidents
Electric Start (Optional Equipment)
Using Chute and Spout Controls
Avoid Damage to Plastic and Painted Surfaces
Service Machine Safely
Service
Troubleshooting
Storing Machine
Assembly
Specifications
Warranty
John Deere Quality Statement
CopyrightŠ Deere & Company

Operating
Operate Safely
ˇ Inspect machine before you operate. Be sure hardware is tight. Repair or replace damaged, badly worn, or missing parts. Be sure guards and shields are in good condition and fastened in place. Make any necessary adjustments before you operate.
ˇ Clear work area of objects that might be thrown. Keep people and pets out of the work area. Keep children in the house when you are operating the snowblower. Stop machine if anyone enters the area.
ˇ If you hit an object, stop the machine and inspect it. Make repairs before you operate. Keep machine properly maintained, clean, and in good working order.
ˇ DO NOT blow snow toward people, cars, or buildings.
ˇ DO NOT use snowblower on surfaces above ground level, such as, a roof of a building.
ˇ Be extremely careful if you must clear snow from a gravel path. Be aware that snowblower may pick up gravel in snow. Adjust spout angle carefully to blow this snow safely.
ˇ DO NOT leave machine unattended when it is running.
ˇ Only operate during daylight or with good artificial light.
ˇ Be sure of footing. Operate slowly on slippery surfaces. Be especially careful when you pull machine backwards with the engine running. Avoid holes, rocks, roots, etc.
ˇ DO NOT blow snow across a slope. Be very careful when you change direction on a slope. Do not try to clear snow from a steep slope. Keep away from edge of a ditch or bank.
ˇ Keep a firm hold on the machine handles. Avoid sudden starts and stops.
ˇ DO NOT run engine in a building unless there is good ventilation.
Rotating Blades are Dangerous - Protect Children and Prevent Accidents
ˇ Never assume that children will remain where you last saw them. Stay alert to the presence of children.
ˇ Keep children in the house when you are operating the machine.
ˇ Turn machine off if a child enters the area.
ˇ Use extra care when you come to blind corners, shrubs, trees, or other objects that may block your vision.
ˇ DO NOT let children or an untrained person operate the machine.
HELP PREVENT SERIOUS OR FATAL ACCIDENTS:
ˇ Be alert at all times, people especially children can move quickly into the area before you know it.
ˇ DO NOT operate snowblower if you are under the influence of drugs or alcohol.
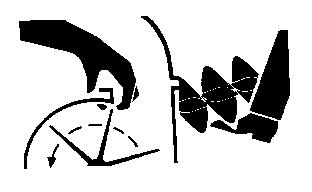
ˇ Keep hands, feet, and clothing away from discharge chute and auger.
Wear Appropriate Clothing
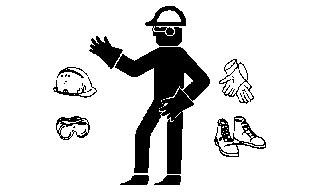
ˇ Wear close fitting clothing and safety equipment appropriate for the job.
ˇ Loud noise can cause impairment or loss of hearing, wear a suitable protective device such as earplugs.
ˇ Do not wear radio or music headphones while operating the machine. Safe operation requires your full attention.
Adjusting Skids
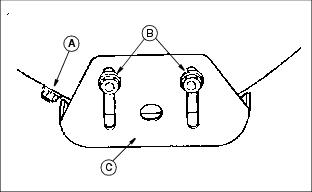
If you operate on a smooth, hard surface, adjust skids so there is 3 mm (1/8 in.) between scraper blade and surface.
If skid is as high as it will go (bolt against bottom of slot), and scraper blade is still too high:
ˇ Loosen five bolts (A) on scraper blade.
ˇ Move blade down to 3 mm (1/8 in.) above surface.
Before you operate snowblower on gravel or uneven surface, adjust bottom of skids to 30 mm (1-1/4 in.) below scraper blade.
Before you adjust skids on wheel models:
ˇ Pressure in each tire must be the same.
ˇ Each tire must be resting on hard surface, not on a cross-link of tire chain.
NOTE: Be sure both skids are set to the same height.
1. Park snowblower on a hard, smooth surface.
2. Put a block under auger housing.
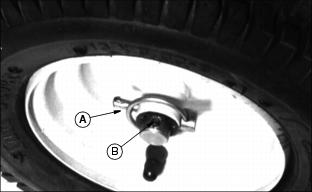
3. Loosen two nuts (B). Move skid (C) to desired position.
4. Tighten nuts. Adjust other skid to same height.
Using Speed Selector Lever
IMPORTANT: Avoid damage! Always release traction drive lever before moving speed selector lever to avoid snowblower damage. |
Speed selector lever (A) controls travel direction and speed of snowblower:
ˇ Forward and reverse direction.
ˇ Six speeds forward and two reverse.
Traction drive lever (B) must be DISENGAGED (Up) before you move speed selector lever.
ˇ Use 1st and 2nd speeds for deep, hard, or wet snow on slippery or sloping surfaces.
ˇ Use 3rd and 4th speeds for light-to-heavy snow on level surface.
ˇ Use 5th speed for light snow and easy going.
ˇ Use 6th speed for driving between jobs, NOT FOR BLOWING SNOW.
ˇ Use the R1 (REVERSE) slot for slippery surfaces and difficult going.
ˇ Use the R2 (REVERSE) slot for bare surfaces and easy going.
Using Drive Control Levers
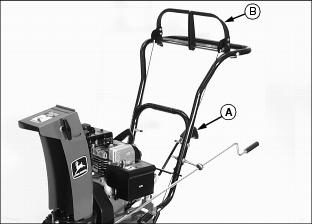
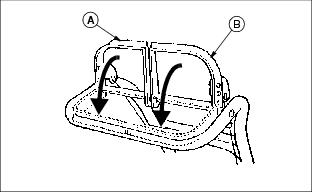
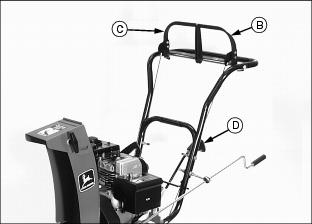
TRACTION DRIVE CONTROL LEVER (A):
ˇ Pull lever down to handle to ENGAGE traction drive.
ˇ Release lever to DISENGAGE traction drive.
AUGER DRIVE CONTROL LEVER (B):
ˇ Pull lever down to handle to ENGAGE auger drive.
ˇ Release lever to DISENGAGE auger drive.
TRACTION AND AUGER DRIVE CONTROL LEVERS:
ˇ Pull and hold both levers down to handle to keep the traction and auger drive ENGAGED.
ˇ Release levers to DISENGAGE drives.
Using Fuel Shutoff Knob
Turn fuel shutoff knob (A) all the way to the left to the OPEN position.
Starting Engine
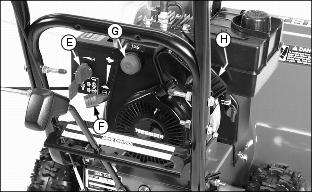
1. Turn fuel shutoff knob (A) all the way to the left to the OPEN position.
2. Traction drive control lever (B) and auger drive control lever (C) must be in the DISENGAGED (Up) position.
3. Speed selector lever (D) in the 1st SPEED position.
NOTE: DO NOT choke or prime a warm engine.
ˇ For cold engine, turn knob (E) to FULL choke position.
ˇ For warm engine, leave knob in the OFF position.
5. Move throttle lever (F) to the FAST (r) position.
ˇ For cold engine, push button two or three times.
ˇ If air temperature is below -12°C (10°F), push button five times.
ˇ If engine is warm, DO NOT push button.
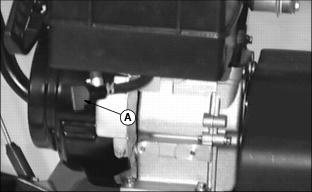
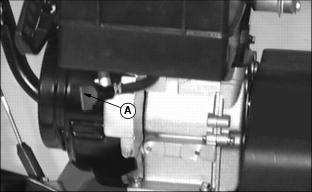
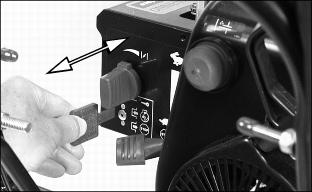
NOTE: The engine ignition key is a two position PUSH/PULL design. DO NOT twist key after it is installed.
7. Install engine ignition key and PUSH it into the "R" position.
ˇ "R" position. To enable the ignition system, PUSH key all the way in until you feel it "Click" into place.
ˇ "STOP" position. To disable the ignition system, PULL key all the way out.
8. Pull starter handle (H) until you feel resistance:
ˇ Do not let handle snap back.
9. After cold engine is started:
ˇ As engine warms, slowly turn choke knob to OFF.
ˇ If engine falters, turn choke knob to the 1/2 position until it runs smoothly then move it to OFF.
ˇ Let engine warm a few minutes.
Electric Start (Optional Equipment)
NOTE: The electric starter motor will shut off automatically if it overheats from cranking the engine. After the motor cools, it will operate again.
1. Follow Steps 1-7 in STARTING ENGINE procedure.
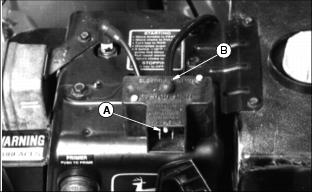
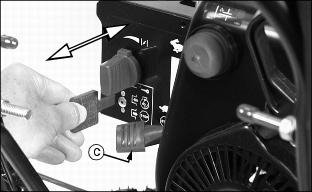
2. Connect power cord to engine switch box (A).
3. Plug other end of cord into three-hole, grounded 120-volt A.C. receptacle.
4. Push starter button (B) to start engine.
5. COLD engine: After engine is started:
ˇ As engine warms, slowly turn choke knob to the OFF position.
ˇ If engine falters, turn choke knob to the 1/2 position until it runs smoothly then move it to OFF.
ˇ Let engine warm a few minutes.
6. Disconnect cord from house circuit FIRST. Then disconnect cord from switch box.
Stopping Engine
Follow steps below before you park, inspect, adjust, or unplug snowblower.
1. Release traction drive lever (A) and auger drive lever (B). Snowblower will STOP and auger/blower will STOP.
2. Push throttle lever (C) DOWN to SLOW (t) position.
NOTE: The engine ignition key is a two position PUSH/PULL design. DO NOT twist key after it is installed.
3. Pull engine ignition key out.
ˇ "R" position. To enable the ignition system, PUSH key all the way in until you feel it "Click" into place.
ˇ "STOP" position. To disable the ignition system, PULL key all the way out.
4. Turn fuel shutoff knob to the right-to the CLOSED position if snowblower will not be used for a few days.
Emergency Stopping
To STOP snowblower in an emergency, RELEASE LEVERS.
Using Wheel Lockout
Put lockout pin (A) in inner hole for better traction on a slope or slippery surface.
Put pin in outer hole (B) for better maneuverability when traction is not a problem.
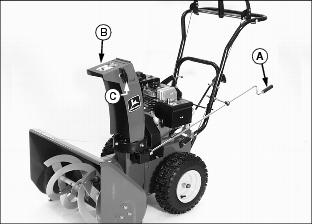
Using Chute and Spout Controls
CHUTE CONTROL CRANK (A) controls the direction of snow discharge:
ˇ Turn crank either direction to turn chute.
ˇ Chute will turn 100° to the left or to the right.
SPOUT DEFLECTOR (B) controls the distance snow will be discharged:
ˇ Loosen handle (C), lower deflector for less distance, or raise deflector for more distance.
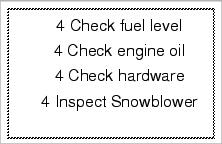
DAILY OPERATING CHECKLIST
Avoid Damage to Plastic and Painted Surfaces
ˇ Be careful not to spill fuel on machine. Fuel may damage surface. Wipe up spilled fuel immediately.
Snowblowing Tips
Clear snow immediately after it falls, if possible.
Overlap each swath slightly for complete snow removal.
Run engine at FAST speed for best snowblower performance.
Blow snow downwind, if possible.
ˇ Clean the snowblower. Wipe it dry.
ˇ Park and run snowblower a few minutes to help keep moving parts from freezing.
Do not cover snowblower if engine is warm.
Pull the starter handle several times to help prevent moisture in the starter from freezing.

