Introduction
Safety
Controls
Operating
Stay Clear Of Rotating Drivelines
Avoid Damage To Plastic And Painted Surfaces
Using 2-Speed Axle Shift Lever
Operating Vehicle Engine When The Operator Is Off The Seat
Transporting Vehicle On A Trailer
Positioning PTO Stub Shaft Shield
Replacement Parts
Service Machine Safely
Service Intervals
Service Engine
Service Transmission
Service Steering & Brakes
Service Electrical
Service Miscellaneous
Troubleshooting
Storage
Assembly
Warranty
Specifications
John Deere Quality Statement
CopyrightŠ Deere & Company

Operating
Operate Safely
ˇ Check brake action before you operate. Adjust or service brakes as necessary.
ˇ If you hit an object, stop the machine and inspect it. Make repairs before you operate.
ˇ Keep machine and attachments properly maintained and in good working order. Keep all shields and guards in place. Replace worn parts.
ˇ DO NOT leave machine unattended when it is running.
ˇ Only operate during daylight or with good artificial light.
ˇ Be careful of traffic when operating near or crossing roadways.
ˇ Use extra care when you come to blind corners, shrubs, trees, or other objects that may block your vision.
ˇ DO NOT let untrained person operate the machine.
ˇ Be alert at all times, drive forward carefully. People can move quickly into the area before you know it.
ˇ Back carefully. Shut off PTO and look behind the machine carefully, especially for children, before you back up.
Park Safely
ˇ Stop machine on a level surface, not on a slope.
ˇ Engage park brake whenever you leave the vehicle.
ˇ Before you leave the operator's seat, wait for engine and all moving parts to STOP.
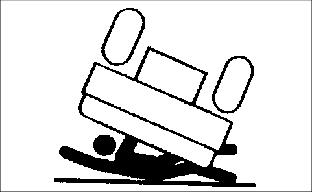
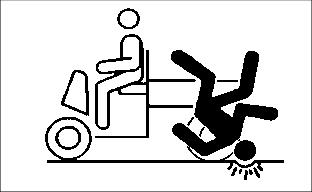
Avoid Tipping
ˇ DO NOT drive where machine could slip or tip.
ˇ Stay alert for holes and other hidden hazards in the terrain.
ˇ Slow down before you make a sharp turn or operate on a slope.
ˇ When operating with a load, limit loads to those you can safely control, and use counterweights when required per your attachment manual.
ˇ Drive up and down a hill - not across. Be careful when you change direction on a slope.
ˇ DO NOT stop when going up hill or down hill. If machine stops going up hill, STOP PTO and back down slowly.
Operator Training Required
ˇ Study operation section of this manual before operating the machine.
ˇ Operate machine in an open, unobstructed area under the direction of an experienced operator.
ˇ Learn the use of all controls.
ˇ Operator experience is required to learn the moving, stopping, turning and other operating characteristics of the machine.
Keep Riders Off
ˇ Only allow the operator and ONE passenger on the machines bench seat. Keep riders off except on the bench seat.
ˇ Riders on the machine or attachment (other than on the vehicle seat) may be struck by foreign objects or thrown off the machine causing serious injury.
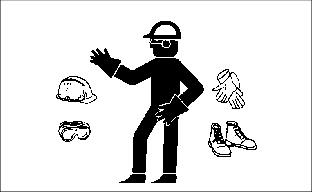
Wear Appropriate Clothing
ˇ Wear close fitting clothing and safety equipment appropriate for the job.
ˇ Loud noise can cause impairment or loss of hearing, wear a suitable protective device such as earplugs.
ˇ Do not wear radio or music headphones while operating the machine. Safe operation requires your full attention.
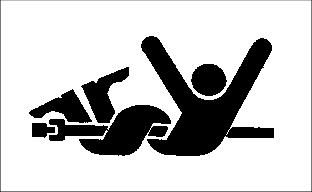
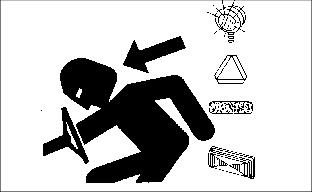
Stay Clear Of Rotating Drivelines
Entanglement in rotating driveline can cause serious injury or death:
ˇ Keep hands, feet, and clothing away from power driven parts.
ˇ Wear close fitting clothing.
ˇ STOP the engine and be sure PTO driveline is stopped before getting near it.
Check Wheel Bolts
ˇ A serious accident could occur causing serious injury if wheel bolts are not tight.
ˇ Check wheel bolt tightness often during the first 100 hours of operation.
Attachments
ˇ Use approved attachments only.
ˇ Traction is reduced without an attachment installed. Operate only on level ground and slowly without an attachment.
Transport Safely
ˇ Use safety lights and devices. Slow moving machines when driven on public roads are hard to see, especially at night. Avoid personal injury or death resulting from a collision with a vehicle.
ˇ Flashing warning lights are recommended whenever driving on public roads to increase visibility. Extra flashing warning lights may need to be installed.
ˇ A safety lighting kit is available from your John Deere distributor.
Avoid Damage To Plastic And Painted Surfaces
ˇ Insect repellent spray may damage plastic and painted surfaces. Do not spray insect repellent near machine.
ˇ Be careful not to spill fuel on machine. Fuel may damage surface. Wipe up spilled fuel immediately.
Raising And Lowering Seat
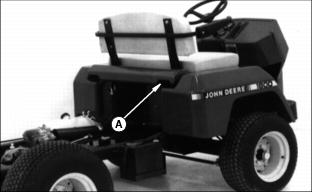
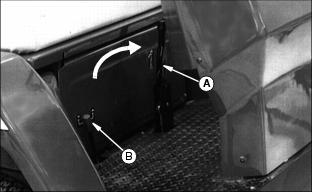
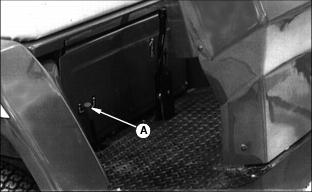
1. Lift up on back of seat (A) and tip seat forward to expose engine compartment.
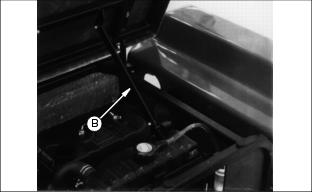
2. Push down on seat support (B) to lock seat in forward position.
1. Push up on seat and pull up on seat support to release seat from locked position.
2. Hold on to seat and lower it to the operating position.
Adjusting Seat
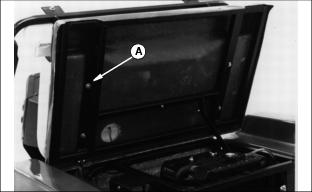
1. Raise seat and lock seat in forward position.
2. Loosen four nuts (A) on underside of seat.
3. Move seat forward or backward to the desired position.
Using The Park Brake
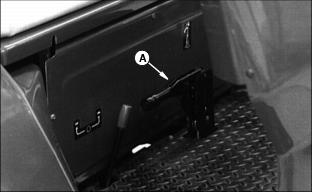
ˇ Pull park brake lever (A) up.
ˇ Push park brake lever (A) down.
Indicator Lights
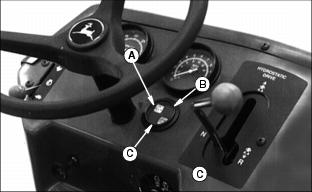
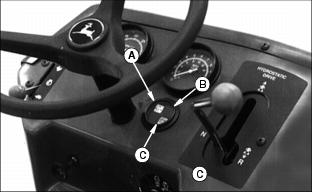
ˇ Engine Oil Pressure indicator (A) will come on when engine oil pressure is too low.
ˇ Battery Discharge indicator (C) will come on when output is too low.
ˇ Water temperature indicator (B) will come on when water temperature is too high.
If indicator light comes on during operation, stop engine and perform appropriate service.
If appropriate service information cannot be found in this manual, refer to vehicle technical manual or see your John Deere distributor.
Starting The Engine
Engine will not start unless brake pedal is completely depressed or park brake is engaged.
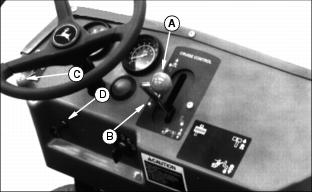
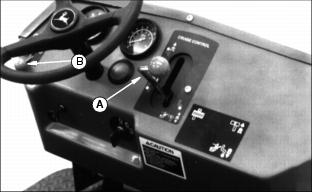
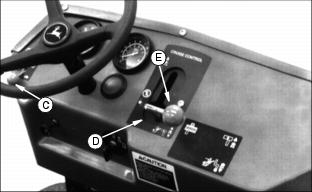
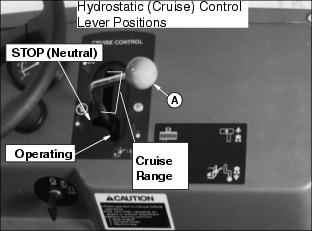
1. Put hydrostatic (cruise) control lever (A) in the STOP (neutral) position (B).
2. LOCK park brake or push down brake pedal.
3. Push throttle control lever (C) up to 1/4 position.
NOTE: You do not need to choke a warm engine.
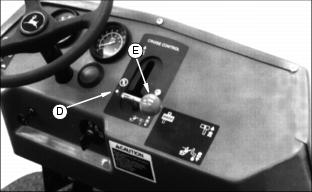
4. Cold engine: Pull choke lever (D) out to full choke position.
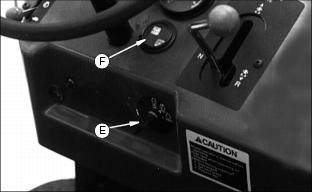
5. Turn key (E) to RUN position.
ˇ Engine Oil Pressure light should be on.
ˇ Battery Discharge light should be on.
6. Turn key to START position:
ˇ Engine Coolant Temperature indicator light should come on and go out.
ˇ If engine does not start within 5 seconds, wait 10 seconds.
ˇ Crank engine again 5 seconds.
Repeat this procedure if necessary.
7. As soon as engine starts, release key. The key will return to the RUN position and indicator lights should go off. If light does not go off, stop engine and perform appropriate service.
8. After engine starts, gradually push the choke knob halfway in. You may have to leave the choke knob halfway in until the engine warms.
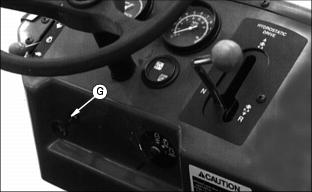
9. As engine warms, gradually push choke knob (G) all the way in.
Stopping The Engine
1. Put hydrostatic (Cruise) control lever (A) in the STOP (neutral) position.
2. Pull throttle lever (B) down to SLOW. Allow engine to idle for a minute.
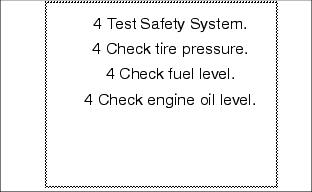
Daily Operating Checklist
Testing Safety Systems
Use the following procedure to check for normal operation of vehicle. If there is a malfunction during one of these procedures, DO NOT operate vehicle. (See technical manual or your John Deere distributor for service.)
TEST 1
Check operation of indicator lights:
ˇ Turn key to RUN position. DO NOT crank engine.
ˇ Engine Oil Pressure (A) and Battery Discharge indicator (C) must light.
ˇ Engine Coolant Temperature (B) indicator must light when you crank the engine.
If one indicator does not light, replace indicator bulb. (See Replacing Indicator Light Bulb in SERVICE-ELECTRICAL section.)
If new indicator bulb does not light or no indicators work, see your John Deere distributor.
TEST 2
2. DO NOT push down service brake pedal.
3. Turn key to START position.
TEST 3
ˇ Start engine. (See Starting The Engine in this section.)
ˇ Stand up. DO NOT get off vehicle. Engine should stop.
ˇ Start engine. (See Starting The Engine in this section.)
ˇ Stand up. Engine should continue to run.
Using Travel Controls
3. Push park brake lever (A) down to the unlocked position.
4. Move the axle shift lever (B) to the proper speed for the job.
6. Move hydrostatic (cruise) control lever (E) to the right and down to the operating position (D).
7. Push throttle lever (C) up to the FAST position.
NOTE: When hydrostatic (Cruise) control lever is in the Operating position, forward OR reverse travel pedals can be used.
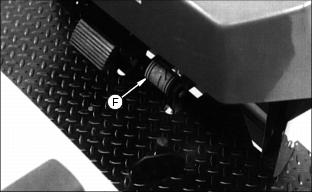
ˇ Slowly push down forward pedal (F). Vehicle will travel faster the farther down you push the pedal.
ˇ Move hydrostatic (cruise) control lever (E) back to the STOP (neutral) position (D).
ˇ Carefully check area behind vehicle.
ˇ Move hydrostatic (Cruise) control lever (E) to the right and down to the operating position.
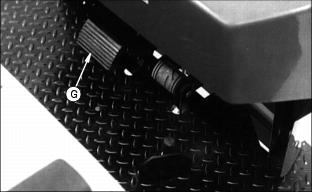
ˇ Slowly push down reverse pedal . Vehicle will travel faster the farther down you push the pedal.
Travel pedals will return to the STOP (neutral) position when travel pedals are released or when brake pedal is pushed.
Using 2-Speed Axle Shift Lever
NOTE: The 2-speed axle shift lever must be in the
FAST or SLOW position before the vehicle will move.
For traveling back and forth between jobs, move lever (A) to the FAST (rabbit) position.
For operating under heavy load, move lever to the SLOW (turtle) position.
Using Cruise Control
1. Move hydrostatic (cruise) control lever (A) to the right and up to desired cruise speed.
NOTE: Vehicle will increase speed if you push down
on the forward pedal. When you release the forward pedal, vehicle will return to set cruise speed.
2. Push down brake pedal or return hydrostatic (Cruise) control lever to STOP (neutral) position to disengage cruise control.
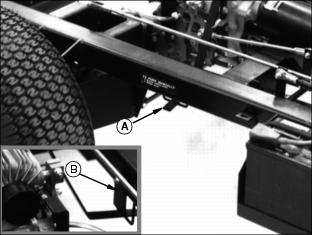
Using Free-Wheeling Lever
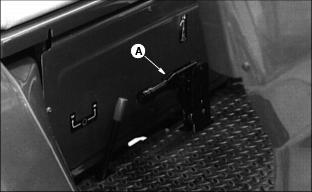
IMPORTANT: Avoid damage! To prevent transmission damage, DO NOT pull or push vehicle a long distance. DO NOT TOW VEHICLE. |
2. Move hydrostatic (Cruise) control lever to STOP (neutral) position.
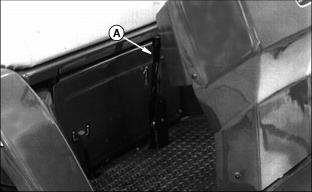
3. Push stop (B) away from free-wheeling lever (A).
4. Pull up and release free-wheeling lever to allow vehicle movement.
NOTE: Transmission will return to operating position when engine is started.
Operating Vehicle Engine When The Operator Is Off The Seat
NOTE: For normal operating conditions, the vehicle engine should stop running when the operator gets off the seat. If not, have vehicle serviced.
To keep vehicle engine running when operator is off the seat:
ˇ Push down brake pedal to stop vehicle.
ˇ Put hydrostatic control (cruise) lever in STOP (neutral) position.
ˇ Engine will continue running when you get off of the seat.
Transporting Vehicle On A Trailer
1. Drive forward onto a trailer. Lock park brake.
2. Fasten vehicle to trailer with heavy-duty straps, chains, or cables.
3. Block rear wheels with chocks or wood blocks.
4. Trailer must have signs and lights required by law.
Positioning PTO Stub Shaft Shield
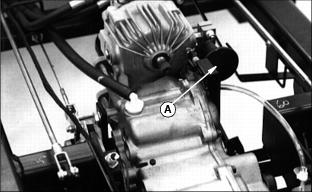
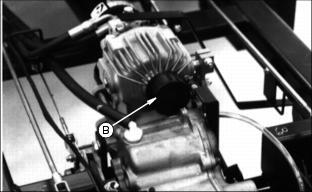
1. When installing attachment, move shield to the open position (A).
2. When attachment is removed, be sure shield is in the closed position (B).

