![]()
Introduction
Safety Signs
Preparing Vehicle
Installing
Removing
Operating
Stay Clear of Rotating Drivelines
Avoid Injury from Moving Parts
Avoid Injury from Hitting Obstructions
Transporting Tractor/Front Mower and Snowblower
Raising and Lowering Snowblower
Service Safely
Service
Troubleshooting
Storing Machine
Assembly
Specifications
John Deere Service Literature
John Deere Quality Statement
Copyright© Deere & Company

Operating
Operate Safely

· Check vehicle brake action before you operate. Adjust or service brakes as necessary.
· Inspect machine before you operate. Be sure hardware is tight. Repair or replace damaged, badly worn, or missing parts. Be sure guards and shields are in good condition and fastened in place. Make any necessary adjustments before you operate.
· Clear work area of objects that might be thrown. Keep people and pets out of the work area. Stop machine if anyone enters the area.
· If you hit an object, stop the machine and inspect it. Make repairs before you operate. Keep machine properly maintained and in good working order.
· DO NOT leave machine unattended when it is running.
· Only operate during daylight or with good artificial light.
· DO NOT let anyone, especially children, ride on machine or vehicle.
· DO NOT let children or an untrained person operate machine.
· Do not wear radio or music headphones while operating the machine. Safe operation requires your full attention.
· Do not blow snow toward people, pets, vehicles or buildings.
Wear Appropriate Clothing
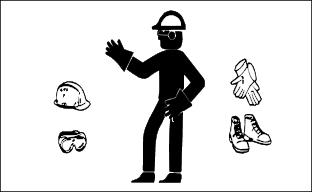
· Wear close fitting clothing and safety equipment appropriate for the job.
· Loud noise can cause impairment or loss of hearing, wear a suitable protective device such as earplugs.
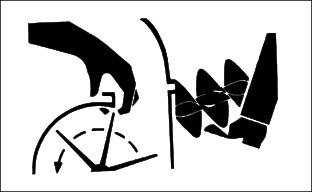
Stay Clear of Rotating Drivelines
Entanglement in rotating driveline can cause serious injury or death:

· Wear close fitting clothing.
· STOP the engine and be sure PTO driveline is stopped before getting near it.
Avoid Injury from Moving Parts
· Keep hands, feet and clothing away from snowthrower and discharge chute when auger is turning.
· Stop auger when you are not throwing snow.
· Stop vehicle engine before you unplug, repair, or adjust snowthrower.
Avoid Injury from Hitting Obstructions
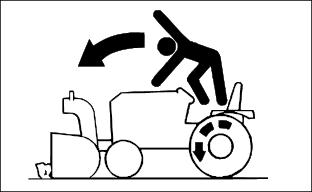
· Raise snowthrower when you drive between jobs.
· Slow down when you remove snow.
Transporting Tractor/Front Mower and Snowblower
1. DO NOT tow tractor/front mower and snowblower. (See your tractor/front mower operator's manual for information on pushing tractor.)
2. Use a heavy-duty trailer to transport tractor/snowblower.
3. MAKE SURE PTO is DISENGAGED.
4. Lower snowblower to trailer deck. LOCK park brake.
5. Trailer should have all lights and signs required by law.
6. Fasten tractor/front mower and snowblower to trailer with straps, chains, or cables.
Snowblowing Tips
Adjust runners before you clear snow.
Use snowblower only at full throttle.
Use snowblower only at a safe travel speed.
· When you throw snow close to buildings or trees.
Raise snowblower when you drive between jobs.
Use drift blade to help cut through drifted snow.
Throw snow downwind, if possible.
· STOP snowblower immediately.
· Check for damage. If damaged, repair damage before you use snowblower again.
Before you clean or unplug snowblower:
· Wait for ALL moving parts to STOP.
Clean snowblower after you use it.
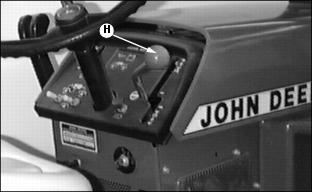
Raising and Lowering Snowblower
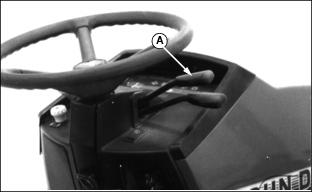
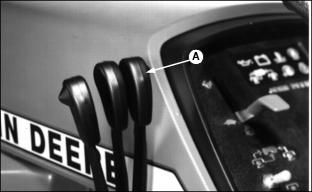
400 Series:

· To LOWER snowblower: Push lever (A) FORWARD.
· To RAISE snowblower: Pull lever (A) REARWARD.
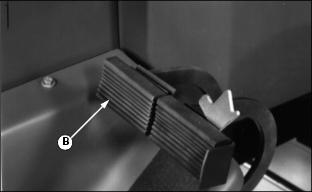
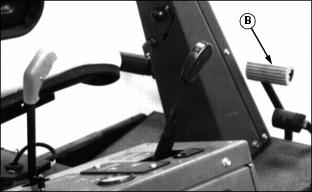
300 Series, 420, 430, and F900 Series:

· To LOWER snowblower: Push lever (B) FORWARD.
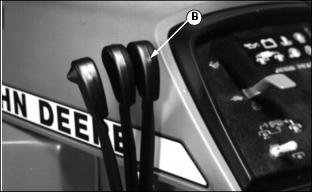
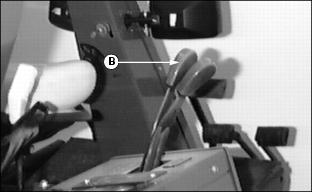
· To RAISE snowblower: Pull lever (B) REARWARD.
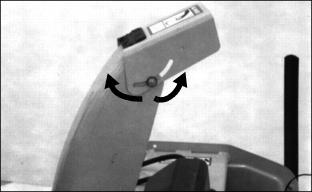
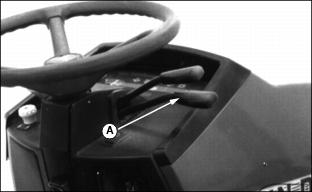
Turning Discharge Chute
400 Series:
· To turn discharge chute to the RIGHT: Pull lever (A) toward you.
· To turn discharge chute to the LEFT: Push lever (A) forward.
F900 Series:

· To turn discharge chute to the RIGHT: Pull lever (A) REARWARD.
· To turn discharge chute to the LEFT: Push lever (A) FORWARD.
300 Series:

· To turn discharge chute to the RIGHT: Push lever (A) FORWARD.
· To turn discharge chute to the LEFT: Pull lever (A) REARWARD.
420 and 430:

· To turn discharge chute to the RIGHT: Push lever (A) FORWARD.
· To turn discharge chute to the LEFT: Pull lever (A) REARWARD.
Adjusting Spout
Move spout to desired position.
Adjusting Runners
NOTE: ·Before using snowblower on gravel or uneven surfaces, lower runners fully.
·Both runners must be in same position.
Lower snowblower to the ground.
To clear snow from a SMOOTH SURFACE:
· Loosen hardware on each runner.
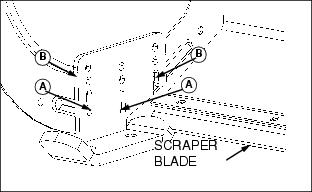
Picture Note: MOUNTED ON INSIDE
· Adjust runner to desired POSITION (A or B).
To clear snow from a ROUGH or a GRAVEL SURFACE:
· Remove two cap screws and lock nuts from each runner.

Picture Note: MOUNTED ON OUTSIDE
· Insert cap screws and lock nuts in POSITION (C or D).
Operating Snowblower
NOTE: See your tractor/front mower operator's manual for detailed information on controls.
2. Push lever (A) forward to lower snowblower to the ground.
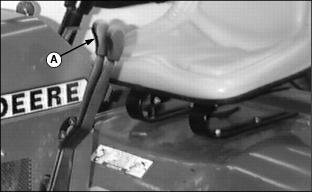

3. Once snowblower is on the ground push lever (A) forward with a slight jerk:
· This will lock the lever in the FLOAT position.
· This FLOAT position allows the snowblower to follow the contours of the surface.
NOTE: 425, 445, 455, and F900 Series, PTO will not work when brake is engaged.


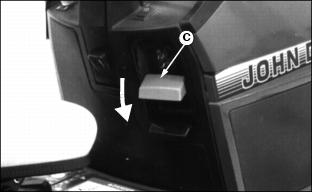
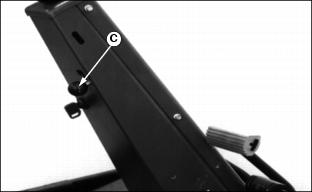
· 400 Series: Push handle (C) DOWN
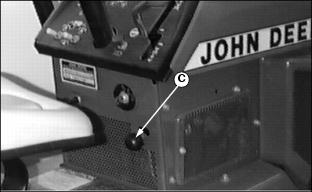
· 300 Series: Pull knob (C) UP to unlock park brake.
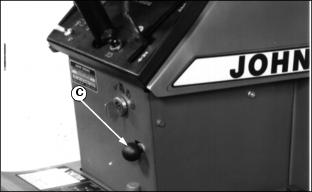
· 420 and 430: Pull knob (C) UP to unlock park brake.
· F900 Series: Pull knob (C) UP to unlock park brake.
IMPORTANT: Avoid damage! To prevent clutch damage: · DO NOT ENGAGE PTO when engine is running at full throttle.Throttle lever, (E). |
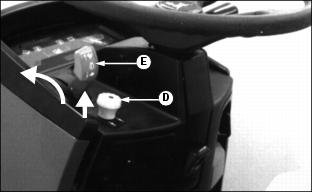
· 400 Series: Engage PTO by pulling knob (D) UP

· 300 Series: Engage PTO by pushing switch (D) UP.

· 420 and 430: Engage PTO by pushing switch (D) UP.
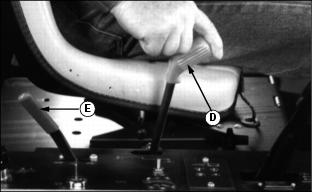
· F900 Series: Engage PTO by pushing lever (D) UP.
8. Move throttle lever (E) to FULL throttle when blowing snow. This will give you the best performance.
400 Series:
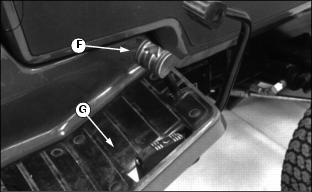
· Push pedal (F) to begin FORWARD travel.
· Push pedal (G) to begin REARWARD travel.
· Operate snowblower at a safe travel speed.
F900 Series:
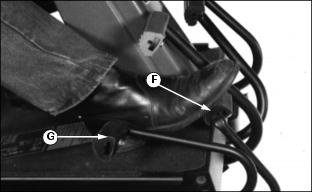
· Push pedal (F) to begin FORWARD travel.
· Push pedal (G) to begin REARWARD travel.
· Operate snowblower at a safe travel speed.