Compact Utility Tractor with Hydrostatic Transmission
Introduction
Safety Signs
Controls
Operating Machine
Replacement Parts
Service Machine Safely
Service Interval Chart
Service Engine
Service Transmission
Checking The Front Axle Oil Level
Hydrostatic Transmission and Hydraulic Oil
Checking Hydrostatic Transmission Oil Level
Changing Hydrostatic Transmission Oil, Oil Filter and Suction Screen
Service Electrical
Service Miscellaneous
Troubleshooting
Storing Machine
Assembly
Specifications
Warranty
John Deere Service Literature
John Deere Quality Statement
Copyright© Deere & Company

Service Transmission
Gear Case Oil
Use the following oil viscosity based on the air temperature range. Operating outside of the recommended oil air temperature range may cause premature gear case failure.
IMPORTANT: Avoid damage! ONLY use a quality oil in this gear case. DO NOT mix any other oils in this gear case. DO NOT use BIO-HY-GARD® in this gear case. |
The following John Deere gear case oil is PREFERRED:
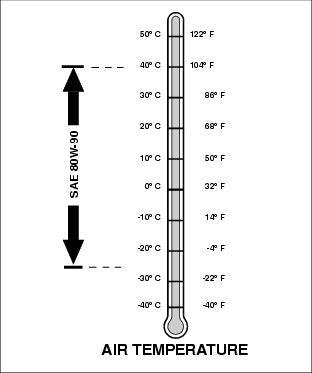
· GL-5 GEAR LUBRICANT®-SAE 80W-90
Other gear case oils may be used if recommended John Deere gear case oil is not available, provided they meet the following specification:
· API Service Classification GL-5.
Checking The Front Axle Oil Level
1. Park tractor on level surface.
2. Lower attachments and stop engine.
3. Turn dipstick (A) to remove it.
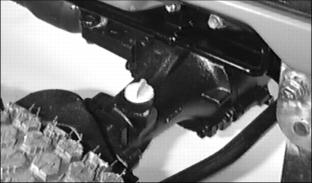
4. Remove and wipe the dipstick. Insert dipstick. Do not screw dipstick into case to check oil level. Pull it out.
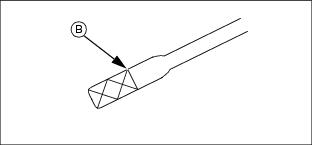
5. Oil level should be on the XX area (B) on dipstick.
6. If oil level is low, pour oil into the dipstick opening. Add GL-5 Gear Lubricant®-SAE 80W-90 or equivalent. Oil level should be to the top of the XX area (B) on the dipstick. Install an tighten dipstick.
7. Allow oil at least one hour to settle, then recheck. Recheck again after the first several hours of operation.
Changing the Front Axle Oil
1. Park tractor on level surface.
2. Lower attachments and stop engine.
NOTE: For draining purposes there is approximately 3.4 L (3.6qt.) of oil in the front axle.
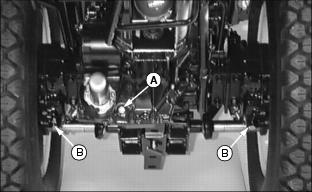
3. Remove differential drain plug (A) from center of axle and drain plugs (B) from left and right spindles. Drain oil into suitable container.
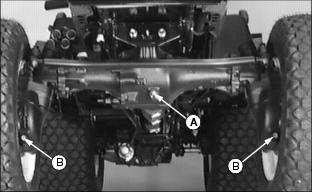
4. Install and tighten three drain plugs after all oil is drained.
5. Add approximately 3.4 L (3.6 qt.) of GL-5 Gear Lubricant®-SAE 80W-90 or equivalent.
IMPORTANT: Avoid damage! Allow oil one hour to settle before checking level. Recheck oil level after several hours of operation. |
6. Remove and wipe the dipstick. Insert dipstick. Do not screw dipstick into case to check oil level. Pull it out.
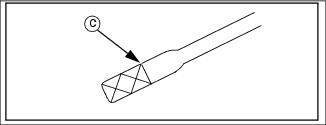
7. Oil level should be to the top of the XX area (C) on the dipstick.
8. If oil level is low, add oil through the dipstick opening.
9. Install and tighten the dipstick.
Hydrostatic Transmission and Hydraulic Oil
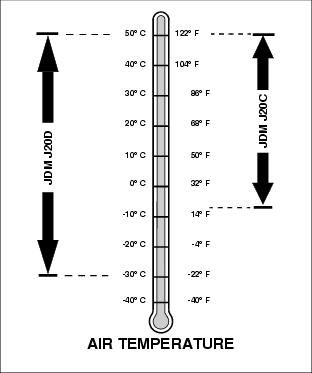
Use oil viscosity based on the expected air temperature range during the period between oil changes.
The following John Deere transmission and hydraulic oil is PREFERRED:
The following John Deere oil is also recommended if preferred oil is not available:
Other oils may be used if recommended John Deere oils are not available, provided they meet one of the following specifications:
· John Deere Standard JDM J20D
· John Deere Standard JDM J20C
Checking Hydrostatic Transmission Oil Level
1. Park tractor on level surface.
2. Lower attachments and stop engine. Transmission oil must be cold for accurate reading.
3. Remove dipstick (A). Check oil level on dipstick.
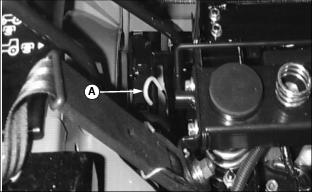
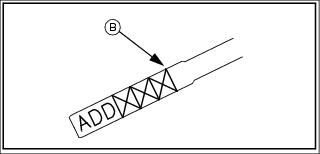
4. Oil level should be in XXX area (B). Oil level is low if level is in the add position below XXX area.
IMPORTANT: Avoid damage! Prevent contamination of hydraulic oil. Carefully clean around filler cap before opening. |
5. If oil level is low, remove oil filler cap (C).
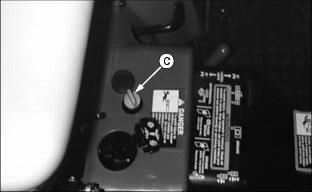
IMPORTANT: Avoid damage! DO NOT overfill hydrostatic transmission. Oil expands during operation and could overflow. |
6. Add Low Viscosity Hy-Gard® (JDM J20D) or equivalent oil until level is at the top of XXX mark (B) on dipstick.
Changing Hydrostatic Transmission Oil, Oil Filter and Suction Screen
1. Park tractor on level surface.
2. Lower attachments and stop engine.
NOTE: For draining purposes there is approximately 12.5 L (3.3 gal) of oil in this transmission.
3. Remove transmission drain plug (A) and left and right final drive drain plugs (B). Drain oil into suitable container.
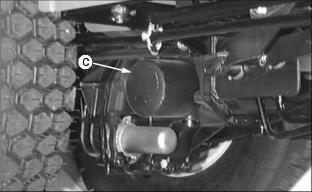
4. Turn transmission filter (C) counterclockwise, using a filter wrench, to remove it. Some oil may come out of filter and filter base during removal. Use a drain pan to prevent an oil spill. Discard filter.
5. Remove drain plug (D) from suction screen cover.
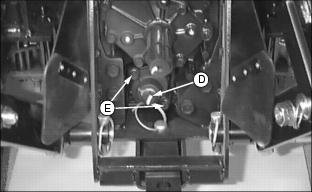
6. Remove two bolts and two lock washers (E) to remove the suction screen cover (F).
7. Remove and clean suction screen assembly:
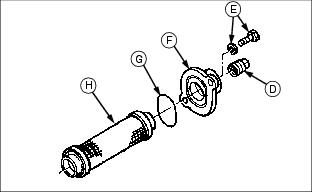
8. Assemble and install the suction screen assembly.
9. Install and tighten four drain plugs (A, B and D).
10. Put a film of clean transmission oil on seal of new filter.
11. Fill filter 1/3 to 1/2 full with Low Viscosity Hy-Gard® (JDM J20D) or equivalent.
12. Tighten filter quickly until it contacts mounting surface. Tighten filter by hand an additional 1/2.
IMPORTANT: Avoid damage! Prevent contamination of hydraulic oil. Carefully clean around filler cap and dip stick before opening. |
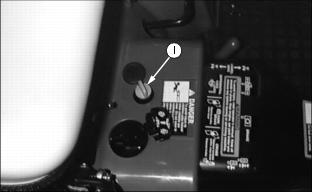
13. Remove oil fill cap (I) and add approximately 12.5L (3.3 gal) Low Viscosity Hy-Gard® (JDM J20D) or equivalent.
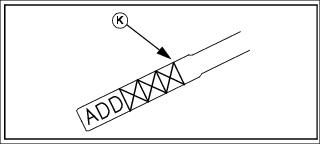
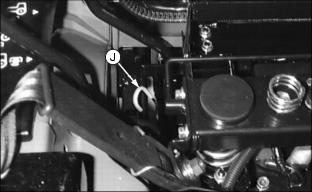
14. Remove dipstick (J). Check oil level on dipstick.
IMPORTANT: Avoid damage! DO NOT overfill hydrostatic transmission. Oil expands during operation and could overflow. |
15. Add oil until level is at the top of the XXX area (K) on dipstick.