![]()
47-Inch Front Mount for F900 Series and F1145
Introduction
Safety Signs
Preparing Vehicle
Installing
Removing
Operating
Service Safely
Service
Checking Auger Gearbox Oil Level
Checking Snowblower Gearbox Oil Level
Lubricating Snowblower Wheel Bearings (F900 Series Only)
Replacing Discharge Chute Cable
Reversing or Replacing Wear Plate
Reversing or Replacing Scraper Blade
Replacing Snowblower Wheel (F900 Series Only)
Troubleshooting
Storing Machine
Assembly
Specifications
John Deere Service Literature
John Deere Quality Statement
Copyright© Deere & Company

Service
Service Intervals
Grease
Use grease based on the expected air temperature range during the service interval.
The following greases are preferred:
· John Deere Moly High Temperature EP Grease.
· John Deere High Temperature EP Grease.
Other greases may be used are:
· SAE Multipurpose EP Grease with 3 to 5 percent molybdenum disulfide.
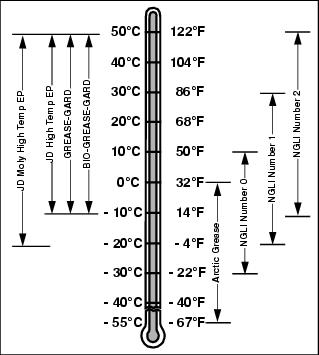
· Greases meeting Military Specification MIL-G-10924C may be used as arctic grease.
Gear Oil
Use oil viscosity based on the expected air temperature range during the period between oil changes.
John Deere GL-5 Gear Lubricant is recommended.
Other oils may be used if they meet one or more of the following:
· API Service Classification GL-5.
· Military Specification MIL-L-2105D.
· Military Specification MIL-L-2105C.
· Military Specification MIL-L-2105B.
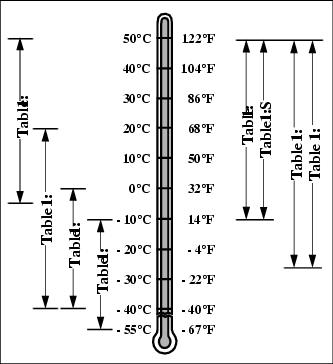
Oils meeting Military Specification MIL-L-10324A may be used as arctic oils.
Checking Auger Gearbox Oil Level
1. Park tractor on level surface.
2. STOP engine. Lock park brake.
3. Lower snowblower to ground.
5. Oil should be level with check plug hole.
6. Remove fill plug, if oil is low.
7. Add oil specified in Lubrication section.
8. Install and tighten fill plug and check plug.
Checking Snowblower Gearbox Oil Level
1. Park Front Mower on level surface.
2. STOP engine. Lock park brake.
3. Lower snowblower to ground.
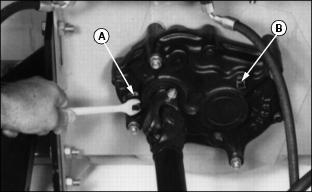
5. Oil should be level with check plug hole.
6. Remove fill plug (B), if oil is low.
7. Add oil specified in Lubrication section.
8. Install and tighten fill plug and check plug.
Lubricating Worm Gear Shaft
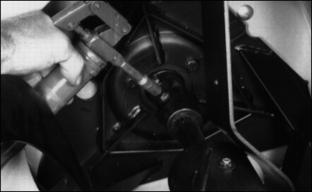
Lubricate with one or two shots of John Deere Moly High Temperature EP Grease or equivalent.
Lubricating Driveline
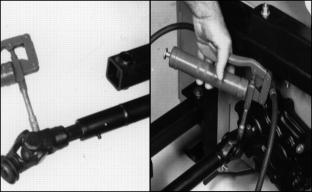
Lubricate each point with one or two shots of John Deere Moly High Temperature EP Grease or equivalent.
Lubricating Snowblower Wheel Bearings (F900 Series Only)
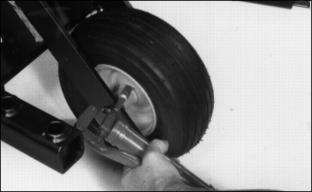
Lubricate with one or two shots of John Deere Moly High Temperature EP Grease or equivalent.
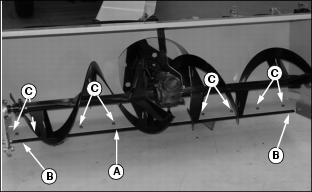
Lubricating Auger Shaft
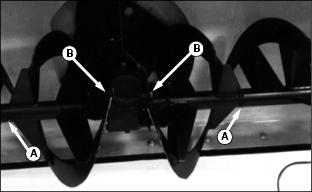
Lubricate (A) with John Deere Moly High Temperature EP Grease or equivalent. Apply grease until it comes out of auger shafts (B) at gearbox.
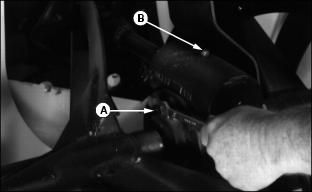
Replacing Shear Bolt

NOTE: A shear bolt (A) is installed in each end of auger. The shear bolt will break when snowblower hits a solid object. This protects the auger and snowblower from serious damage.
1. If you hit a solid object, STOP snowblower immediately.
2. STOP engine. Lock park brake. Lower snowblower.
3. Find and correct cause for shearing.
4. Remove shear bolt stored in auger housing.
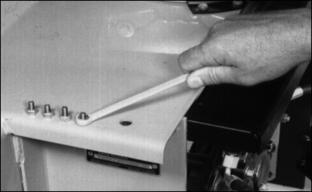
Replacing Discharge Chute Cable
2. Turn chute 90° to left using hydraulic lever. Hydraulic cylinder should be completely retracted.
3. STOP engine. Lower snowblower. Lock park brake.
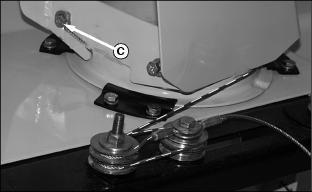
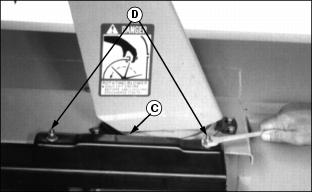
4. Remove two nuts, washers, and cable shield.
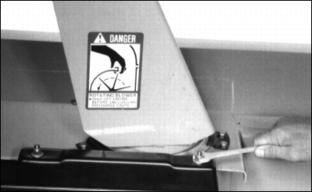
6. Disconnect cable ends from chute.

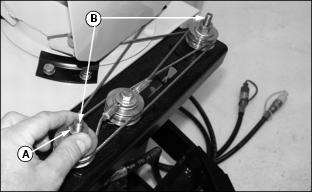
7. Remove nut (D), bolt and washers (A).
8. Remove cable ends (B) and (C) from pulleys. Remove cable assembly.
9. Install new cable so longer cable end (B) is to the left and shorter cable end (C) is to the right.
10. Install bolt and washers (A) in cable assembly eyelet. Install and tighten nut (D).
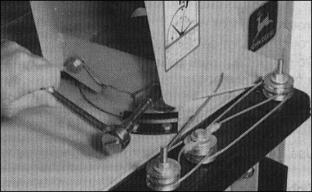
Routing Chute Cables
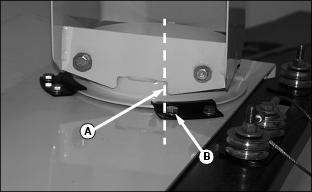
1. Move chute so tab (A) on chute is in line with edge of cap screw (B). Chute opening will be on the left.
3. Use locking pliers to pull cable tight.
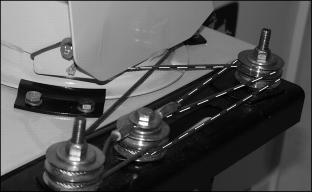
· Around bottom center pulley.
6. Use locking pliers to pull cable tight.
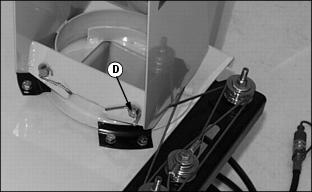
Installing Cable Shield
1. Install a washer (A) on each cable shield bolt (B).
2. Install cable shield (C), two washers, and nuts (D).
Reversing or Replacing Wear Plate
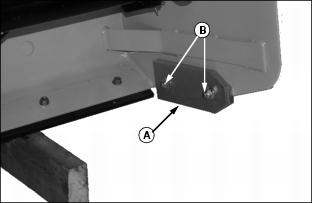
When edge of plate (A) becomes worn, rough, or bent, reverse the plate. If both edges are worn, rough or bent, replace the plate:
· Raise snowblower. Put blocks under auger housing to prevent snowblower from falling.
· STOP engine. Lower snowblower. Lock park brake.
· Remove two nuts (B) and bolt. Remove plate.
· Install plate with square end to rear of snowblower. Install bolts and nuts and tighten.
· START engine and raise snowblower. Remove blocks. Lower snowblower.
Reversing or Replacing Scraper Blade
NOTE: Reverse the blade when one edge of blade (A) becomes worn, rough, or bent. If both edges of blade are worn, rough, or bent, replace blade.
1. Safely raise snowblower. Put blocks under auger housing (B) to prevent snowblower from falling.
4. Flip blade so rear edge of blade is at front.
5. Install blade. Install bolts and tighten nuts.
Replacing Snowblower Wheel (F900 Series Only)
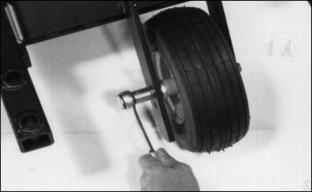
4. Install bearing inside new wheel.