
2243 Gas Professional Greensmower
Introduction
Safety
Controls
Operating Machine
Operating Cutting Units
Replacement Parts
Service Machine Safely
Service Intervals
Service Lubrication
Service Engine
Changing Engine Oil And Filter
Checking and Cleaning Precleaner/Air Cleaner Element
Removing And Replacing Drive Belts
Service Transmission
Service Cutting Units
Service Electrical
Service Miscellaneous
Troubleshooting
Storage
Assembly
Specifications
Warranty
John Deere Quality Statement
Copyright© Deere & Company

Service Engine
Avoid Fumes
 c CAUTION: Avoid injury! Engine exhaust fumes can cause sickness or death:
· If it is necessary to run an engine in an enclosed area, use an exhaust pipe extension to remove the fumes. |
Engine Oil
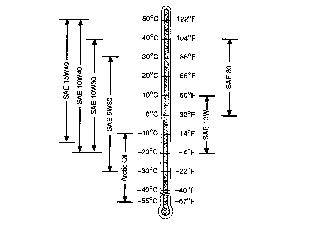
Use oil viscosity based on the expected air temperature range during the period between oil changes.
The following oil is preferred:
Other oils may be used if they meet one of the following:
· API Service Classification SG
· API Service Classification SF
Oils meeting Military Specification MIL-L-46167B may be used as arctic oils.
Checking Engine Oil Level
NOTE: Check oil twice a day if engine is run over 4 hours a day.
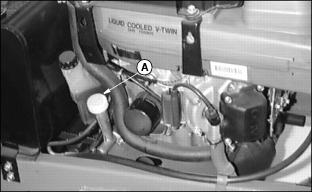
3. Check engine oil when oil is cold.
5. Clean around dipstick. Remove dipstick (A).
6. Install dipstick in tube, but DO NOT tighten. Let dipstick threads rest on top of tube.
7. Remove dipstick. Check oil level on dipstick.
8. Oil must be between ADD and FULL marks.
9. If oil level is low, add oil to bring oil level no higher than FULL mark on dipstick. (See Engine Oil in this section for correct oil.)
10. Install and tighten dipstick. Lower hood.
11. If oil level is above full mark, drain to the proper level. Determine cause of over full condition and correct.
Changing Engine Oil And Filter
NOTE: Change engine oil after the first 5 hours of break-in operation.
1. Run engine to warm the oil.
2. Park mower on level surface.
3. Stop engine, lock park brake, and remove ignition key.
4. Put drain pan under hose (A) and open drain valve (B) to drain oil.
5. Remove oil filter (C). Turn filter counterclockwise to remove.
6. Apply a film of clean engine oil on seal of new filter.
7. Install filter. Turn filter until seal contacts mounting surface. Tighten 1/2-3/4 turn after gasket contact.
8. Tighten valve (B) to 7 N·m (60 in-lbs).
10. Add approximately 1.9 L (2 qt) of oil. (See Engine Oil in this section for correct oil).
11. Run engine at slow speed 2 minutes. Check for leaks around filter.
12. Stop engine and wait a couple of minutes. Check oil level. Add oil only to FULL mark on dipstick.
13. Install and tighten dipstick.
Cleaning Air Intake Screen
1. Stop engine and remove key.
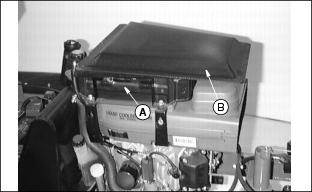
3. Turn tab (A) on both sides and remove air intake screen (B).
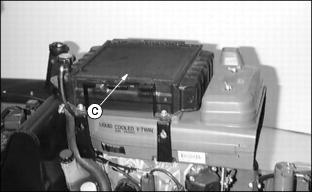
Checking and Cleaning Precleaner/Air Cleaner Element
NOTE: If operating mower in dusty conditions, replace element at more frequent intervals.
Remove air intake screen. (See Cleaning Air Intake Screen in this section).
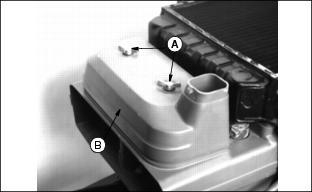
2. Remove bolts (A), washers, and filter housing (B).
NOTE: If precleaner or paper element has a break or is damaged, replace it.
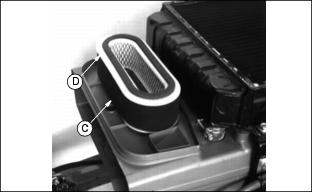
3. Check: If precleaner (C) is dirty, remove it from paper element (D).
4. Check: If paper element is dirty, tap it gently on your hand to remove dust. If element is extremely dirty, install a new element.
5. If precleaner is dirty, wash in a solution of warm water and liquid detergent. DO NOT wash paper element.
6. Rinse precleaner with clean water.
7. Squeeze excess water from precleaner.
8. Allow precleaner to air dry.
9. Put approximately 30 mL (1 oz) of clean engine oil on precleaner. Squeeze precleaner to distribute oil evenly.
10. Install precleaner on paper element.
12. Install cover. Lower hood.
Service Cooling System Safely
Engine Coolant
Use ethylene glycol base coolant. These coolants usually have labels stating "For Automobile and Light Duty Service." These products are also often labeled for use in aluminum engines. Check container label before using.
IMPORTANT: Avoid damage! To prevent engine damage due to overheating, DO NOT use pure antifreeze. DO NOT mix or add any other type additives to the cooling system. |
Mix approximately 50 percent antifreeze with 50 percent distilled or deionized water. This mixture will provide freeze protection to -37 degrees C (-34 degree F).
Certain geographical areas may require lower temperature protection. See the label on your antifreeze container or consult your John Deere distributor to obtain the latest information and recommendations.
The recommended antifreeze provides:
· Corrosion-resistant environment within the cooling system.
· Compatibility with cooling system hose and seal material.
· Protection during cold and hot weather operations.
Checking Coolant Level
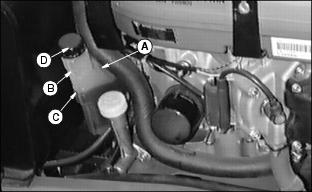
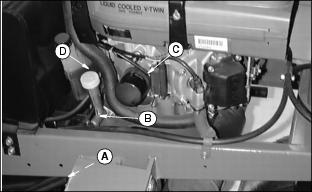
2. Observe coolant in recovery tank (A). Coolant level should be up to H mark (B) on recovery tank when engine is hot or to L mark (C) when engine is cold.
3. Remove cap (D) to add coolant.
4. If coolant is low, add ethylene glycol (without stop-leak additive) antifreeze and distilled or deionized water in the ratio specified on the antifreeze container.
5. Install and tighten recovery tank cap.
6. Clean debris from air intake screens and radiator.
7. Check condition of hoses. Check for leaks or loose connections.
Draining Cooling System
|
c CAUTION: Avoid injury! Do not remove radiator cap unless engine is cool.
Then turn cap slowly to the stop. Release all pressure before removing cap. |
1. Stop the engine and let cool.
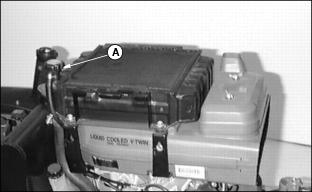
3. Slowly remove radiator cap (A).
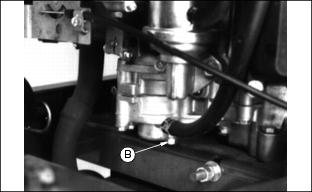
4. Remove drain plug (B) under engine to drain all coolant from radiator and engine.
5. After all coolant has drained, install drain plug. Tighten drain plug.
6. Flush cooling system. (See Flushing Cooling System in this section).
Flushing Cooling System
|
c CAUTION: Avoid injury! Engine and coolant will be hot.
Turn radiator cap using a thick rag or glove to protect your hand. |
IMPORTANT: Avoid damage! To prevent engine damage, DO NOT pour water into a hot engine. DO NOT operate engine without coolant. |
1. Fill cooling system with clean water and John Deere Cooling System Cleaner, or John Deere Cooling System Quick Flush or an equivalent. Follow directions on the can.
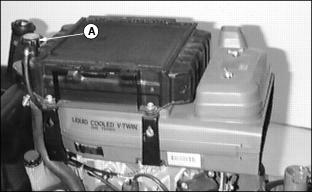
2. Install and tighten radiator cap (A).
3. Start and run engine until it reaches operating temperature. Stop engine.
4. Drain the cooling system immediately before rust and dirt settle. (See Draining Cooling System in this section).
5. Install and tighten drain plug.
Filling Cooling System
1. Fill cooling system. Mix approximately 50 percent antifreeze with 50 percent distilled or deionized water. This mixture will provide freeze protection to -37 degrees C (-34 degree F).
Certain geographical areas may require lower temperature protection. See the label on your antifreeze container or consult your John Deere distributor to obtain the latest information and recommendations.
John Deere Cooling System Sealer or its equivalent may be added to the radiator to seal leaks. Do not use any other additives in the cooling system.
2. Install and tighten radiator cap.
3. Run engine until it reaches operating temperature.
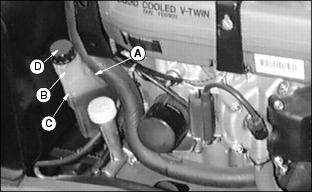
4. Stop engine. After engine cools, check coolant level in recovery tank (A). Level should be up to H mark (B) on tank when engine is hot or L mark (C) on tank when engine is cold. Remove cap (D) to add coolant if necessary.
5. Check condition of coolant system hoses. Install new hoses periodically. Tighten hose clamps regularly.
Checking Spark Plugs
|
c CAUTION: Avoid injury! Before removing spark plugs:
|
NOTE: Engine has two spark plugs, one on each side of engine.
In Canada, replace spark plugs with resistor plugs only.
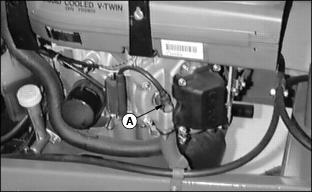
2. Disconnect spark plug wire (A), one on each side of engine.
4. Clean spark plugs carefully with a wire brush.
· -Pitted or damaged electrodes.
6. Replace spark plugs as necessary.
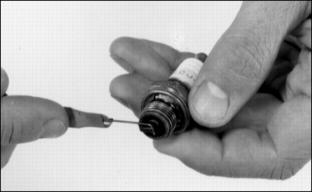
7. Check plug gap using a wire feeler gauge.
8. Gap must be 0.7 mm (0.028 in.).
9. To change gap, bend electrode.
10. Install and tighten spark plugs. Tighten plugs to 20 N·m (15 lb-ft).
Removing And Replacing Drive Belts
For maximum belt life, handle and install positive drive belts with care.
Follow the instructions below to prevent damage to the belt tensile members:
· Do not store belt on a hook.
· Tension belt per operator's manual.
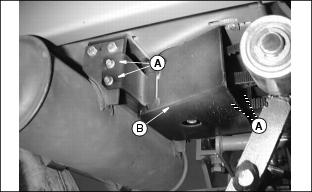
1. Remove four bolts and nuts (A) and shield (B).
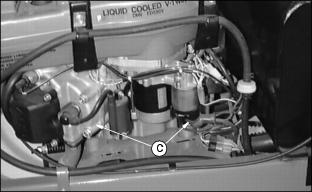
2. Remove pump sprocket shield.
NOTE: Engine should be free to move but not tip. Put engine as far forward as possible.
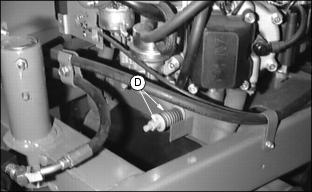
3. Loosen four engine bolts (C) and adjusting nuts (D).
IMPORTANT: Avoid damage! Do not use tools to pry belts over sides of sprockets. Damage to belts may occur. |
NOTE: Pump should be free to move but not tip. Move pump support as far rearward as possible.
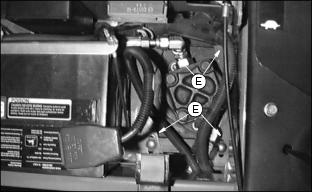
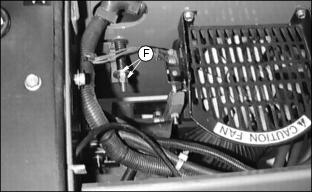
4. Loosen four pump bolts (E) and adjusting nuts (F).
NOTE: Install 10 mm (13/32 in.) wide hydraulic pump
drive belt first.
6. Install 16 mm (5/8 in.) wide hydrostatic drive belt and 10 mm (13/32 in.) wide hydraulic pump drive belt. (See Adjusting Drive Belts in this section.)
Adjusting Drive Belts
For maximum belt life, handle and install positive drive belts with care.
Follow the instructions below to prevent damage to the belt tensile members:
· Do not store belt on a hook.
· Tension belt per operator's manual.
NOTE: Adjust hydrostatic drive belt first.
Hydrostatic drive belt is 16 mm (.63 in.) wide. Hydraulic drive belt is 10 mm (.39 in.) wide.
Shake engine periodically while making adjustment.
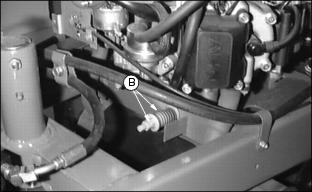
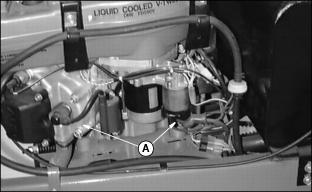
1. Loosen four engine bolts (A) and adjusting nuts (B).
NOTE: Shake pump periodically while making adjustment.
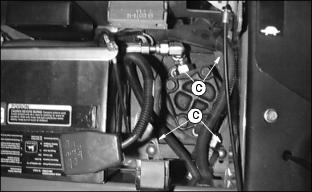
2. Loosen four pump bolts (C).
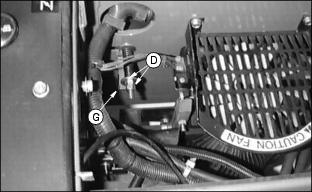
3. Loosen four adjusting nuts (D).
4. Adjust hydrostatic belt tension using spring washer, and nuts assembly (E).
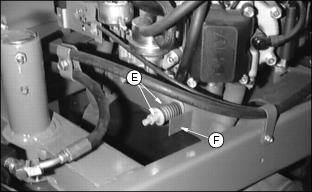
5. Adjust spring, washer, and nut assembly (E) on engine until outside edge of washer is flush with end (F) of gauge strap.
6. Tighten double nuts and four engine bolts.
7. Adjust pump drive belt using spring, washer, and nut assembly (D).
8. Adjust spring, washer, and nut assembly (D) on pump until outside edge of washer is flush with end (G) of gauge strap.
9. Tighten double nuts and four pump bolts.
Replacing Fuel Filter
1. Park machine on level surface. Lift hood.
3. Turn fuel selector valve to OFF position.
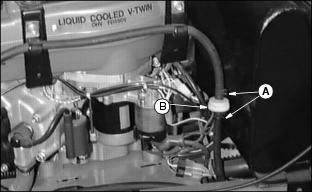
4. Slide hose clamps (A) away from filter (B).
5. Disconnect hoses from filter.
6. Connect hoses to new filter.