John Deere

OMMT2702

Issue C6

2243 Gas Professional Greensmower

Serial No. (958001 - )

Introduction

Safety

Controls

Operating Machine

Operating Cutting Units

Replacement Parts

Service Machine Safely

Service Intervals

Service Lubrication

Service Engine

Service Transmission

Service Cutting Units

Service Electrical

Service Miscellaneous

Checking Tire Pressure
Refueling Machine

Filling Fuel Tank

Filling Fuel Tank (Continued)

Fuel Storage

Adjusting Parking Brake

Tightening Wheel Bolts

Raising Seat

Removing Seat

Raising Hood

Troubleshooting

Storage

Assembly

Specifications

Warranty

John Deere Quality Statement

CopyrightŠ Deere & Company

All Manuals Close Window

Service Miscellaneous


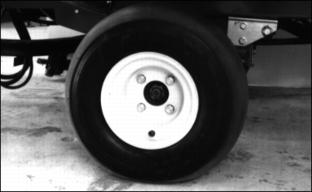
Checking Tire Pressure

c CAUTION: Avoid injury! Explosive separation of a tire and rim parts can cause serious injury or death:

ˇ Do not attempt to mount a tire without the proper equipment and experience to perform the job.

ˇ Always maintain the correct tire pressure. Do not inflate the tires above the recommended pressure. Never weld or heat a wheel and tire assembly. The heat can cause an increase in air pressure resulting in a tire explosion. Welding can structurally weaken or deform the wheel.

ˇ When inflating tires, use a clip-on chuck and extension hose long enough to allow you to stand to one side and NOT in front of or over the tire assembly.

ˇ Check tires for low pressure, cuts, bubbles, damaged rims or missing lug bolts and nuts.


E33695

1. Check tires for damage.

2. Check tire pressure with an accurate gauge.

3. Add air, if necessary. Correct tire pressure is between 69-83 kPa
(10-12 psi) (0.7-0.8 bar).

Refueling Machine

c CAUTION: Avoid injury! Handle fuel with care, it is highly flammable:

ˇ DO NOT refuel machine while you smoke, when machine is near an open flame or sparks, or when engine is running. STOP engine.

ˇ Fill fuel tank outdoors.

ˇ Prevent fires: clean oil, grease and dirt from machine. Clean up spilled fuel immediately.

ˇ Do not store machine with fuel in tank in a building where fumes may reach an open flame or spark.

ˇ To prevent fire and explosion caused by static electric discharge, while you fill tank, use a non-metal fuel container. If you use a funnel, MAKE SURE it is PLASTIC. Avoid using a funnel which has a metal screen or filter.

ˇ Use only clean oil and fuel and clean approved containers and funnels.

ˇ Store oil and fuel in an area protected from dust, moisture and other contamination.

Filling Fuel Tank

IMPORTANT: Avoid damage! Avoid spilling fuel. Fuel can damage plastic and painted surfaces.

DO NOT mix oil with gasoline. Unleaded gasoline with an octane rating of 87 or higher is recommended.

Fuel tank capacity is 18.9 L (5 gal) per tank: 37.9 L (10 gal) total.


ˇ Use only clean, fresh, unleaded regular grade gasoline.

ˇ Remove any trash from top of fuel tank drain area.

ˇ Never use fuel that is stale or has been stored for a long period of time:

Warm Weather: Maximum 60 days.

Cold Weather: Maximum of 90 days.

ˇ Fill fuel tank at the end of each day's operation. This helps to keep condensation out of fuel tank.

Oxygenated Fuel

Oxygenates (either ethanol or MTBE) are added to the gasoline. If you use the oxygenated fuel be sure it is unleaded and meets the minimum octane rating requirement.

The following are the EPA approved percentages of fuel oxygenates:
ETHANOL (Ethyl or Grain Alcohol): You may use gasoline containing up to 10 percent ethanol by volume.
MTBE (Methyl Tertiary Butyl Ether): You may use gasoline containing up to 15 percent MTBE by volume.
METHANOL (Methyl or Wood Alcohol): You may use gaoline containing up to 5 percent methanol by volume, as long as it also contains cosolvents and corrosion inhibitors to protect the fuel system. Gasoline containing more than 5 percent methanol by volume may cause starting and/or performance problems. It may also damage metal, rubber, and plastic parts of your fuel system.
Filling Fuel Tank (Continued)

E33788

1. STOP engine. If engine is hot let it cool several minutes before you add fuel.

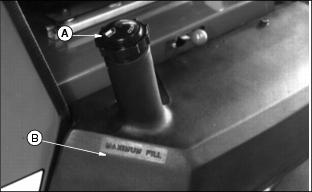
2. Remove fuel tank cap (A) slowly to allow any pressure built up in tank to escape.

3. Fill tank only to maximum fill line (B).

4. Install fuel tank cap.

Fuel Storage

IMPORTANT: Avoid damage! Keep all foreign material out of fuel.


Keep fuel in a clean container in a protected area. Water and sediment must be removed before fuel gets to the engine. Do not use de-icers or depend on fuel filters to remove water from fuel. Install a water separator at the storage tank outlet. See your John Deere distributor for this part.

Store fuel drum on side with plug up.

Adjusting Parking Brake

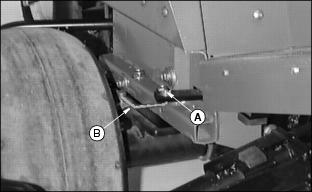
1. Park greensmower on level surface.

M73957

2. Remove cotter pin (A).

3. Adjust rod (B) to minimum length to remove looseness and still be able to replace rod in lever and install cotter pin.

4. Repeat on opposite side.

5. When properly adjusted, each wheel hub should hold 250 Nˇm (185 ft.lb.) of torque with the brake set.

E33708

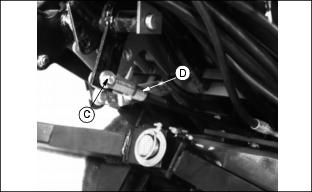
ˇ Remove pin (C) and lengthen the main brake rod (D) as needed to increase the brake holding torque.

6. Install cotter pin (C).

NOTE: Initial setting is approximately 51 mm (2 in.) of thread below connector.

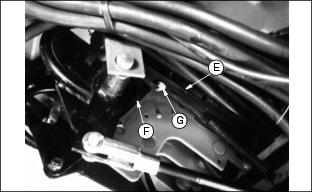
7. Adjust parking brake lock so latch (E) engages pedal (F).

E33961

8. Turn lock nut (G) to adjust.

NOTE: Initial setting is 7 mm (1/4 in.) of thread below lock nut.

Tightening Wheel Bolts

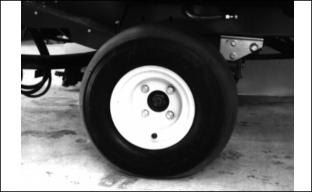
NOTE: Tighten bolts after first 10 hours of operation and every 50 hours thereafter.

E33695

Tighten wheel bolts to 81-95 Nˇm (60-70 lb-ft).

Raising Seat

c CAUTION: Avoid injury! To help prevent injury:

Carefully raise and lower the seat to avoid pinching fingers.


M73971

To raise seat:

ˇ Lift seat (A) all the way up.

ˇ Be sure push nut (B) is seated in notch (C).
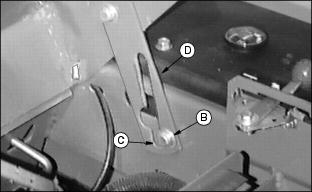

M73968

To lower seat:

ˇ Push up on seat.

ˇ Pull the support rod (D) out of notch (C).

ˇ Let push nut slide in slot as you lower the seat.

Removing Seat
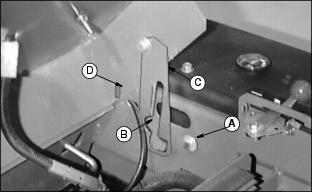

M73970

1. Raise seat.

2. Slide push nut (A) through notch (B) and unlatch support rod (C).

3. Lower seat so that tab (D), one on each side, aligns with notch and slide seat off of frame.

Raising Hood

c CAUTION: Avoid injury! Hood is heavy. Handle weight safely. Carefully raise and lower the hood to avoid pinching hands.

IMPORTANT: Avoid damage! Do Not move the machine with the hood raised.


E33732

1. Stop the engine.

2. Lock the parking brake.

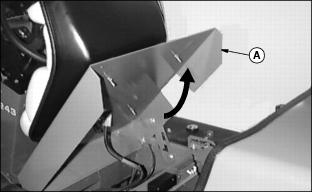
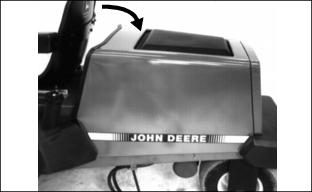
3. Raise the front of the hood.