![]()
Introduction
Safety Signs
Controls
Operating Machine
Replacement Parts
Service Machine Safely
Service Interval Chart
Service Engine
Service Transmission
Service Electrical
Service Miscellaneous
Adjusting Accelerator Pedal Pressure
Adjusting Side Panel Fit When Closed
Cleaning Engine Compartment And Operator Station
Cleaning And Polishing Plastic Hood and Fenders
Troubleshooting
Storing Machine
Assembly
Specifications
Warranty
John Deere Service Literature
QUALITY DOESN'T END WHEN YOU INVEST IN A DEERE
Copyright© Deere & Company

Service Miscellaneous
Fuel
Diesel Fuel
Consult you local fuel distributor for properties of the diesel fuel in your area.
In general diesel fuels are blended to satisfy the low temperature requirements of the geographical area in which they are marketed.
Diesel fuels specified to EN 590 or ASTM D975 are recommended.
In all cases, the fuel shall meet the following properties;
Sulfur content:
· Sulfur content should not exceed 0.5% Sulfur content less than 0.05% is preferred.
· If diesel fuel with sulfur content greater than 0.5% sulfur content is used, reduce the service interval for engine oil and filter by 50%.
· DO NOT use diesel fuel with sulfur content greater than 1.0%.
Bio-diesel fuels meeting DIN 51606 or equivalent specification may be used.
DO NOT mix used engine oil or any other type of lubricant with diesel fuel.
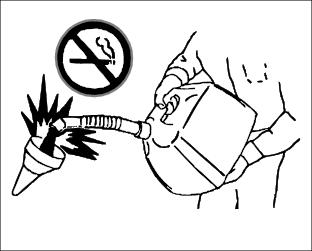
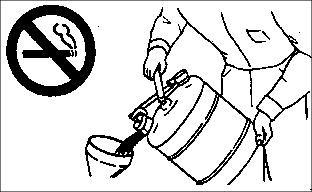
Storing And Handling Fuel
DO NOT USE a galvanized container to store diesel fuel.
Store fuel in plastic containers, aluminum containers, or specially coated containers made for diesel fuels.
DO NOT USE brass coated containers: brass is an alloy of copper and zinc.
Fuel is available in summer or winter grades and should be bought as near to the intended time of use as possible.
IMPORTANT: Avoid damage! To avoid engine damage due to contamination, keep dirt, scale, water, or other foreign material out of fuel. |
Keep fuel in a clean container in a protected area away from buildings.
Keep storage tank on its side with plug up.
Drain water and sediment from storage tank regularly. Water and sediment must be removed before fuel gets into engine. Do not use de-icers to remove water from fuel. Do not depend on fuel filters to remove water.
If possible, install a water separator at the storage tank outlet. (See your John Deere dealer to order.)
NOTE: Diesel fuels stored for a long time may form gum and plug filters and injectors.
Avoid storing fuel for a long time. If there is a very slow turnover of fuel in the tank or supply tank, it may be necessary to add a fuel conditioner to prevent water condensation. Contact your John Deere dealer for proper service or maintenance recommendations.
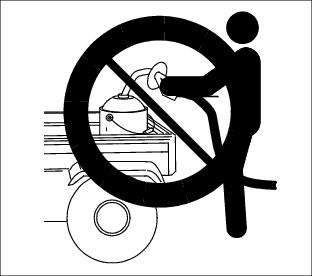
Filling Fuel Tank
Fuel tank capacity is 20 L (5.3 gal.).
Fill fuel tank at end of each day's operation or when fuel gauge shows 1/4 or less fuel in tank. Fill only to bottom of filler neck.
Service Tires Safely
Explosive separation of a tire and rim parts can cause serious injury or death.

DO NOT attempt to mount a tire unless you have the proper equipment and experience to perform the job.
Always maintain the correct tire pressure. Do not inflate the tire above the recommended pressure. Never weld or heat a wheel and tire assembly. The heat can cause an increase in air pressure resulting in a tire explosion. Welding can structurally weaken or deform the wheel.
When inflating tires, use a clip-on chuck and an extension hose long enough to allow you to stand to one side and NOT in front of or over the tire assembly. Use a safety cage if available.
Check wheels for low pressure, cuts, bubbles, damaged rims or mission lug bolts and nuts.
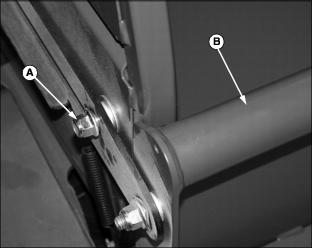
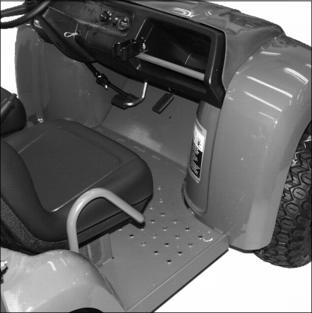
Adjusting Accelerator Pedal Pressure
The pressure required to push accelerator pedal can be adjusted for operator's preference.

Picture Note: Open Position Shown
· Connect spring (A) to left hole (B) for greater pedal pressure.
Connect spring (A) to right hole (C) for less pressure.
Adjusting Side Panel Fit When Closed
The purpose of this adjustment is to minimize the gap between the side panels and the front of the cargo box
2. Push side panel (B) toward cargo box load guard.
Checking Tire Pressure
2. Keep heavy-duty tires inflated to 34-41 kPa (5-6 psi) and Extended Mobility Technology (EMT) tires inflated to 27-34 kPa (4-5 psi).
3. Heavy-Duty All Purpose tire inflation pressure can be as low as 27 kPa (4 psi) and EMT tires as low as 14 kPa (2 psi) to provide a better ride.
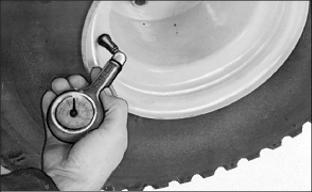
4. Check tire pressure with an accurate gauge.
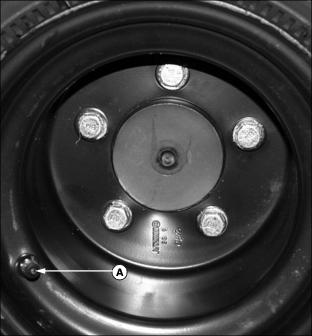
Installing Wheels
Install wheel bolts on drive wheels (valve stem to outside) making sure beveled sides face inward, and tighten in proper sequence (A), (B), (C), (D) and (E) as illustrated, alternately and even until "snug".

Tighten bolts to 90 N·m (65 lb-ft) on drive wheels.
Tighten front wheel bolts to 90 N·m (65 lb-ft).
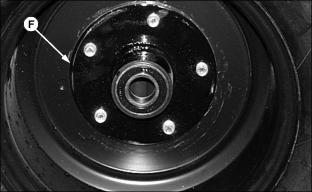
Install hub (F) on the front wheel of the EMT tire and tighten each mounting bolt to 90 N·m (65 lb-ft).
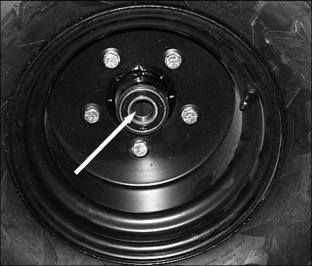
Install wheel and tire to axle hub on utility vehicle using one M16 x 40 flanged cap screw. Tighten to 90 N·m (65 lb-ft).
Cleaning Engine Compartment And Operator Station
Clean for debris or refuse from engine compartment, especially around brake linkage which attaches to output shaft on each side of transaxle.
Clean debris from brake pedal and accelerator pedal area of operator's station.
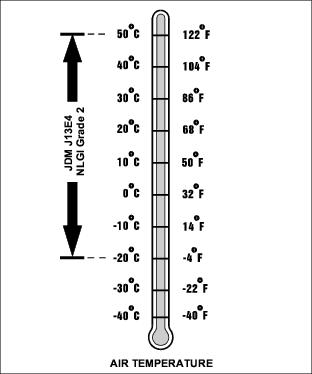
Grease
Use the following grease based on the air temperature range. Operating outside of the recommended grease air temperature range may cause premature failures.
ONLY use a quality grease in this application. DO NOT mix any other greases in this application. DO NOT use any BIO-GREASE in this application.
The following John Deere grease is PREFERRED:
NON-CLAY HIGH-TEMPERATURE EP GREASE®-JDM J13E4, NLGI Grade 2.
Other greases may be used if above preferred John Deere grease is not available, provided they meet the following specification:
John Deere Standard JDM J13E4, NLGI Grade 2.
Lubricating Front King Pins
NOTE: In extreme conditions lubrication should be done every 25 hours. Under normal conditions, it should be done every 50 hours.
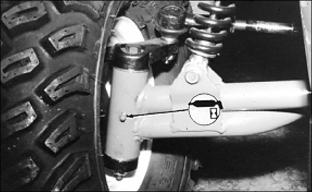
Lubricate one grease fitting on each king pin bushing with one or two shots John Deere Moly High Temperature EP Grease or an equivalent.
Cleaning And Polishing Plastic Hood and Fenders
1. Remove excess dust or dirt using water only.
2. When surface is dry, spray on PLEDGE®* and leave for 30 to 60 seconds.
3. Using a dry soft clean cloth (such as Cheesecloth) wipe off to bring up luster.
Replacing Hood
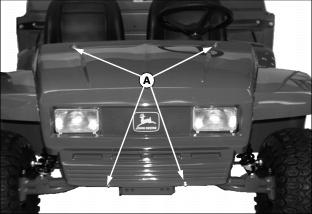
1. Remove self-tapping screws (A) and lift hood up and off vehicle.
2. To replace, tighten top screws first then push hood upward leaving space all around headlight housings.