
Introduction
Product Identification
Safety
Preparing Vehicle
Installing
Removing
Operating
Stopping Tractor and Snowthrower
Raising and Lowering Snowthrower
Adjusting Scraper Blade Clearance
Inspect, Unplug, or Park Snowthrower Safely
Replacement Parts
Service
Troubleshooting
Storage
Assembly
Specifications
Quality Statement
Copyright© Deere & Company

Operating
Before Operating Snowthrower
· Learn all controls and how they work. Read your Tractor's Operator Manual, if necessary.
· Make operating adjustments as necessary.
Daily Operating Checklist
Snowthrowing Tips
Install tire chains and rear weights on tractor.
Adjust runners before you clear snow.
Operate snowthrower at full throttle.
Operate snowthrower at safe travel speed.
· When you throw snow close to buildings or trees.
Raise snowthrower when you drive between jobs.
Use optional drift blade to help cut through drifted snow.
Throw snow downwind, if possible.
· STOP snowthrower immediately.
· Fix damage before you use snowthrower again.
Before you clean or unplug snowthrower:
· Put PTO switch in OFF position.
· Wait for ALL moving parts to STOP.
Clean snowthrower after you use it.
Stopping Tractor and Snowthrower
When stopping tractor, do the following:
1. Put transmission in NEUTRAL position.
2. Lower snowthrower to ground.
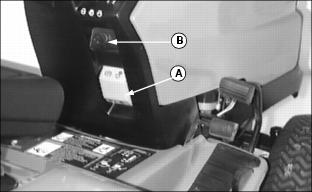
Raising and Lowering Snowthrower
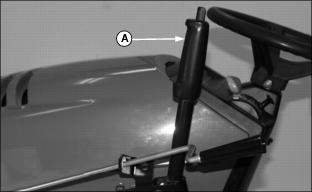
To RAISE snowthrower: Pull lift lever (A) all the way back.
To LOWER snowthrower: Push lift lever (A) all the way forward to latch into LOCK-OUT position.
Adjusting Lift Height
 c CAUTION: Avoid injury! Before adjusting lift height: STOP engine. LOCK park brake. Wait for auger to STOP.
|
Snowthrower Lift can be adjusted by turning two yokes on snowthrower frame (A) OR yoke attached to lift rod (B).
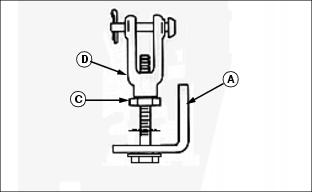
· To INCREASE lift height: Loosen jam nut (C) and turn yoke (D) clockwise. Tighten nut.
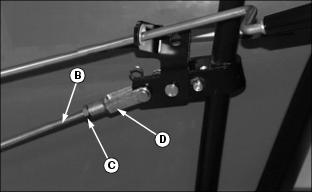
· To DECREASE lift height: Loosen jam nut (C) and turn yoke (D) counterclockwise. Tighten nut.
Lift snowthrower to check adjustment and make further adjustments, if necessary.
Adjusting Lift Effort
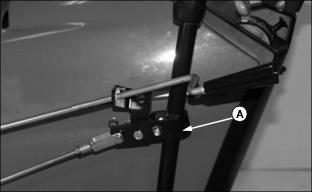
Lift effort can be reduced by moving J-bracket (A) lower on lift handle of tractor. However, this will reduce amount of lift height as well as decrease amount of distance snowthrower will go below grade.
Additional lift height adjustments can then be made by adjusting lift yokes on lift rod or lift arms.
Leveling Snowthrower
|
c CAUTION: Avoid injury! Before leveling snowthrower:
|
1. Pull lift lever back to RAISE snowthrower fully.
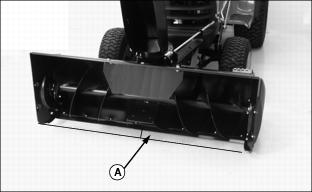
2. Measure distance from each end of scraper blade to floor. Each end should be approximately 102 mm (4 in.) (A) from floor when snowthrower is FULLY RAISED.
3. Adjust yokes on snowthrower frame if necessary:
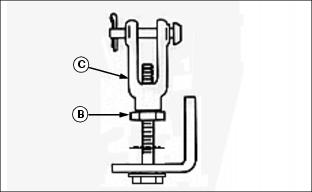
· Loosen jam nut (B) on yoke (C) on LOW side of snowthrower.
· Adjust yoke until snowthrower is level.
Adjusting Scraper Blade Clearance
|
c CAUTION: Avoid injury! Before adjusting scraper blade:
|
1. Lower snowthrower to the ground.
For clearing snow from a SMOOTH surface:
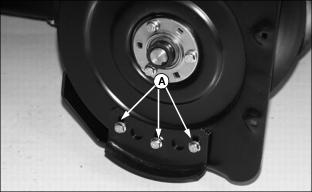
· Adjust runners so scraper blade is 2-3 mm (1/16-1/8 in.) above surface.
For clearing snow from a ROUGH or a GRAVEL surface:
· Adjust runners for more clearance.
· Check Adjustment: Scraper blade should clear away maximum amount of snow without picking up rocks.
Adjusting Chute
1. Chute will turn 108° to each side.
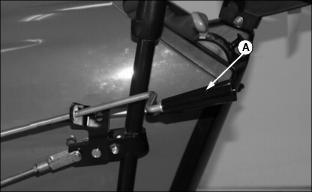
2. Turn handle (A) to move chute to desired position.
Adjusting Spout
|
c CAUTION: Avoid injury! Before adjusting spout::
|
NOTE: Spout MUST BE tight enough to stay in position when snow from auger hits it, but also loose enough to move by hand.
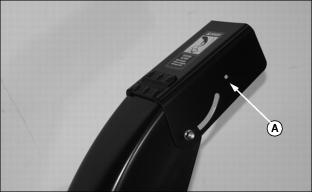
Grasp spout (A) and move to desired position. You should feel resistance.
Operating Snowthrower
|
c CAUTION: Avoid injury! due to thrown objects. Before you operate snowthrower:
Clear area of bystanders and pick up objects which may be thrown by snowthrower. |
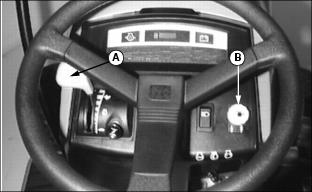
2. Put throttle lever (A) at ONE-FOURTH position.
3. Lower snowthrower to the ground.
4. Pull PTO knob (B) UP to ENGAGE snowthrower.
IMPORTANT: Avoid damage! For best snowthrower and engine performance, operate at a FAST engine speed. |
5. Move throttle lever to the FAST position.
Inspect, Unplug, or Park Snowthrower Safely
|
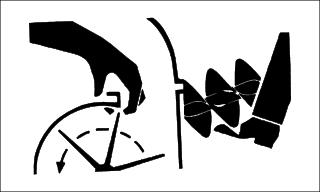
c CAUTION: Avoid injury! If you get off operator's seat when engine and snowthrower are running, engine and snowthrower MUST STOP. If not, have electrical system checked.
|
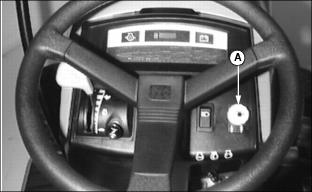
2. Push PTO knob (A) down to DISENGAGE.
3. Lower snowthrower to the ground.
Transporting
1. Drive tractor and snowthrower onto heavy-duty trailer equipped with lights and signed required by law.
2. LOWER SNOWTHROWER to trailer deck.
5. Fasten tractor and snowthrower to deck with straps, chains, or cables.