Introduction
Safety Signs
Controls
Operating Machine
Operating Mower
Lawn Care
Replacement Parts
Service Machine Safely
Service Interval Chart
Service Engine
Service Transmission
Service Steering & Brakes
Service Mower
Avoid Injury From Contacting Blades
Checking The Mower Gearbox Oil Level
Changing The Mower Gearbox Oil
Checking The PTO Gearbox Oil Level
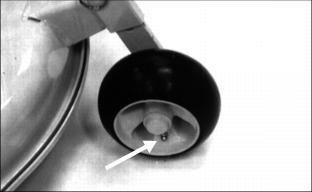
Lubricating The Caster Wheel Bearings And Spindles
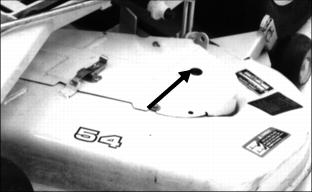
Lubricating The Mower Spindles
Lubricating The Mower Rear Wheel Bearing
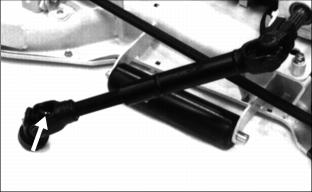
Lubricating The Driveline U-joints And Spline
Removing And Installing The Belt Shields
Balancing And Installing The Blades
Service Electrical
Service Miscellaneous
Removing Mower
Installing Mower
Troubleshooting
Storing Machine
Assembly
Specifications
Warranty
John Deere Service Literature
QUALITY DOESN'T END WHEN YOU INVEST IN A DEERE

Service Mower
Avoid Injury From Contacting Blades
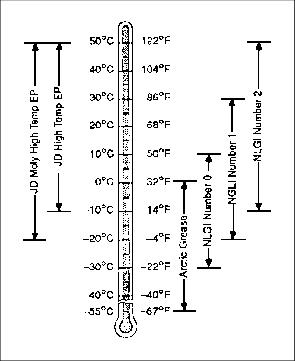
Grease
Use grease based on the expected air temperature range during the service interval.
The following greases are preferred:
· John Deere MOLY HIGH TEMPERATURE EP GREASE.
· John Deere HIGH TEMPERATURE EP GREASE.
Other greases may be used are:
· SAE Multipurpose EP Grease with a maximum 5 percent molybdenum disulfide.
· Greases meeting Military Specification MIL-G-10924F may be used as arctic grease.
Replacing PTO Belts
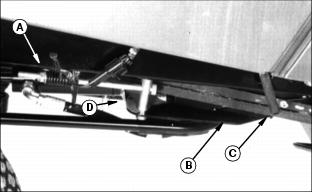
1. Loosen nut (A) to loosen the idler bracket (B) and sheave.
2. Remove the nut, flat washer, and tooth washer (C) from the bottom, front of the bracket.
3. Remove the bolt and flat washer (D) from the bottom, rear of the bracket.
4. Remove the bracket and both belts.
5. Install the new belts, bracket, and hardware.
6. Tighten nut (A) until the belt deflects 19mm (3/4-in.) when you push the mid point of the belt on its longest side.
Adjusting PTO Clutch
To adjust the PTO clutch, see the Service-Engine section.
Gearbox Oil
Checking The Mower Gearbox Oil Level
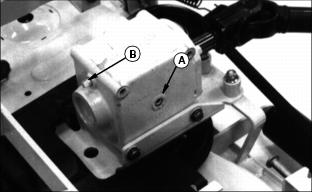
1. Stop the engine. Wait until the gearbox is cool.
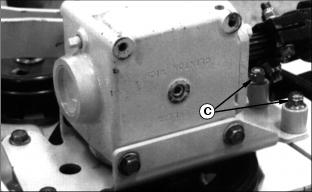
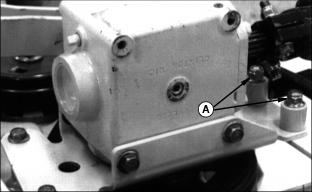
2. Remove the check plug (A) from either side of the gearbox.
3. Oil should drain from the plug hole.
4. If not, remove the fill plug (B).
5. Pour or squirt oil through the fill plug hole until the oil runs out of the check plug hole.
Changing The Mower Gearbox Oil
1. STOP the engine. Wait until the gearbox is cool.
2. Lift the seat to the second position.
3. Remove the driveline coupler from the vehicle gearbox shaft.
4. Remove the three mower belt shields. Use a spring puller to remove the end of the mower belt tension spring from its bracket.
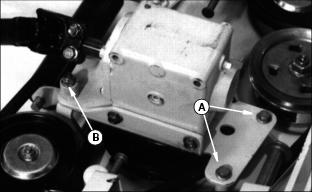
5. Remove the two cap screws (A) from in front of the gearbox.
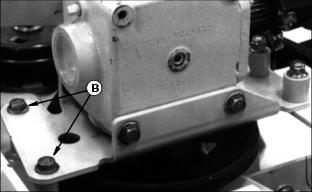
6. Remove the two bolts (B) and spacers from the rear of the gearbox.
7. Remove the gearbox and driveline from the belt and the mower.
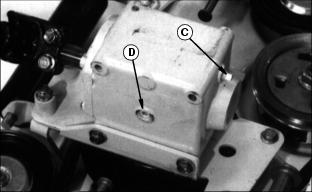
8. Remove the fill plug (C) from the gearbox.
9. Turn the gearbox upside down to drain it.
10. After the oil has drained, turn the gearbox right side up.
11. Remove a check plug (D) from either side of the gearbox.
12. Pour or squirt oil through the fill plug hole until the oil runs out of the check plug hole.
13. Install the two plugs in the gearbox.
14. Install the gearbox on the mower. Install the belt on the gearbox sheave as you install the gearbox.
15. Tighten the cap screws and bolts to 70 N·m (50 lb-ft).
16. Connect the coupler to the vehicle gearbox shaft.
17. Use a spring puller to install the end of the spring in its bracket.
Checking The PTO Gearbox Oil Level
2. Lift the seat to the second position.
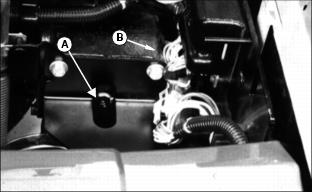
3. Remove the check plug (A). Oil should flow from the plug hole.
4. If not squirt oil through the check plug hole, OR remove the fill plug (B) and squirt oil through the fill plug hole.
Lubricating The Caster Wheel Bearings And Spindles
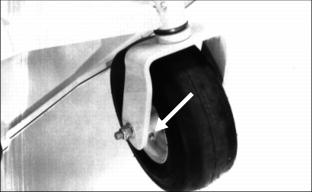
Lubricate two points on each front wheel assembly.
Use John Deere Multipurpose Grease or equivalent.
Lubricating The Mower Spindles
Use John Deere Multipurpose Grease or equivalent.
Lubricating The Mower Rear Wheel Bearing
Use John Deere Multipurpose Grease or equivalent.
Lubricating The Driveline U-joints And Spline
Use John Deere Multipurpose Grease or equivalent.
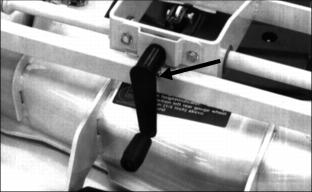
Lubricating The Crank Bushing
Use John Deere Multipurpose Grease or equivalent.
Removing And Installing The Belt Shields
1. To remove the shields, open the three latches shown.
2. Remove the center shield first, then the other two shields.
3. Install the outer shields first, then the center shield.
Replacing The Rollers
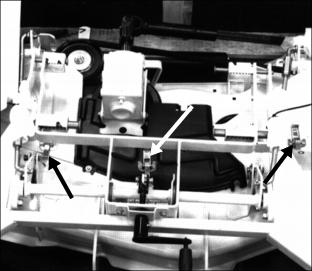
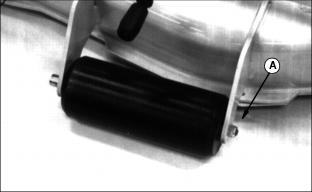
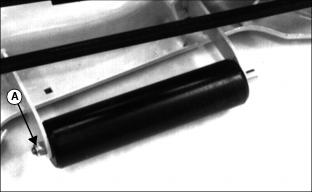
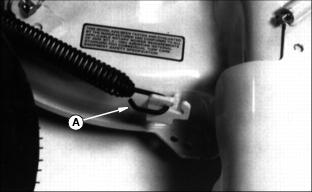
1. Turn the crank to raise the mower as high as it will go.
3. Pull the shaft out and remove the roller.
4. Install the new roller on the shaft.
5. Install and tighten the lock nut.
Removing The Mower Belt
1. Remove the three belt shields.
2. Lower the mower all the way by turning the crank on the front of the mower.
3. Use a spring puller to remove the end of the spring (A) from the mower bracket.
4. Loosen the two cap screws (B) in front of the gearbox several turns.
5. Remove the two bolts (C) and the two spacers from the rear of the gearbox.
6. Use a bar to lift and hold up the rear of the gearbox.
7. Remove the belt from under the gearbox. Lower the gearbox.
8. Remove the belt from the other sheaves and discard it.
Installing Mower Belt
1. Use a bar to lift and hold up the rear of the gearbox.
2. Install the new belt on the sheave that is under the gearbox.
4. Use the picture at the right to help you install the belt on the other sheaves. Do not twist the belt.
5. Install the two bolts and spacers (A) at the rear of the gearbox.
6. Tighten the two bolts to 70 N·m (50 lb-ft).
7. Tighten the two cap screws (B) in front of the gearbox several turns.
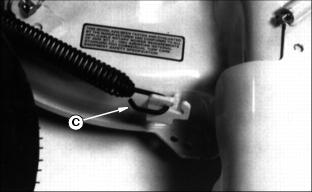
8. Use a spring puller to install the end of the spring (C) in the bracket.
9. Install the three belt shields.
Checking The Blades
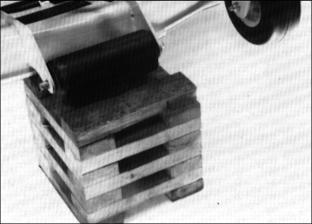
1. Put blocks in front of the mower.
3. Pull up the Mower Lift Lever to RAISE the mower as high as it will go.
4. Hold the Lift Lever up and drive the Front Mower SLOWLY forward until you can lower the mower onto the blocks.
5. RELEASE the Lift Lever to lower the mower onto the blocks.
6. STOP the engine. LOCK the park brake.
7. Check the blades for damage and sharpness.
9. Sharpen a dull blade. See Sharpening The Blades next in this section.
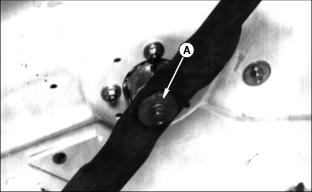
10. To remove a blade, turn the bolt (A) counterclockwise.
Sharpening Blades
1. Sharpen blades with grinder, hand file or electric blade sharpener.
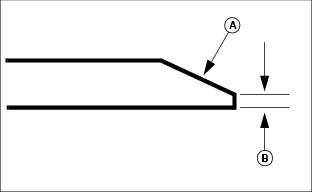
2. Keep original bevel (A) when you grind. Blade should have 0.40 mm (1/64 in.) cutting edge (B).
3. Balance the blade. See BALANCING AND INSTALLING THE BLADES next in this section.
Balancing And Installing The Blades
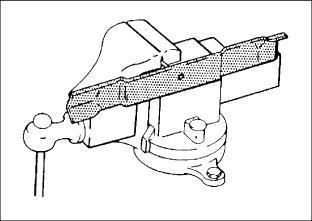
· Put the blade on a nail in a vise or wall. The heavy end of the blade will drop. Grind the bevel of the heavy end. Do not change the bevel.
2. Fasten blades with washers and bolts. The cup-side of the washer must be against the blade. Tighten bolts to 68-75 N·m (45-55 lb-ft).

