M653, M655 and M665 PIN (010001- )
Introduction
Safety Signs
Controls
Operating Machine
Replacement Parts
Service Machine Safely
Service Interval Chart
Service Lubrication
Service Engine
Service Transmission
Service Steering & Brakes
Remove and Install Rear Drive Wheels
Remove and Install Front Caster Wheels
Checking and Aligning Motion Control Levers
Service Mower
Service Electrical
Service Miscellaneous
Troubleshooting
Storing Machine
Assembly
Specifications
Warranty
John Deere Service Literature
John Deere Quality Statement
CopyrightŠ Deere & Company

Service Steering & Brakes
Remove and Install Rear Drive Wheels
Removing:
1. Park machine on a hard, level surface.
2. Stop engine and engage park brake.
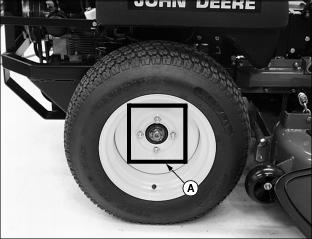
3. Slightly loosen four wheel nuts (A).
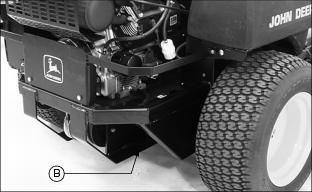
4. To remove the rear drive wheel on the RIGHT side of the machine:
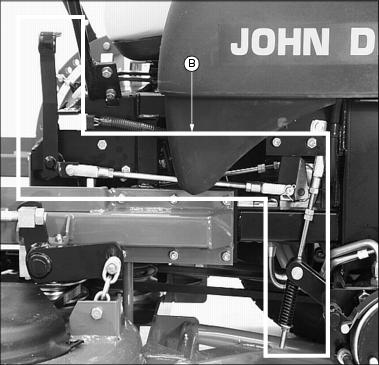
ˇ Lift mower with jack centered under right frame skid plate (B).
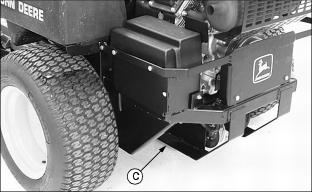
5. To remove the rear drive wheel on the LEFT side of the machine:
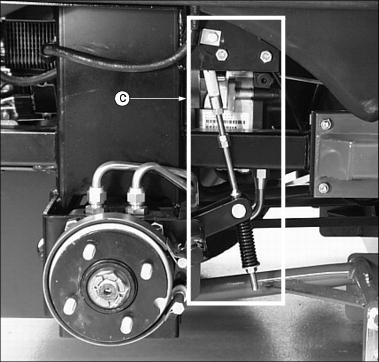
ˇ Lift mower with jack centered under left frame skid plate (C).
Installing:
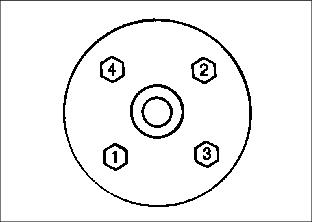
ˇ Tighten wheel nuts in numbered sequence shown for safe wheel installation. Tighten alternately until recommended torque value is reached.
ˇ Tighten nuts to 100 Nˇm (75 lb-ft.).
Remove and Install Front Caster Wheels
Removing
1. Park machine on a hard, level surface.
2. Stop engine and engage park brake.
3. Lift front of machine with a safe lifting device.
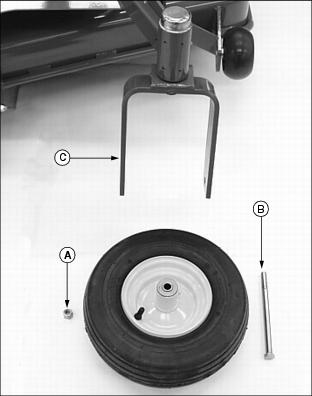
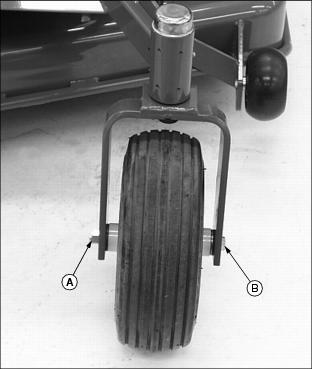
4. Remove nylock hex nut (A) and wheel bolt (B).
5. Remove wheel from assembly yoke (C).
Installing
2. Install wheel bolt (B) and nylock hex nut (A).
Checking and Aligning Motion Control Levers
Check Alignment:
1. Park front mower on a hard level surface.
2. Stop engine and engage park brake.
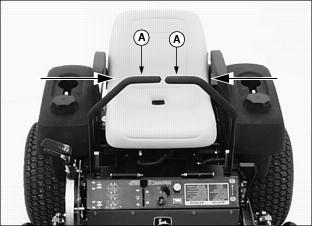
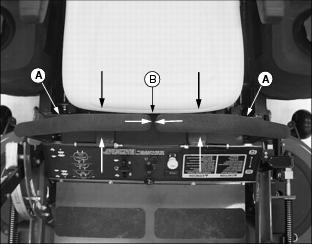
3. Move both motion control levers (A) to the NEUTRAL position.
4. Check levers for equal alignment.
ˇ Check gap (B) between the levers. The recommended gap is 3-6 mm (1/8-1/4 in.).
ˇ If positions of the control levers are unequal, an adjustment is necessary.
Alignment Procedure
1. Adjust position of motion control levers:
ˇ Slide both levers forward or rearward to desired position within tab slots until levers are aligned.
NOTE: If the ends of the levers strike against each other while in the NEUTRAL position, move the levers outward to the NEUTRAL LOCK position and carefully bend them outward. Move them back to the NEUTRAL position and check for the recommended gap of 3-6 mm (1/8-1/4 in.).
Adjusting Park Brake
Test Park Brake:
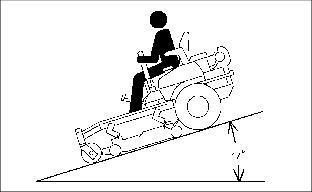
1. Stop front mower on a maximum 17° slope.
2. Raise park brake lever (A) to the (Z) position.
ˇ A properly adjusted park brake must prevent the drive wheels from turning.
ˇ If the drive wheels turn, a brake adjustment will be necessary.
Adjust Park Brake
1. Park front mower on a hard level surface.
2. Stop engine and engage park brake (A).
NOTE: Rear drive wheels are removed to illustrate photo clarity. Rear drive wheels do not need to be removed to make this service adjustment.
4. Locate the park brake adjustment assembly on each side of the machine.
5. Brake linkage identification:
ˇ Left brake adjustment linkage (B).
ˇ Right brake adjustment linkage (C).
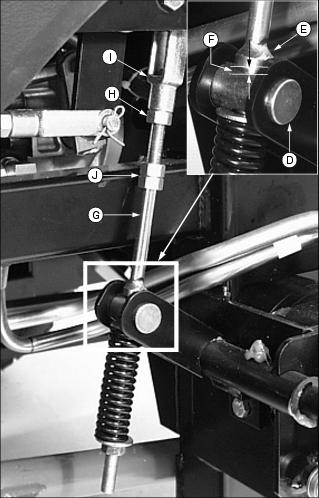
6. Measure the distance between the top of the trunnion pin (D) and the bottom of the collar (E) welded to the brake rod.
ˇ Distance (F) should be 6-8 mm (1/4-5/16 in.).
7. If necessary, adjust length of brake rod (G).
ˇ Loosen jam nut (H) directly below yoke (I).
ˇ To obtain distance (F), rotate the rod by turning the double hex nuts (J).
ˇ Tighten jam nut (H) against yoke (I).
8. Check park brake linkage on other side of machine for proper adjustment.
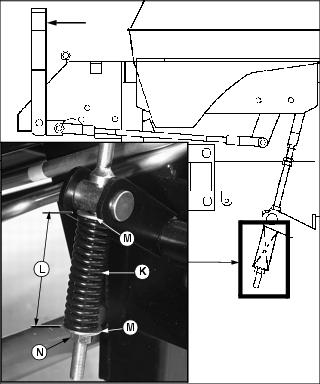
10. Measure the length of linkage spring (K).
ˇ The distance (L) between the washers (M) on each end of the spring should be 67-70 mm (2-5/8-2-3/4 in.).
11. If necessary, adjust length of linkage spring (K).
ˇ Adjust position of hex nut (N) until the proper distance between the washers (M) is obtained.

